Reduced preview resolution & proxy with Neat Video
Proxy or offline editing is a norm for video editing as it allows you to work with large video files without making your editing process as slow as low as an asthmatic snail. In many cases, it is simply the only way you can work on a project, otherwise, your system may take too long to render each preview frame. The same story with a reduced resolution of the preview. It just makes things easier for the computer and quicker for you.
When does it hurt?
As with pretty much everything in life, working with proxy files or having reduced resolution of the preview has its downsides. Neat Video, and some other video effects, is sensitive to the resolution of the frames it receives from the video editing software. The quality of noise reduction depends on the resolution of the frame used to build a noise profile and tune the filter. For the best results Neat Video has to receive the frames in the same full resolution both during profiling and during the final render. If that is not ensured and profiling is done using a reduced resolution frame, then the resulting profile will not be good to render full-resolution frames.
So the rule of thumb is: build a noise profile using a full resolution frame (not using a reduced resolution frame, not using a proxy).
For example, if you work in After Effects with a 4K composition and a 4K clip, and if you set the After Effects preview to 1/4 and then export the final video as 4K again, you might be not quite happy with the quality of the final picture. If you check the pictures below, you’ll get an idea of what the difference in quality of the final result can be made by doing the right and the wrong things.

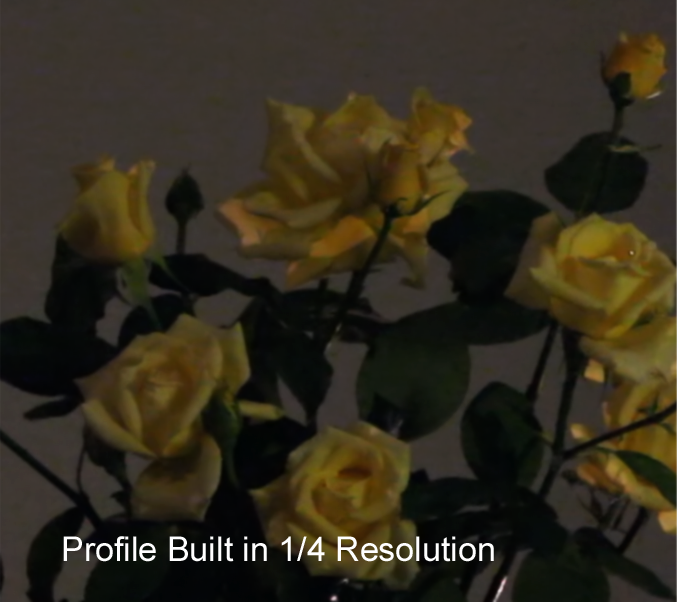
As anyone who cares about the beautiful crispy high-resolution picture, you don’t really want to get your final result to look like the second picture. You didn’t spend all that time editing to end up with blurry lines and artifacts, did you?
How to get the best out of it?
Luckily, most video editing applications allow you to switch between online and offline editing as well as change the preview resolution fairly easy. So you can for example switch to the full resolution mode before you build a noise profile for a clip and adjust the filter settings in Neat Video window and then switch back to reduced resolution to keep editing other parts of the project at full speed.
However, every software is different and there is no one-fits-all rule for switching between such modes. We have tried to cover the most popular applications below. If you don’t find your application here, send us a message and we will figure that out together. Let’s get started.
Adobe Premiere Pro
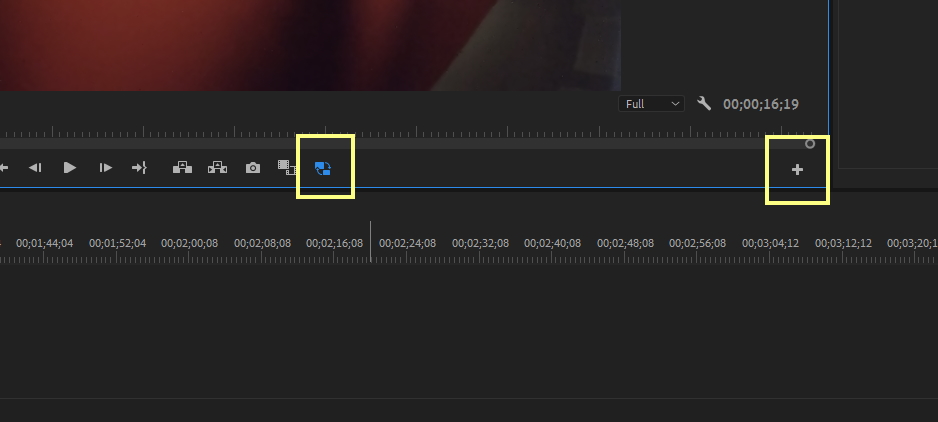
In online editing Premiere Pro usually supplies Neat Video with the frames of the same size during profiling and final render. The only exception is when you set BOTH Playback Resolution and Paused Resolution to something smaller than Full. Then Premiere may send smaller frames to Neat Video. Luckily Premiere makes it super-easy to choose the preview resolution. You can choose it in the drop-down menu underneath the main preview window on the right-hand side. Alternatively, you can right-click the frame in Premiere’s preview and in the popup menu select Paused Resolution > Full before opening Neat Video’s window.

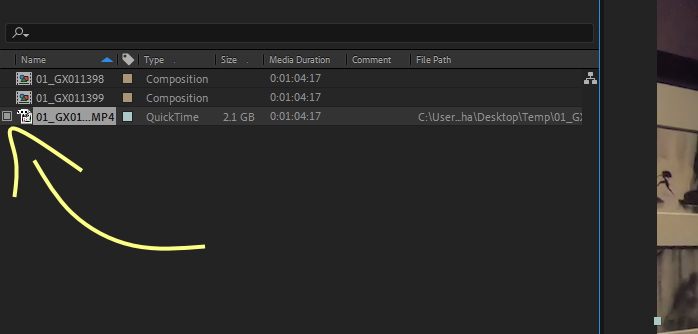
Switching between the proxy and original files is also a seamless process here. When you want to switch to online editing to provide Neat Video with the original frames, click Toggle Proxies button (turn it grey) under the same main preview window. If you do not have it, simply add it from Button Editor (of course you do not need to do that if you do not use proxies at all). You should do this step even though Neat Video's windows will be showing that it has received a full frame for profiling. This is happening because Premiere Pro is supplying it with the frames from proxy files that have been stretched to the frame size of the sequence.
Adobe After Effects
After Effects, unlike Premiere Pro, provides Neat Video’s window with frames of preview resolution so if you set After Effects preview to a lower resolution mode, then it will send smaller frames to Neat Video for profiling (so you need to switch the preview in After Effects to full resolution first). During the final render, on the other hand, the denoiser receives the frames in their original resolution. The good thing is the switch between different preview resolutions in After Effects is quick and easy. The drop-down menu is right under preview, you just need to set it to Full.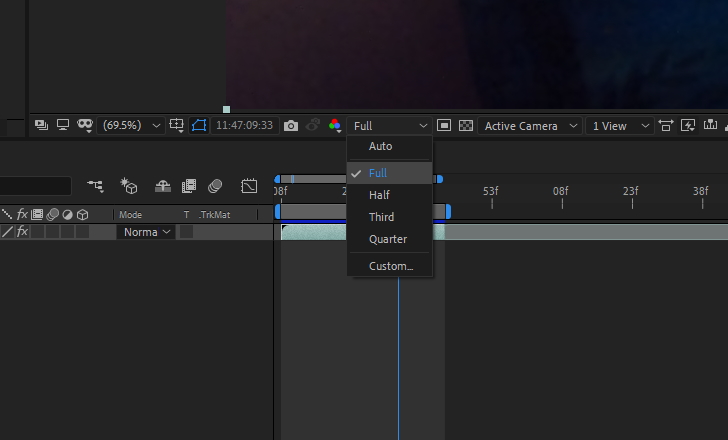
To disable proxy simply uncheck the gray box on the left side of the video file that you have created a proxy for in the project panel. Then proceed to build a noise profile in Neat Video. Once you have built a noise profile, you can switch back to proxy to keep working on the project at full speed. You should do this step even though Neat Video's windows will be showing that it has received a full frame for profiling. This is happening because After Effects is supplying it with the frames from proxy files that have been stretched to the frame size of the composition.
DaVinci Resolve
Unlike other software, Resolve always supplies the effects with the frames of the timeline resolution. If you export final video with the same resolution as in the timeline, then you don’t have to worry even when using proxy. Resolve will send the same frame size to the denoiser during each phase.
There can be cases where timeline resolution is set to a smaller value than the final render resolution (the render done when you export the clip).
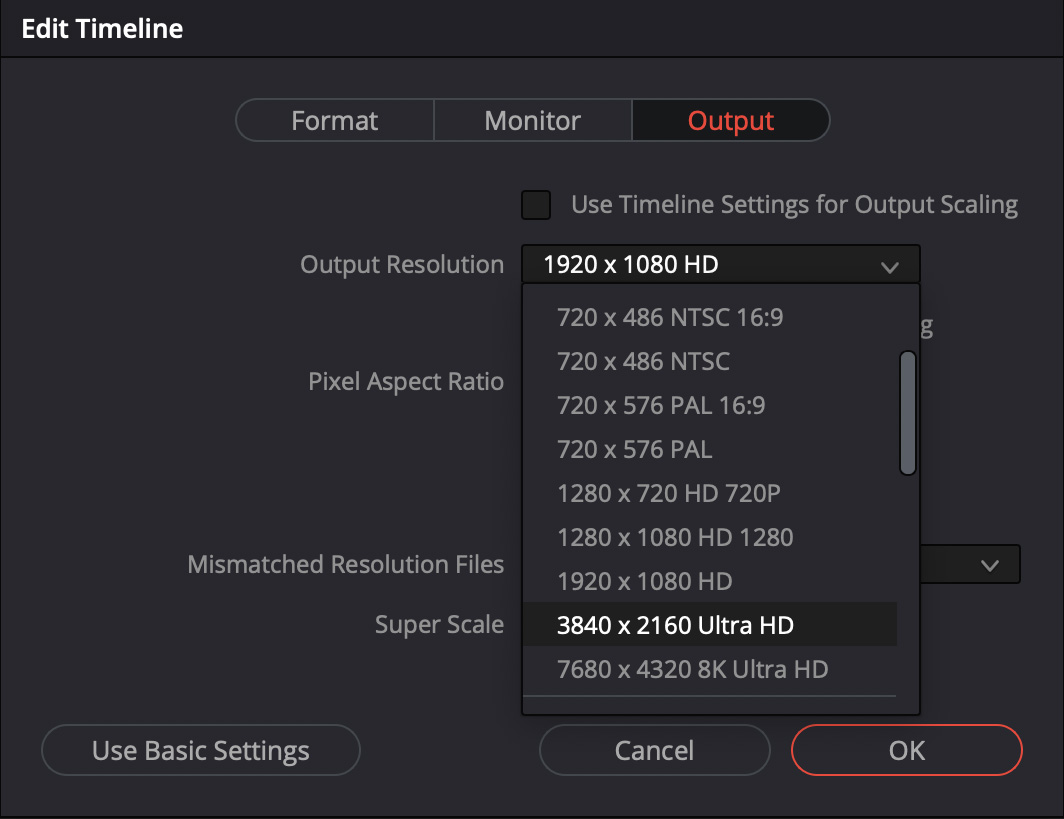
This can happen when Output Resolution is not the same as Timeline Resolution. You can also run into this when the final render is performed in Individual сlips mode with Resolution setting not being equal to Timeline Resolution. In these scenarios things can get a little tricky for Neat Video and overall look of your footage.
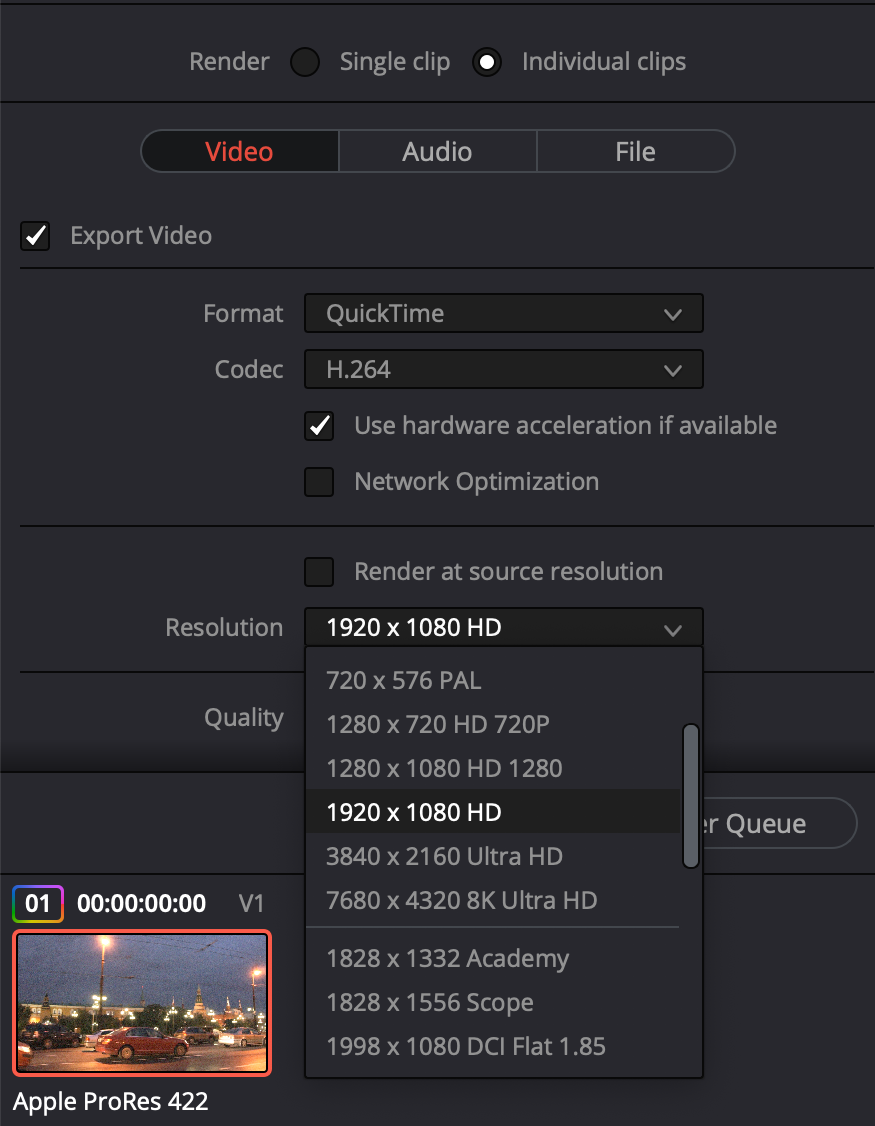
If you have found yourself in such a situation, there are some options to consider. The first one is to export the final video with the same resolution as the timeline. Clearly, this path may not be always acceptable. The other option is more time consuming, but achieving the exact goal. You can create a temporary project and a new timeline with the resolution matching the resolution of the final clip. Then throw the clip you want to denoise into that timeline, build a noise profile, adjust filter settings and save both noise profile and filter settings to the disk. After that go back to your primary project, apply Neat Video to the clip and load the noise profile and filter settings you have just prepared using the correct frame size in that temporary project.
Final Cut
This software is looking like a champ when it comes to handling preview resolution and proxy. You don’t even have to think about switching between resolutions and proxy when working with Neat Video. Final Cut automatically sends the frames of original resolution to Neat Video.
Wrap up
If you remember one thing after reading this post we want it to be this:
do NOT build a noise profile nor adjust filter settings using reduced resolution frames or proxy;
instead, switch to full resolution and disable proxy before opening Neat Video window to achieve the best results.
Different software have their own ways of scoring this goal and that may also change over time, but if you know and apply the general rule above, then you will not lose quality during render/export.