Get animations rendered faster

Blender, along with other CGI modeling and animation software, is becoming increasingly popular in its domain. A major difficulty when using that software is long render times. Depending on a scene's complexity and hardware used, rendering a single frame can take anywhere from a few seconds to several minutes. Consequently, rendering an entire animation can take many hours.
Efforts to reduce Blender’s render times are not new, but creators still often have to deal with the extensive waiting periods before progressing with their workflows.
Fortunately, an unexpected assistant can be found in Neat Video. Although originally designed to remove video noise from footage captured by a regular camera, Neat Video can also effectively suppress noise present in CGI renders. By using Neat Video in such a workflow, for example by post-processing a result of Blender render with Neat Video, you can minimize the number of required render samples, sometimes reducing it to as low as 30 samples (for simple scenes), while still achieving the required visual quality.
The main idea is that you initially render your scene in Blender with a low number of samples to produce the output set of (noisy) frames and then you apply Neat Video noise reduction to those frames in post-processing in one of video editing applications such as After Effects, Premiere, Resolve, Final Cut Pro, etc. That two-step process reduces the overall render time as compared with just using more samples to get a cleaner output in Blender alone.
The built-in denoising in Blender can also assist in reducing the number of samples. However, it does not allow you to go as low as 25 or 30 samples. Additionally, in most cases, built-in denoising introduces flickering, jitter and artifacts into the final frames. Those issues may be more challenging to remove than random noise. It is often easier to prevent a problem rather than to fix it later.
Lets see how to set up the Blender functions to prevent unnecessary artifacts and to help Neat Video reduce noise in post-processing most accurately.
1. Disable built-in denoising features
While built-in denoisers can help reduce some noise, if you set the noise threshold to 0.01 to achieve an image of acceptable quality, it will significantly increase the rendering time, which is exactly what we are trying to avoid. Moreover, built-in denoisers introduce artifacts. If you decide to apply Neat Video to a pre-denoised frame set from Blender, removing the remaining noise and artifacts will be much more challenging than dealing with the original untouched noisy frames. Additionally, using only one denoiser will preserve the details better.
Cycles:
To disable the built-in denoiser for rendered frames, go to View Layer Properties > Passes > Data and disable the "Include Denoising Data" option. If the denoiser node is used in the Compositing Nodetree  then disable the "Include Denoising Data" path: go to View Layer Properties > Passes > Data > Include Denoising Data and untick the box.
Radeon ProRender:
To disable the denoiser for rendered frames, go to View Layer Properties and uncheck the RPR Denoiser box.
2. Set the Seed value to match the frame rate value
The Seed is a number used to initialize pseudo-random functions with different values. If the Seed is set to 0 or disabled, the noise will be the same across all frames. This type of noise is referred to as repeated noise in Neat Video, and it is challenging to remove. Neat Video works best with changing noise patterns, when each frame has a different pattern, just like in regular video footage.
You can easily instruct Blender to make the noise different in each frame. To do that enable the Seed and set it to the same value as the frame rate.

Frame rate value
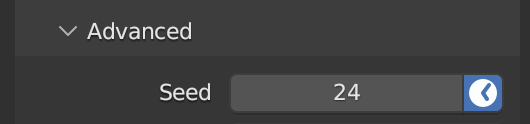
Seed value
Neat Video's temporal filter will then do a much better job of eliminating those randomly changing bits of noise while preserving the details.
3. Apply lens distortion after denoising
Unfortunately, the way lens distortion is currently implemented in Blender significantly distorts the noise patterns. It introduces a grid of modified noise, which is difficult to fix afterward.
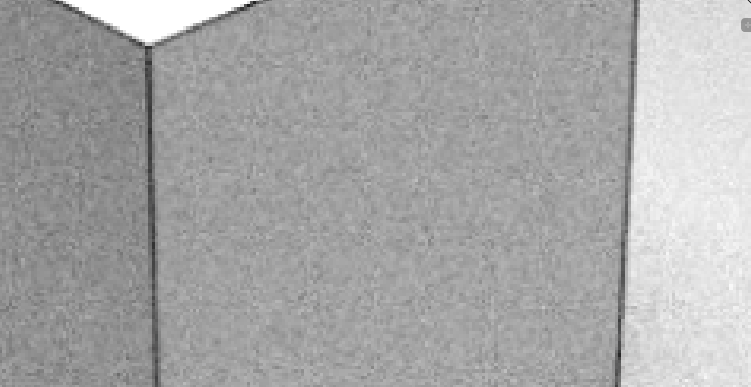
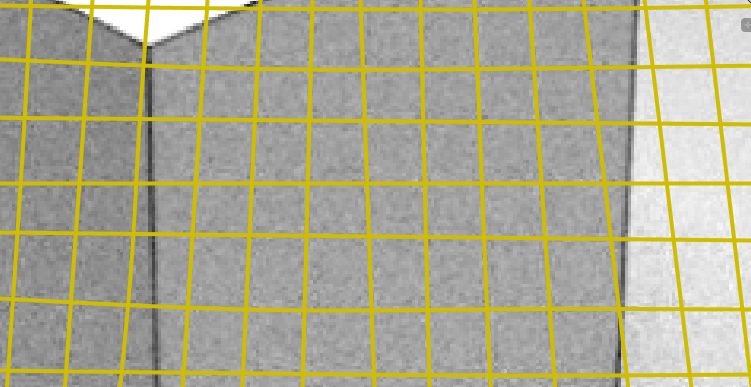
The noise in those grid lines does not behave like regular noise and can be only removed at the expense of losing lots of fine details and blurring the image.
To prevent that problem from the start, apply the lens distortion effect (if you want to use it) in the video editing application where you normally work with frames exported from Blender. Applications such as Adobe After Effects, Premiere Pro, DaVinci Resolve, etc., offer lens distortion effects that can be applied to any clips. Also, apply it after Neat Video, so that lens distortion was applied to already denoised frames.
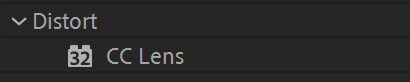
After Effects:
Go to Distort > CC Lens
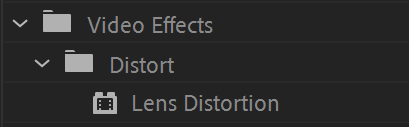
Premiere Pro:
Go to Video Effects > Distort > Lens Distortion
Resolve:
In the Edit page, go to the toolbar. Then OpenFX > Filters > Resolve FX Warp > Lens Distortion

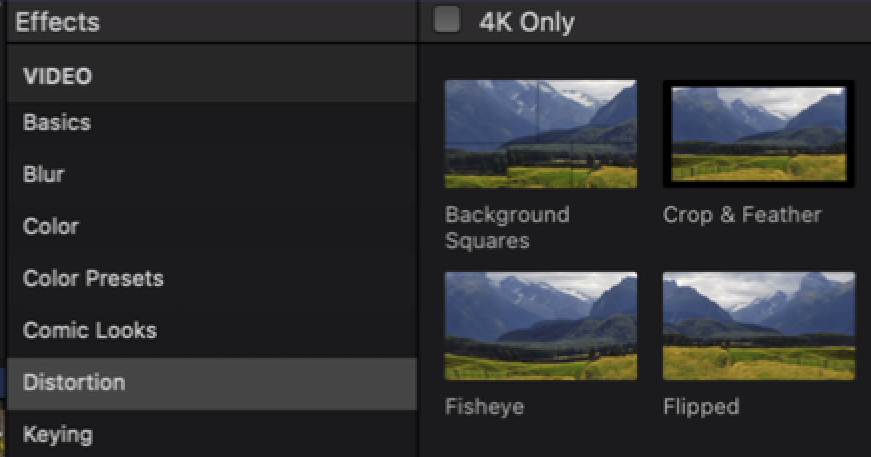
Final Cut:
You can try to use the Fisheye effect from the Distortion group in Final Cut, or you can download a third-party lens distortion effect. They are available in both free and paid versions.
Afterthoughts
Regardless of the type of frames you are denoising with Neat Video, the results will only be as good as the noise samples used to build a noise profile. When the noise is uniform and has not been previously manipulated or distorted in previous steps of your CGI workflow, Neat Video can produce excellent results even in seemingly hopeless situations. Therefore, if you want to use Neat Video in your CGI workflow, make it the first tool to touch those original unmodified noisy frames to achieve the best possible results. Any other post-processing should better be done already after that. If you adhere to that, then you will achieve not only reduction of the overall render times but also maximize the final visual quality of your results.