Frequency of video noise
The term (spatial) frequency is used in Neat Video’s Spatial filter to denote elements of a video clip (both important details and noise/grain) of a certain size. High frequency corresponds to elements of the smallest size. Medium (Mid) frequency corresponds to elements of medium size. Low, Very Low and Ultra Low frequencies correspond to elements of correspondingly larger sizes. Noise frequency refers to the size of noise elements.
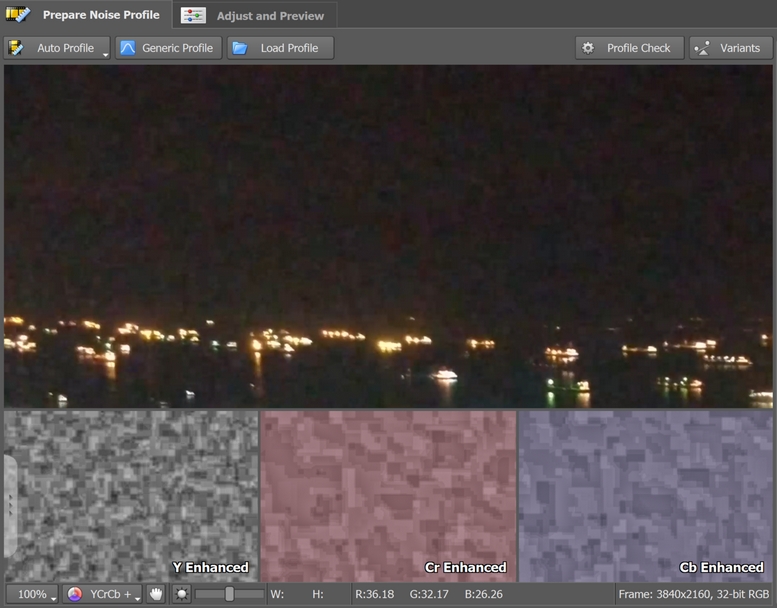
For reference, see the noise samples of different frequencies in the Noise Filter Settings tab of the Neat Video plug-in window, or in the Device Noise Profile panel (in both cases, use the menu Tools to make sure Neat Video works in Advanced Mode to make those visible).
Why does noise come in different sizes?
Many factors can affect the size of the noise structures that you see in a video. They include:
- your camera’s sensor
- demosaicing (color reconstruction)
- in-camera denoising
- in-camera resizing
- codecs used to encode the video
- filters and effects preceding Neat Video in your NLE
These can change the original noise coming from the camera sensor as well as introduce additional noise such as compression artifacts. Each of these may come in different typical sizes or different spatial frequencies.
Removing video noise in different frequency ranges
In most cases, noise of different sizes is analyzed and removed by Neat Video automatically. The only thing required is a good noise profile. When you provide Neat Video with a sample noise pattern, its intelligent analysis algorithm finds all the types of noise in all frequency ranges and then its noise filter removes the noise based on that analysis. That works well in most cases except in some more difficult cases discussed below.
When do problems arise?
1. Inaccurate or unrepresentative noise profile
If Neat Video gets an inaccurate or unrepresentative noise profile, then the accuracy of noise reduction will suffer. Therefore always make sure that you use for profiling an area (1) without details, (2) as large as possible (so that it includes noise of different sizes), (3) as noisy as possible, (4) containing a representative sample of noise present in this video.
2. Influence of pre-denoising steps
In-camera noise reduction, codecs and filters can change the characteristics of the noise. Often, we can see as a result of in-camera processing, that the uniform areas become almost noise-free, but all details are still covered and surrounded by noise. That leads to different noise properties (including frequency properties) in uniform areas vs detail-rich areas. That complicates building an accurate noise profile because using uniform areas will not work very well in such a situation, while using detail-rich areas for profiling is generally incorrect. Consider using alternative profiling methods like Generic Profiles in such cases.
3. Low frequencies
When a noise element or structure is extra large (sometimes it can be as large as an actual object of the scene), it may be more difficult to correctly analyze it during profiling because it would require using a larger featureless area of the frame, which may not always be available. As a result, the filter may not sufficiently suppress such large noise elements. When you see blotches of color (for example in Profile Check mode or in the Adjust and Preview tab) similar to those in the picture below, try increasing noise levels in Low, Very Low and Ultra Low-frequency ranges.
How to use Neat Video’s tools for different frequency ranges
Noise analysis stage
Whenever you see some leftover noise, doesn’t matter what frequency it is, double check if your noise profile was built correctly. It should be built using a large area without details, but with lots of noise. That’s crucial as what you give Neat Video to analyze determines what sort of noise is then removed by the filter. Pay particular attention to the quality of the analysis in different frequency ranges. There will be green, yellow and red bars against each range (High, Medium, Low, Very Low, Ultra Low) in the Device Noise Profile panel (visible in Advanced Mode; see menu Tools > Advanced Mode). Green color means ‘all good’, yellow -- ‘could be better’, red -- ‘no way you are going to get accurate noise reduction with this measurement’.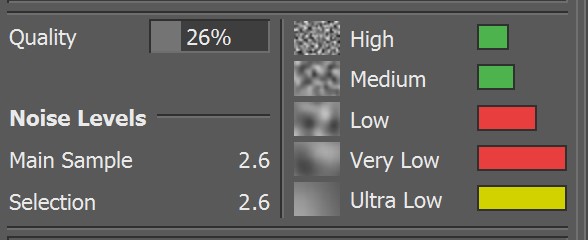
Noise reduction stage
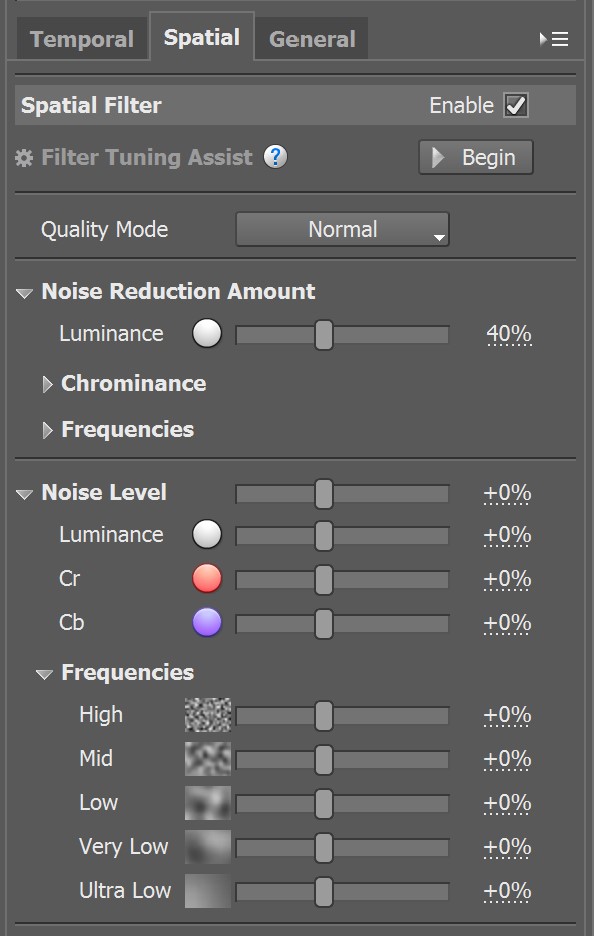
When you are generally happy with the results produced by the Temporal Filter, but you can see that noise of a particular size is still present, try adjusting the noise levels and possibly also noise reduction amounts in different frequencies in the Spatial Filter. Here are the steps to follow:
- Make sure you are working in Advanced Mode (menu Tools > Advanced Mode)
- Switch to the Spatial tab in the Filter Settings panel
- Open Frequencies under Noise Level
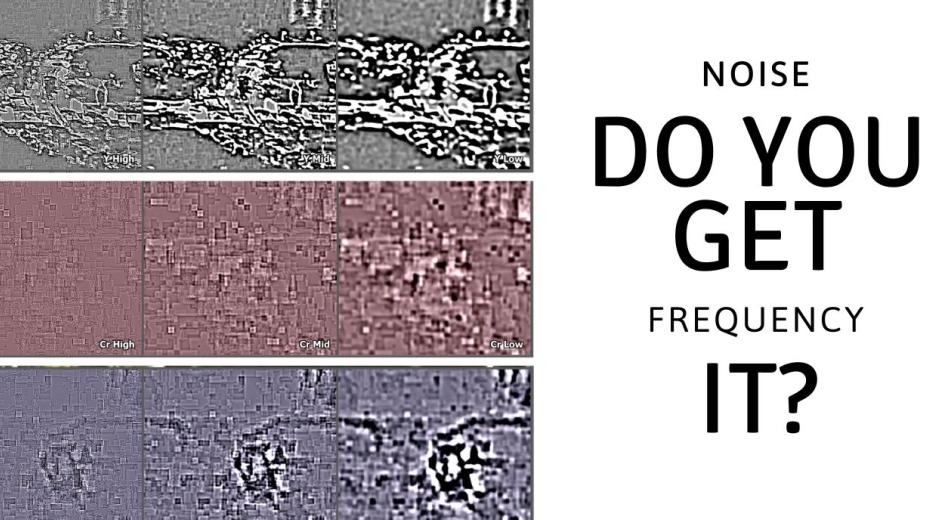
- Switch the preview mode to the Y Channel Frequencies (using the menu under the viewer)
to directly see the High, Mid and Low-frequency components of the Luminance (Y) channel.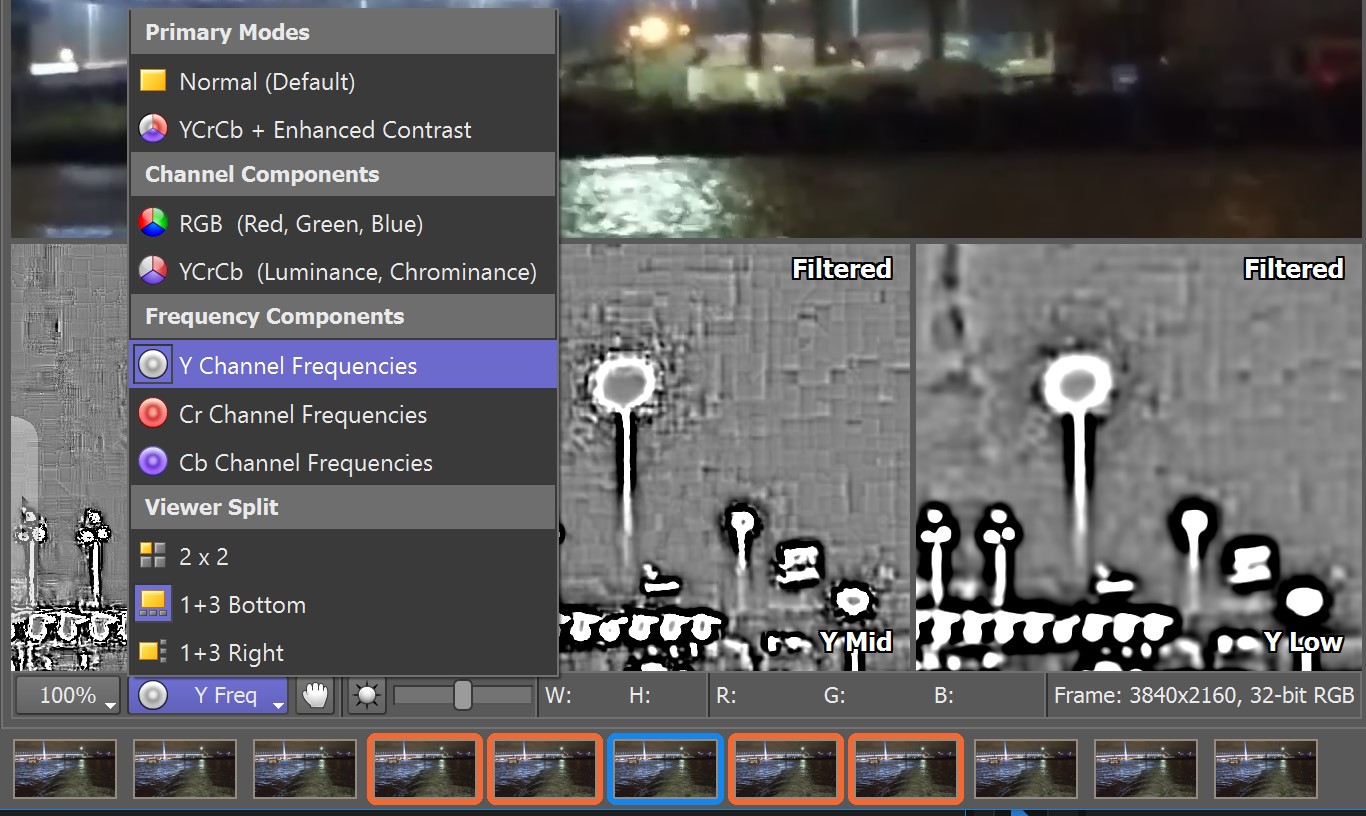
- Zoom into the area you want to check and try to increase noise levels in those frequency components where you see some leftover noise. When you see some remaining noise particles showing in the Y High viewer, increase the Noise Level > Frequencies > High setting. Similarly, if you see larger remaining particles in the Y Mid or Y Low viewers -- increase the Noise Level > Frequencies > Mid and Low settings correspondingly. If even larger noise particles, color blobs, or even spots are still visible in the main viewer (there is no separate viewer for the Very Low and Ultra Low ranges), then try to increase the Noise Level > Frequencies > Very Low and/or Ultra Low settings, while observing how that affects the main preview.
- Besides adjusting the noise levels in those individual frequency components, you can also adjust the noise reduction amounts. Those control how much noise reduction should be applied to the noise elements of the corresponding frequencies.
By default, a 100% noise reduction amount is applied to High, Mid, Low and Very Low components, while the Ultra Low component is not processed (the noise reduction amount is set to 0%) since usually Ultra Low noise is not present in most videos.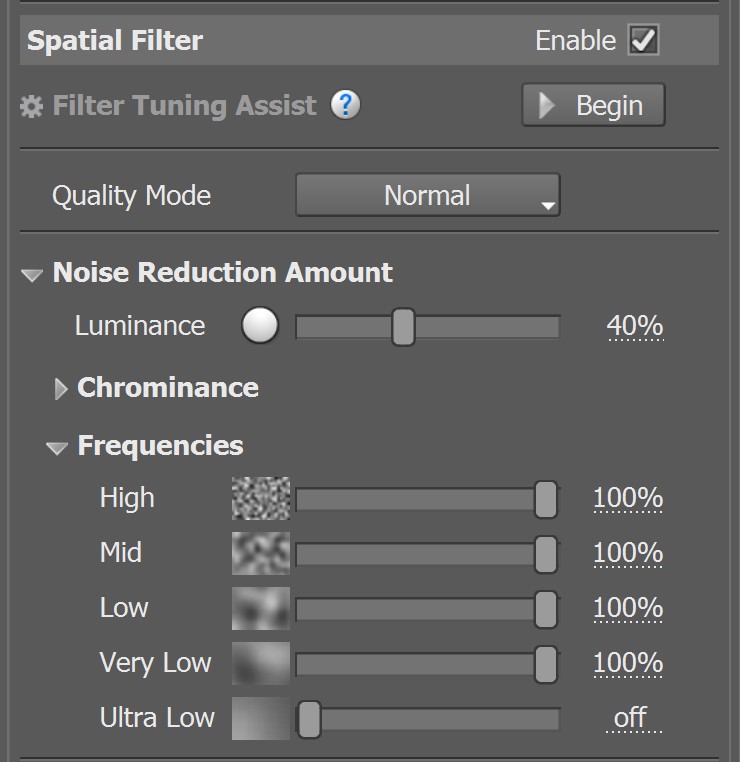
If a particular clip contains strong ultra-low frequency noise (like large color blobs sometimes produced by compression), enable the noise reduction in that component by increasing the Noise Reduction Amount > Frequencies > Ultra Low setting. Also, you can adjust the Noise Level setting for that component.
Final words
In most cases, noise of different sizes is automatically analyzed and successfully removed by Neat Video. The only thing that you need to do to achieve that in each particular case is to build an accurate noise profile by following the general recommendations offered for example in this tutorial.
In more complicated cases of unusual noise or difficult profiling conditions, try to follow the recommendations for additional tuning of the filter settings as described in this article.
Always remember, that there is no right or wrong in denoising, sharpening, and color grading. It all depends on your personal preference, the preferences of your client, and the mood of the final video. Enjoy editing!