Noise profiling: featureless area hunt

When you just started learning about denoising video footage using Neat Video, you might have noticed how much we talked about the importance of a good noise profile. The reason for that is in the way how Neat Video decides what is noise that should be taken out of the picture vs details that should be preserved. For the best results, Neat Video needs to analyze a frame area that is completely featureless and contains only noise on a flat background. That way our denoiser adjusts its “sieve grid” to sort the noise out of your video. If the noise profile is built correctly, then Neat Video can be ruthless to the noise while being very gentle with the details.
Sounds great, doesn’t it? But as you can imagine, it is not always as easy as it might sound. Sometimes areas that appear to be featureless are in fact full of fine details and using such areas for profiling can significantly reduce the quality of denoising. Therefore it is critically important to choose the right area for profiling.
We have gathered some examples of good and not-so-good areas where anyone can get tricked.
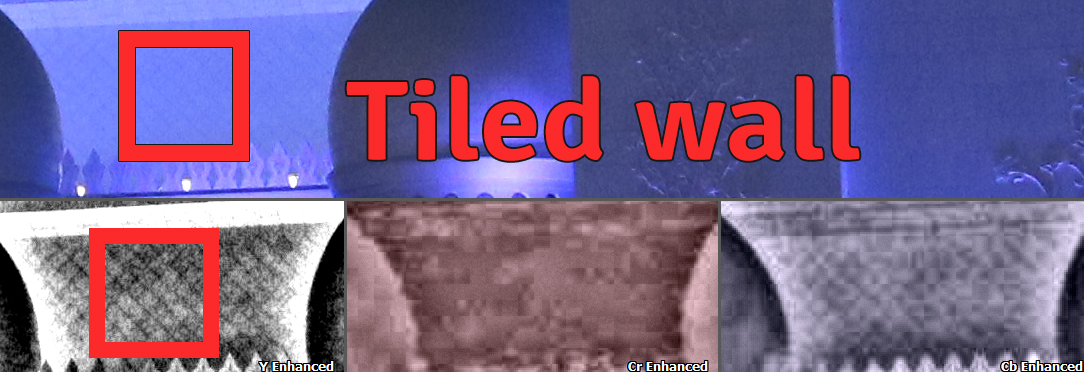
Walls with pattern
Walls with some pattern that’s hard to see at first.

The walls of this mosque are actually not as featureless as they may seem. They are covered with tiles. Building noise profiling using such an area will result in loss of details and over-processing the video.
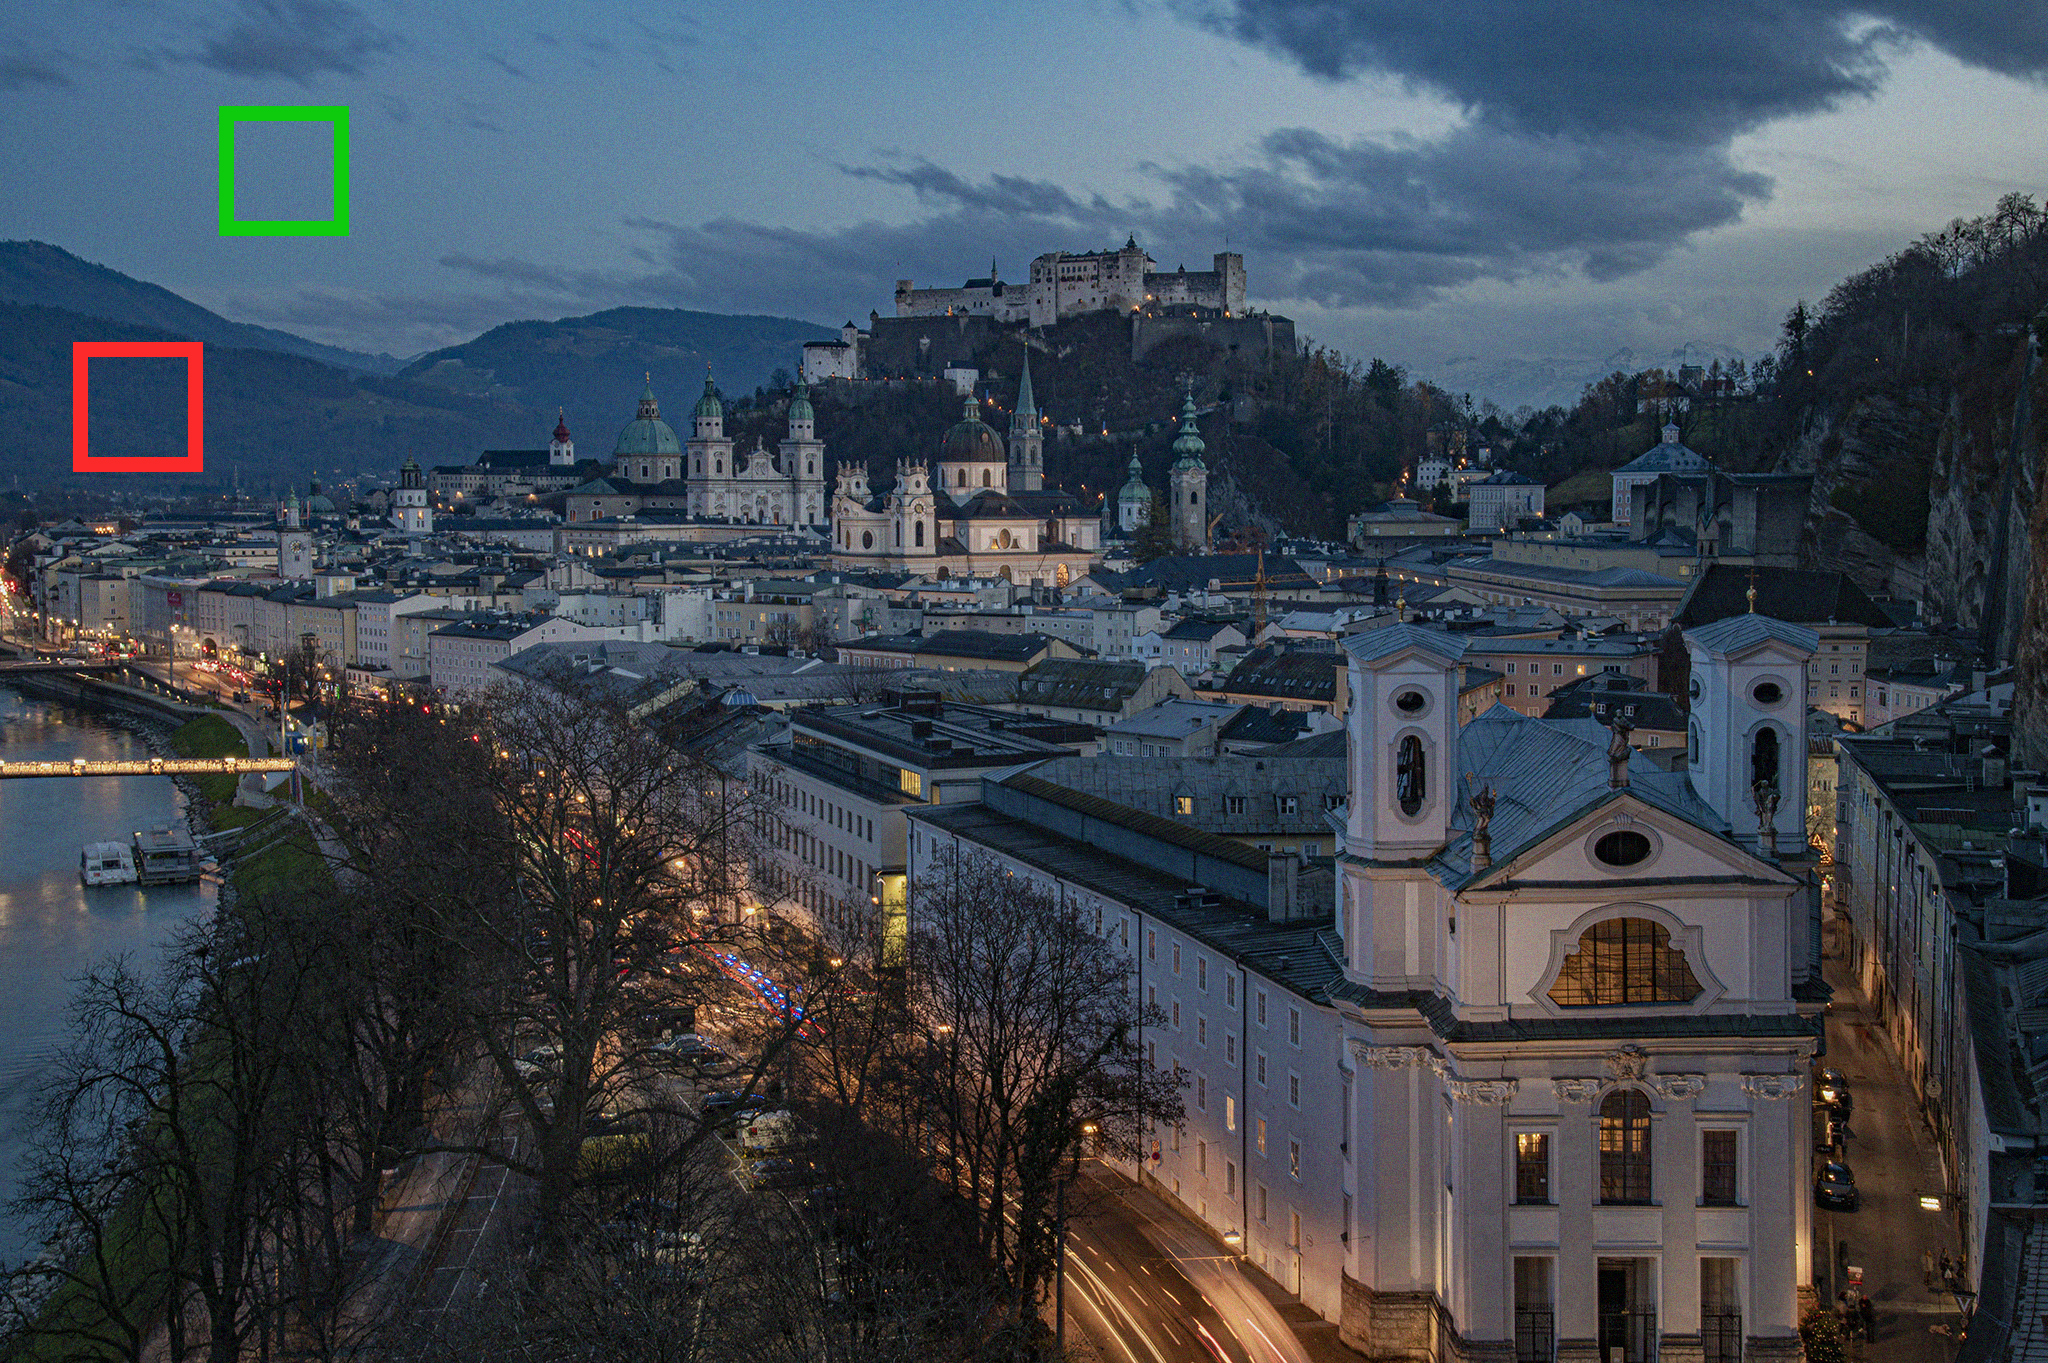
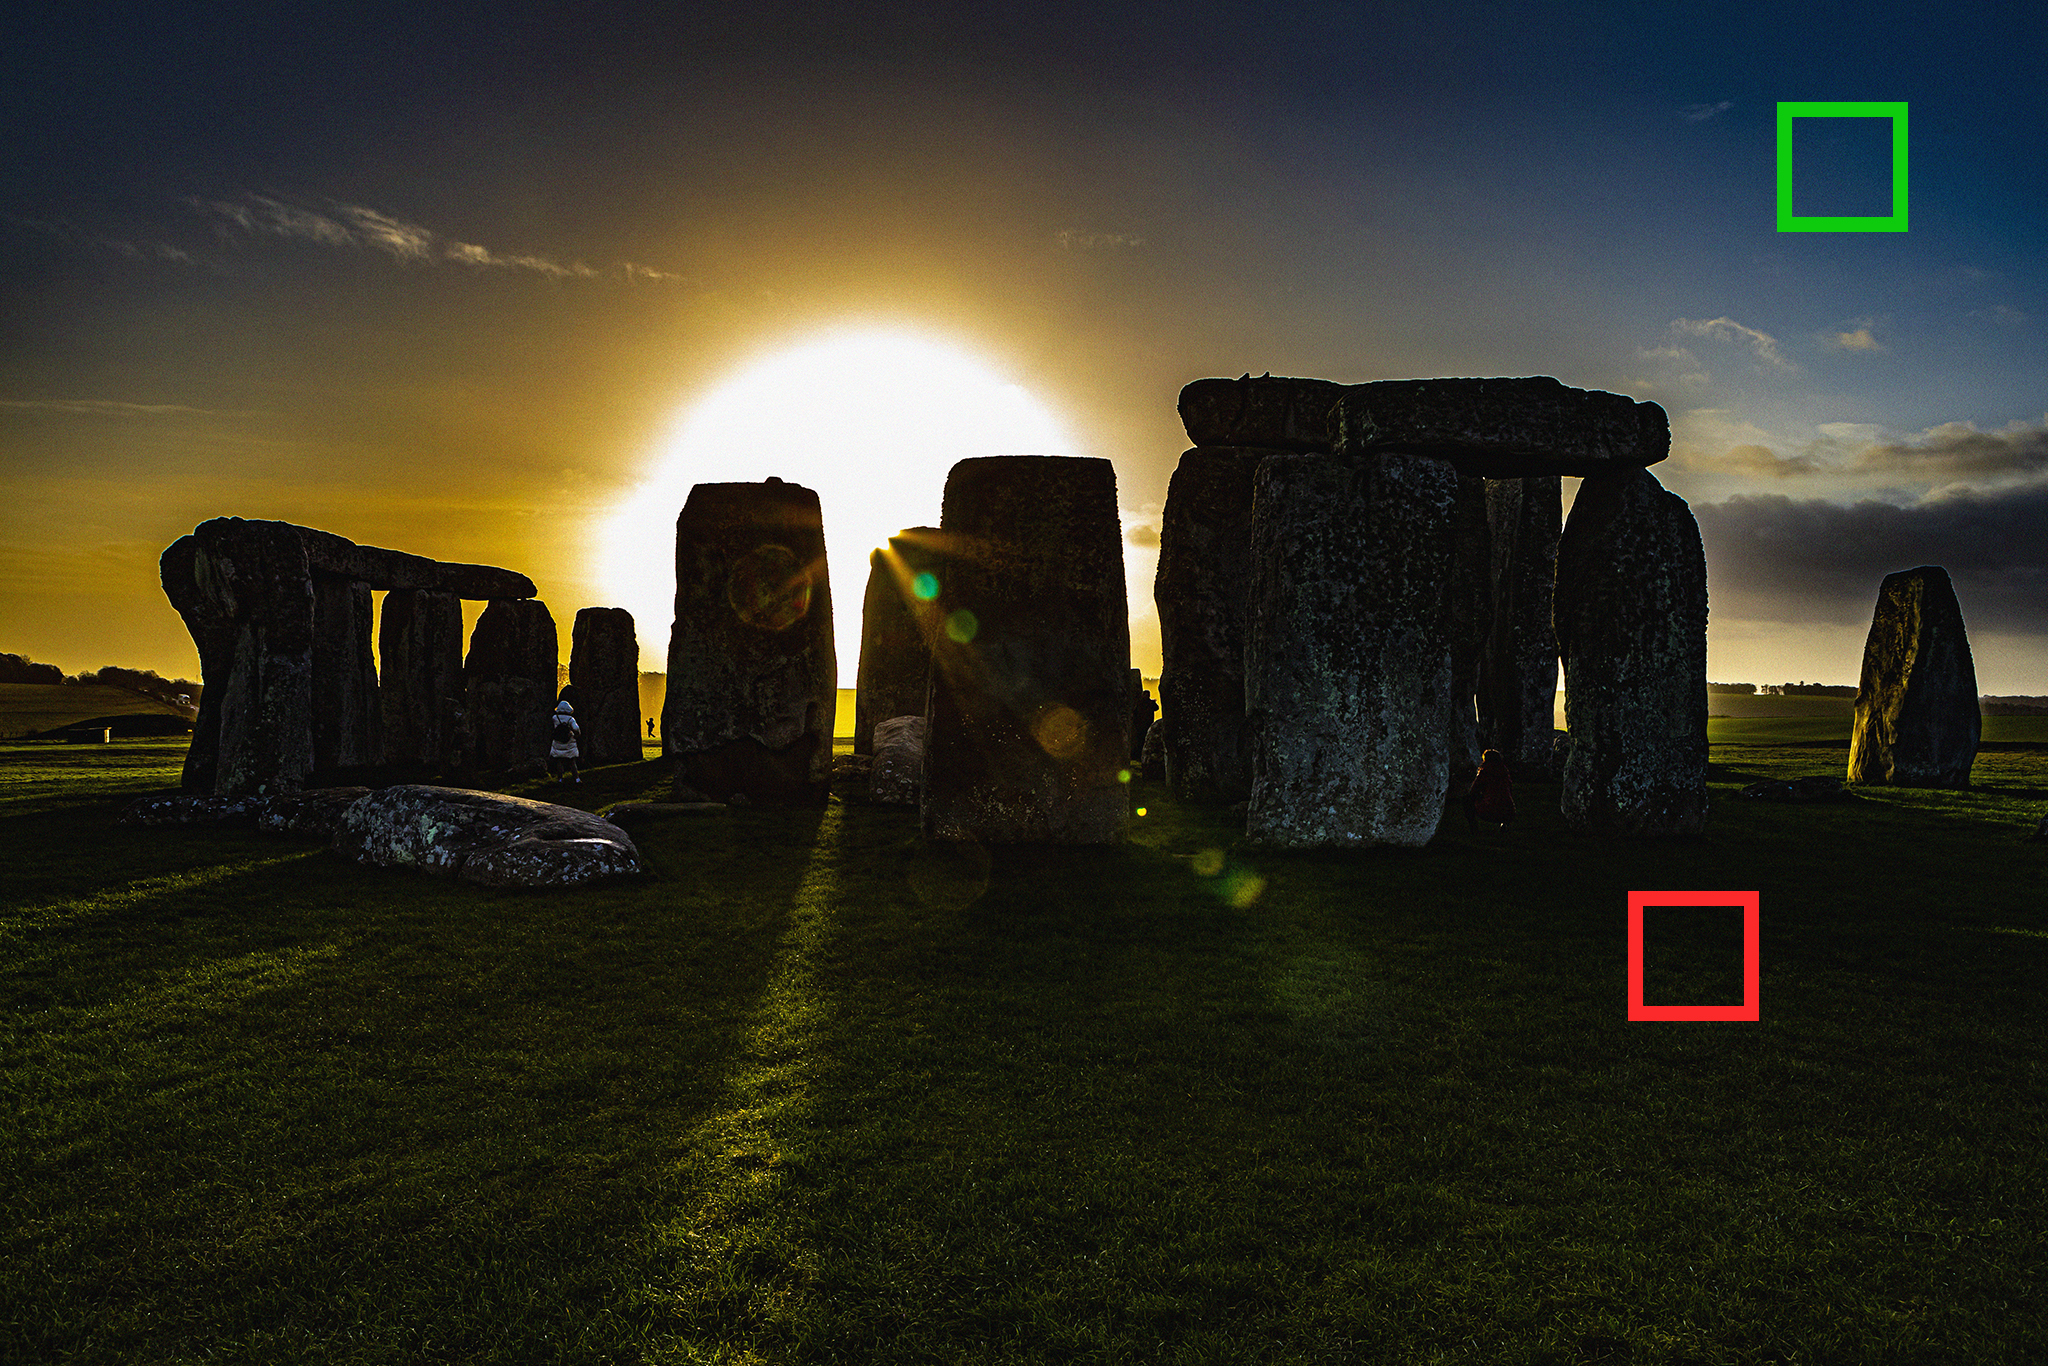
It’s better to build a noise profile using some area in the clear sky.

Trees
Again these two areas look similar in terms of having details in them, but let’s zoom in…
Even though the trees in this forest are far away they still form an area that has details all over it. Try to avoid building a noise profile on the part of a frame demonstrating something that is generally full of features, even small ones.
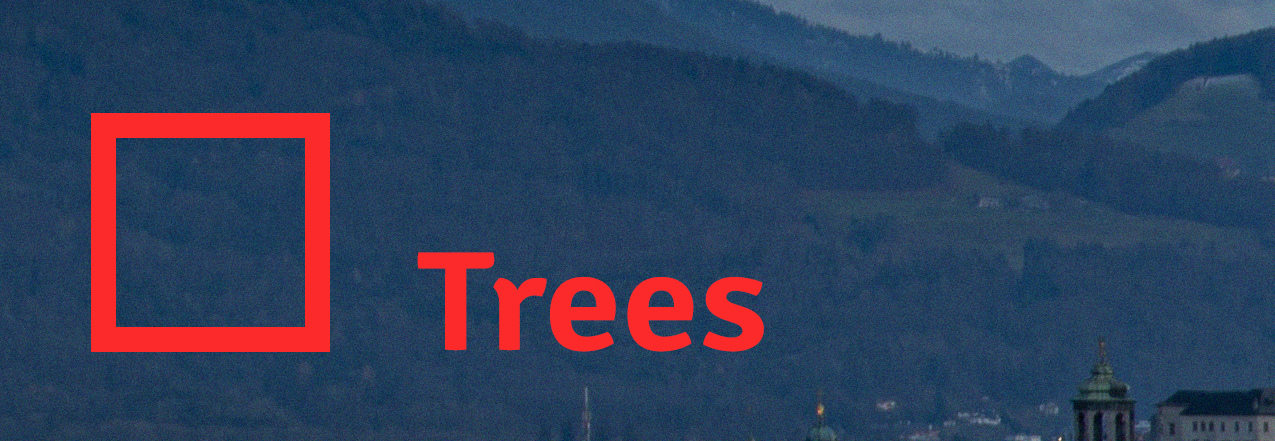
Using clear sky for the noise analysis profile in this example is a much better option.

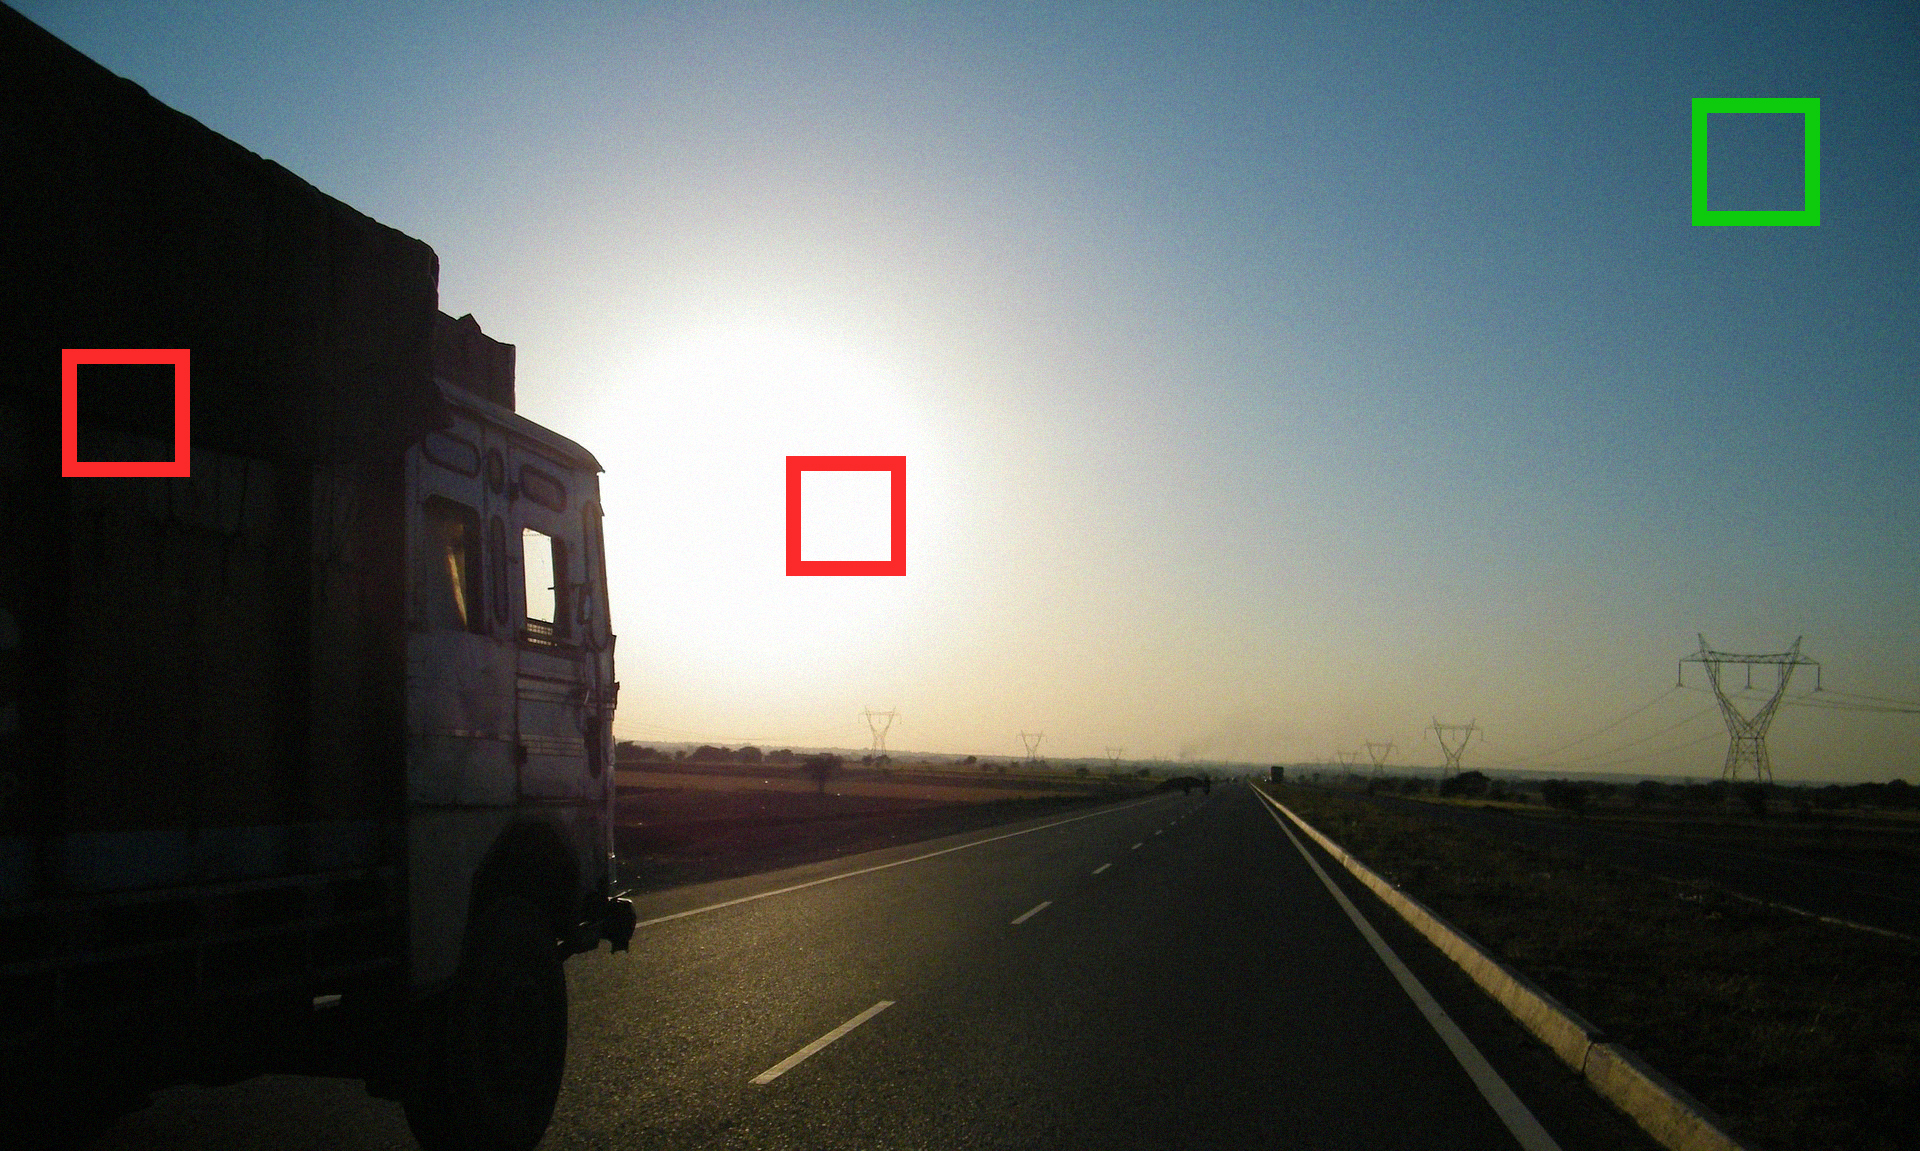
Road surfaces
It may be very tempting to use road surface as a place to build a noise profile. It may look uniform or almost uniform and the noise level is usually quite high. Why do we advise against using road surface for calibrating the filter?

As you can see here or almost anywhere on the street, road surface is not actually uniform. It consists of gravel, stains, oil spills, cracks, etc. It’s way too “busy” with details to make a good sample of noise for profiling. Again, using such an area can lead to poor denoising results.

In this frame, using the window glass without any glare, reflections and stains is a better option.

Grass
Guess why the area at the bottom is marked with red?
Because the grass has lots of fine details even if it is in the shadow and you can’t see much of it. When Neat Video analyzes such patches it gets through to the very core of an image and can pick up details that you may not be able to see in the low brightness area.

Yup, stay safe and rather go with the clear sky.

Skin
Choosing some skin as a spot for profiling is another option you may fall into. We recommend to be very careful about it, because as humans we have some minor and sometimes major features on our skin. They can be as fine as a hair and as significant as a tattoo.
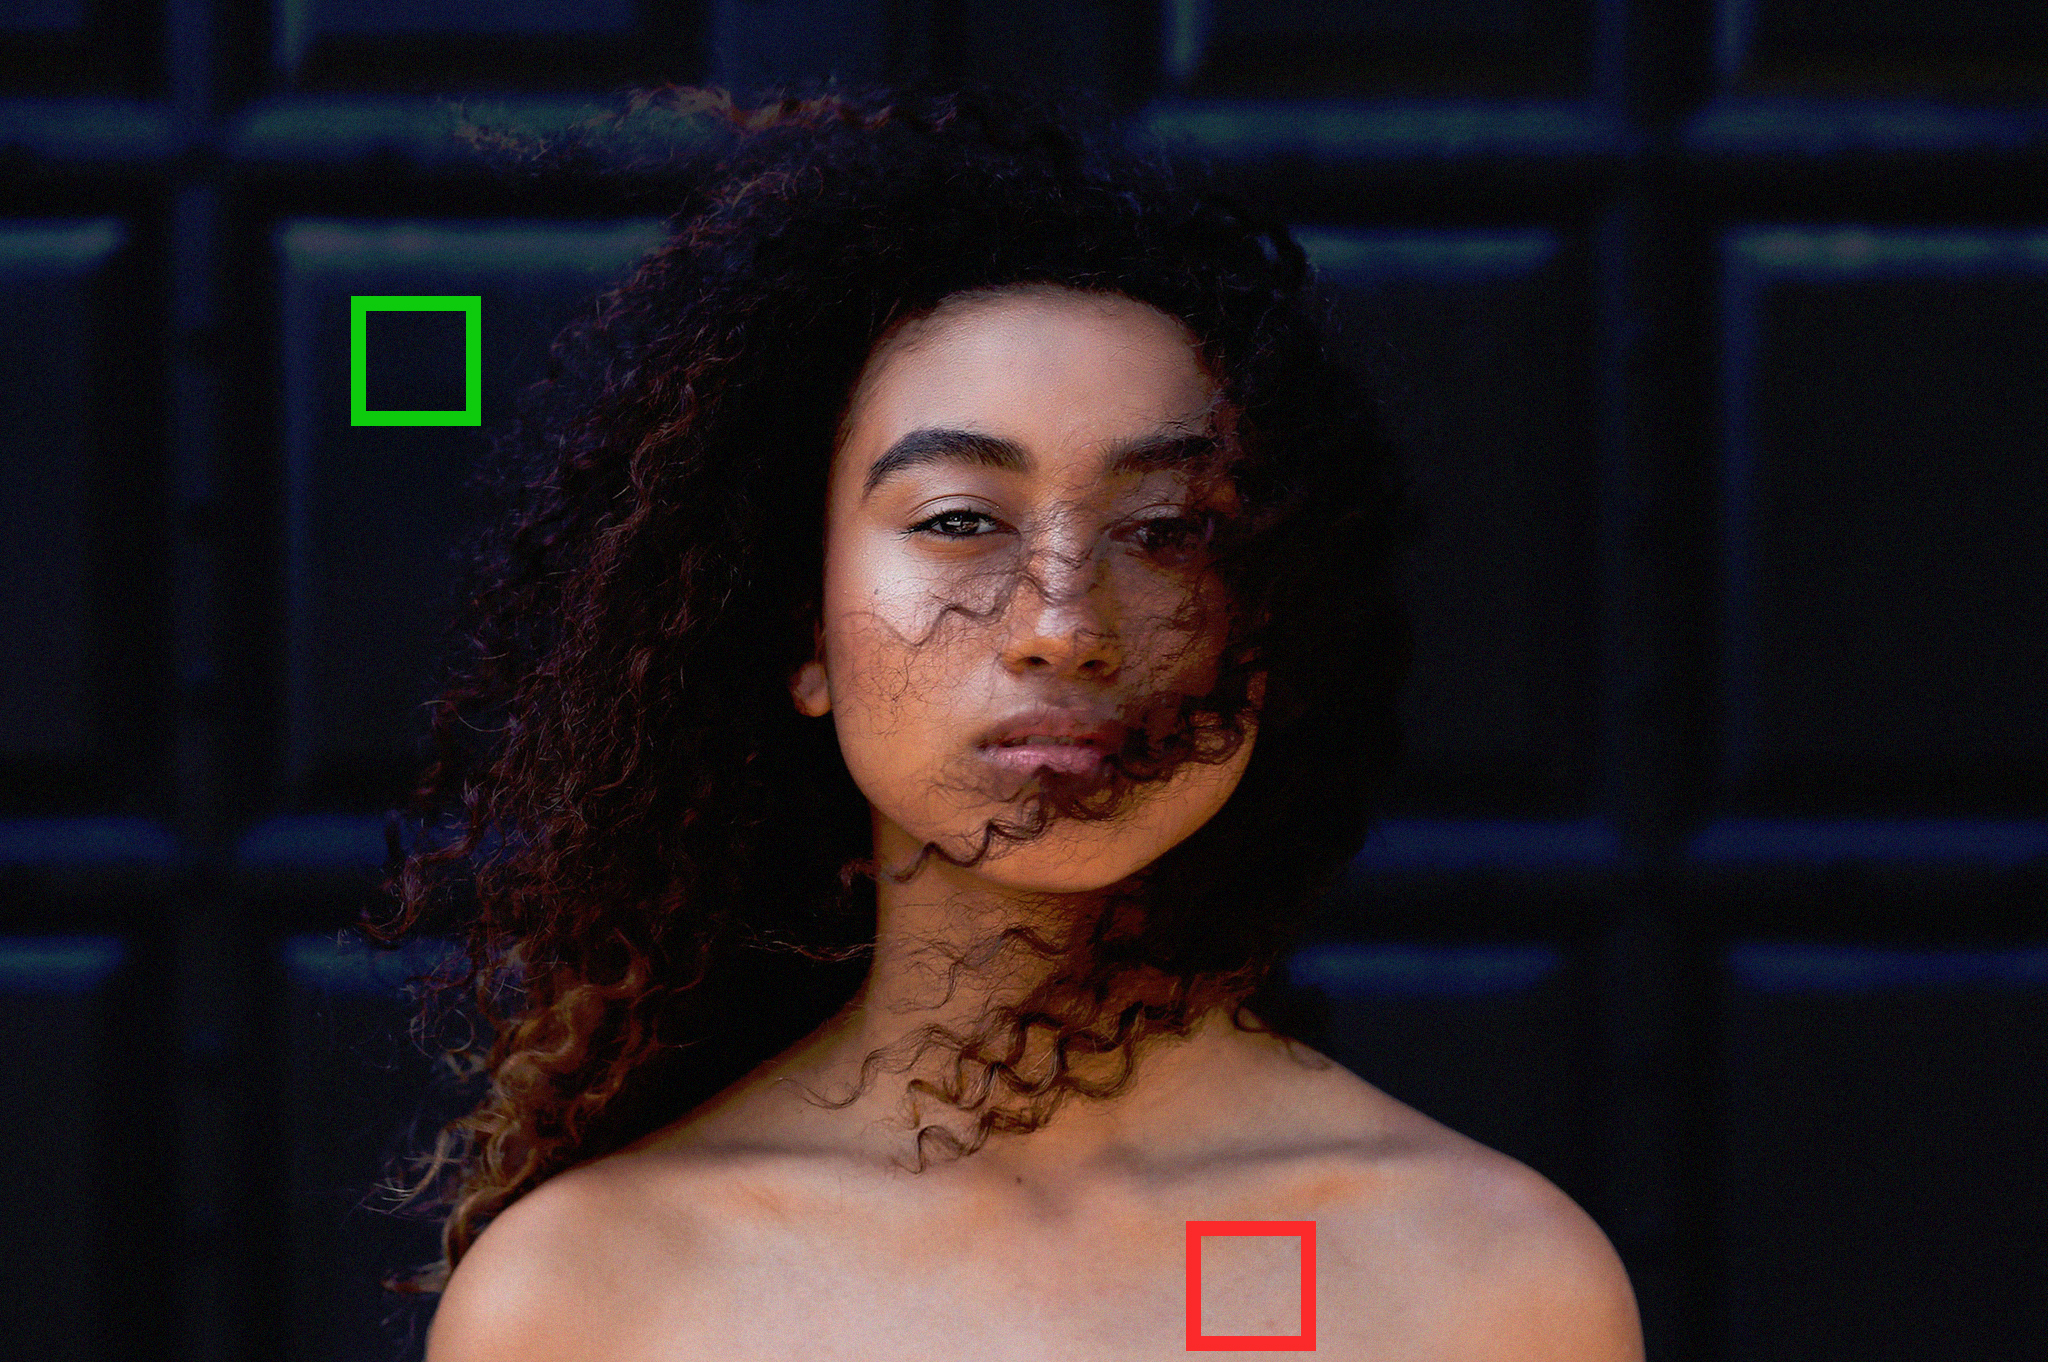
Even a tiny pimple and blood vessel can compromise the quality of your final image if you choose to build a noise profile using your model’s skin.

This patch of the background will give you better results as it is flat and featureless.

Too bright and too dark areas
Finding a uniform area for profiling is very important, but it is not the only ingredient of a quality profile. Brightness also plays a role. Extremely bright (white or almost white) and dark (black or almost black) areas often have clipping (white or black). Areas with clipping don’t have noise or have very little noise that doesn’t represent the grain present in the rest of the frame. To avoid that, try to find a mid-range area with visible noise for best results.


Areas with gradient
Building a noise profile using a spot with a gradient may also reduce the quality of the noise analysis, so try to avoid profiling using areas with changing brightness or colors.
Scratched film
Working with archived film records presents an extra challenge. Here you not only need to avoid true details when building a noise profile, but also keep an eye on dust and scratches that often present in old films.

Try to find an area that has no visible scratches on featureless areas and use it for profiling. Do not include any dust and scratches into an analysis region. That will help the filter to remove the actual dust and scratches present in other parts of the frame and clip.

Small areas
Very small areas are also not a great choice for building a noise profile. The filter has to work with an area that is big enough, otherwise it won’t be able to provide you with accurate noise reduction. Luckily there is a way to reduce noise even in clips bursting with details in each area of each frame. Keep on reading!

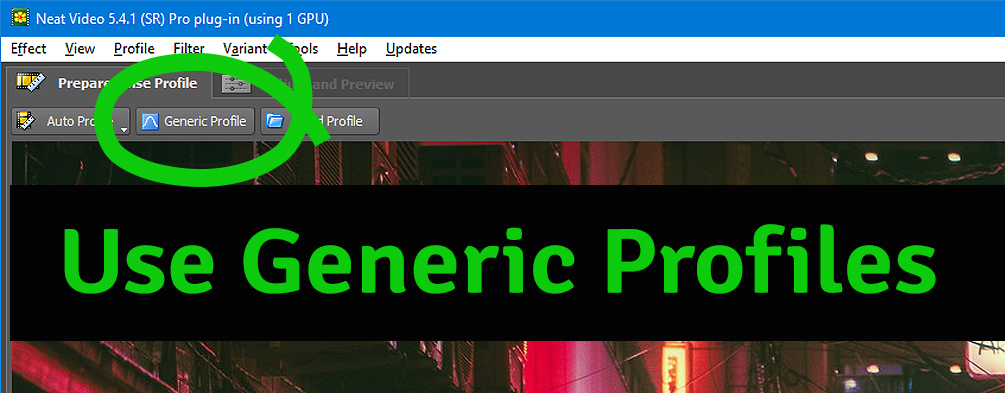
Starting with Neat Video 4 we have introduced Generic Profile, the mechanism allowing to denoise even those clips where you cannot find a single frame with large enough featureless area for profiling. In Neat Video 5, Generic Profile has been improved further and now it is able to deliver great results even in the toughest cases.
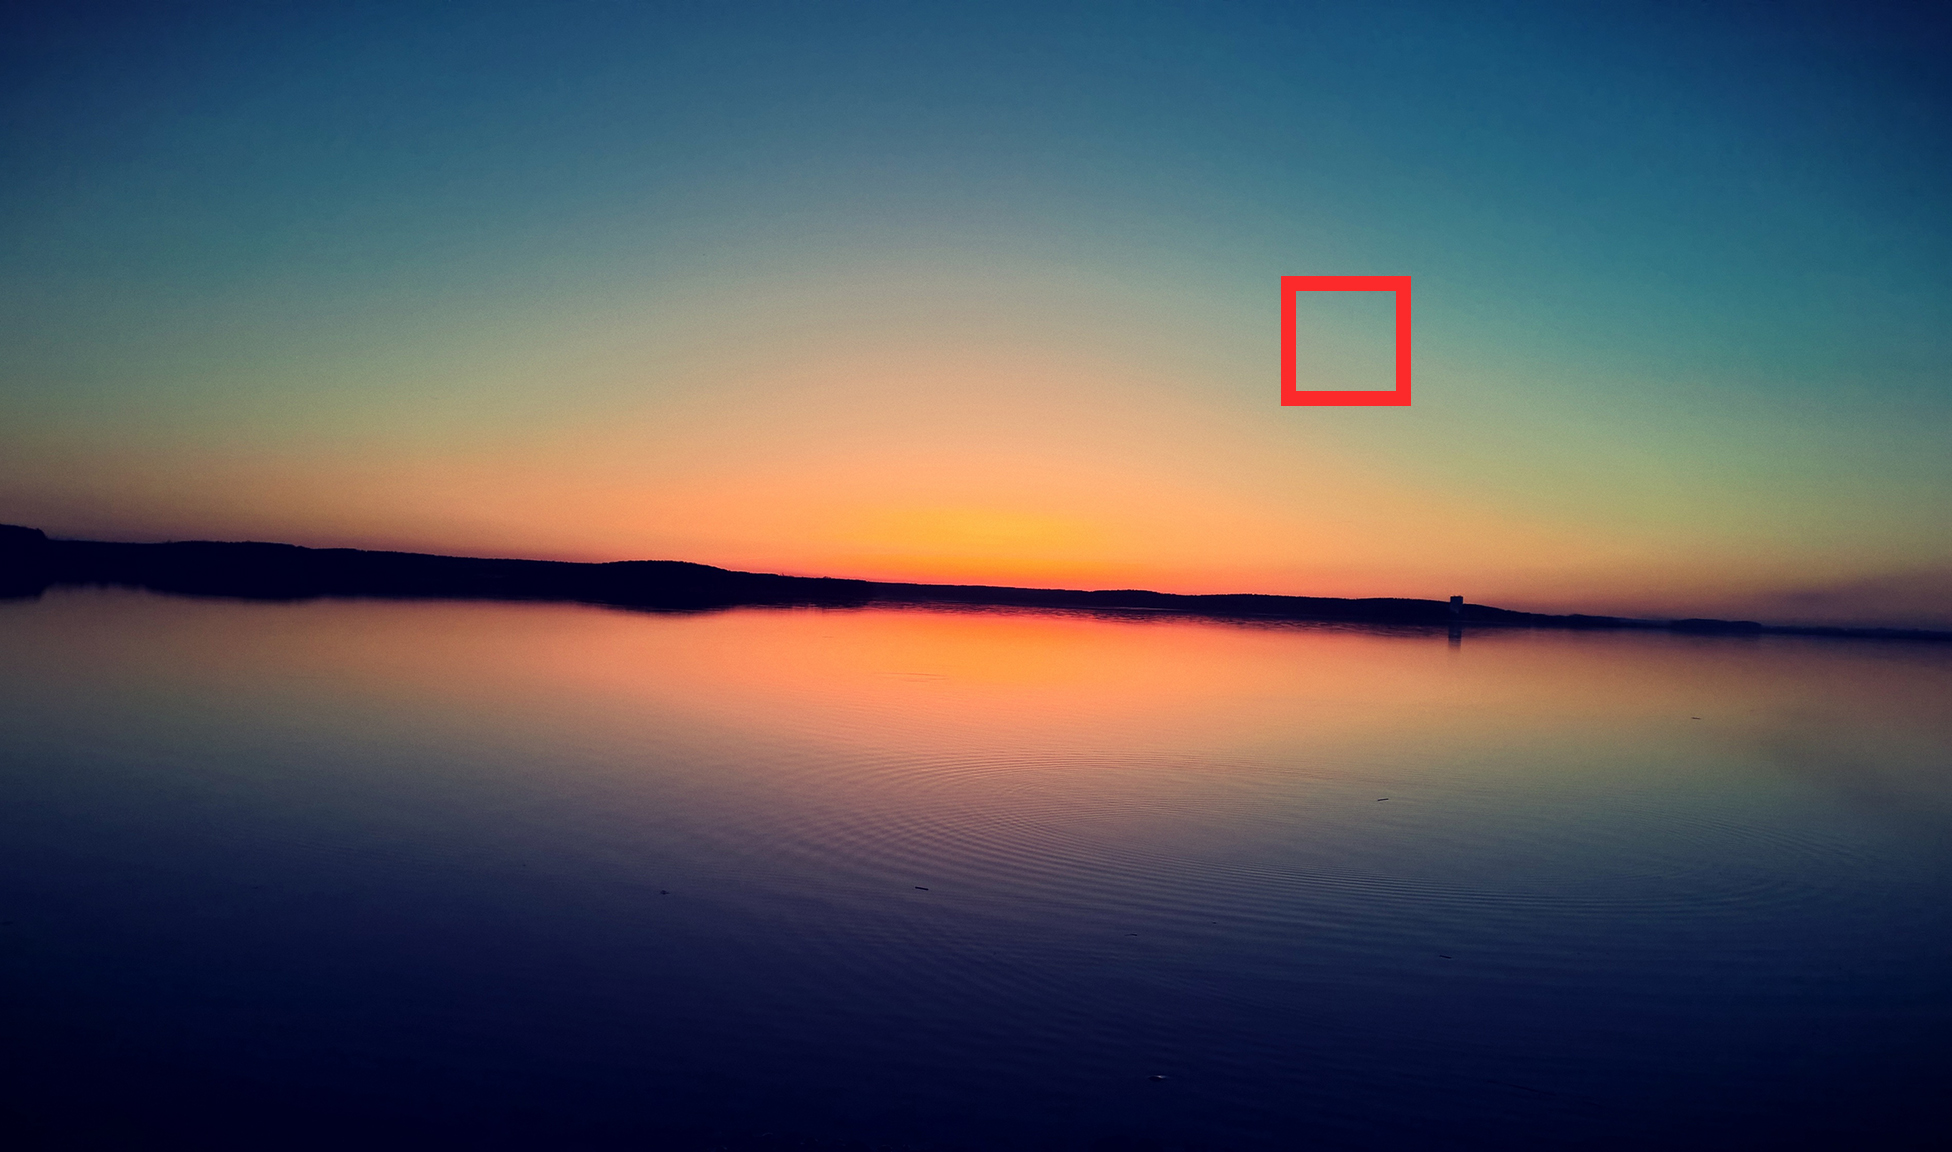
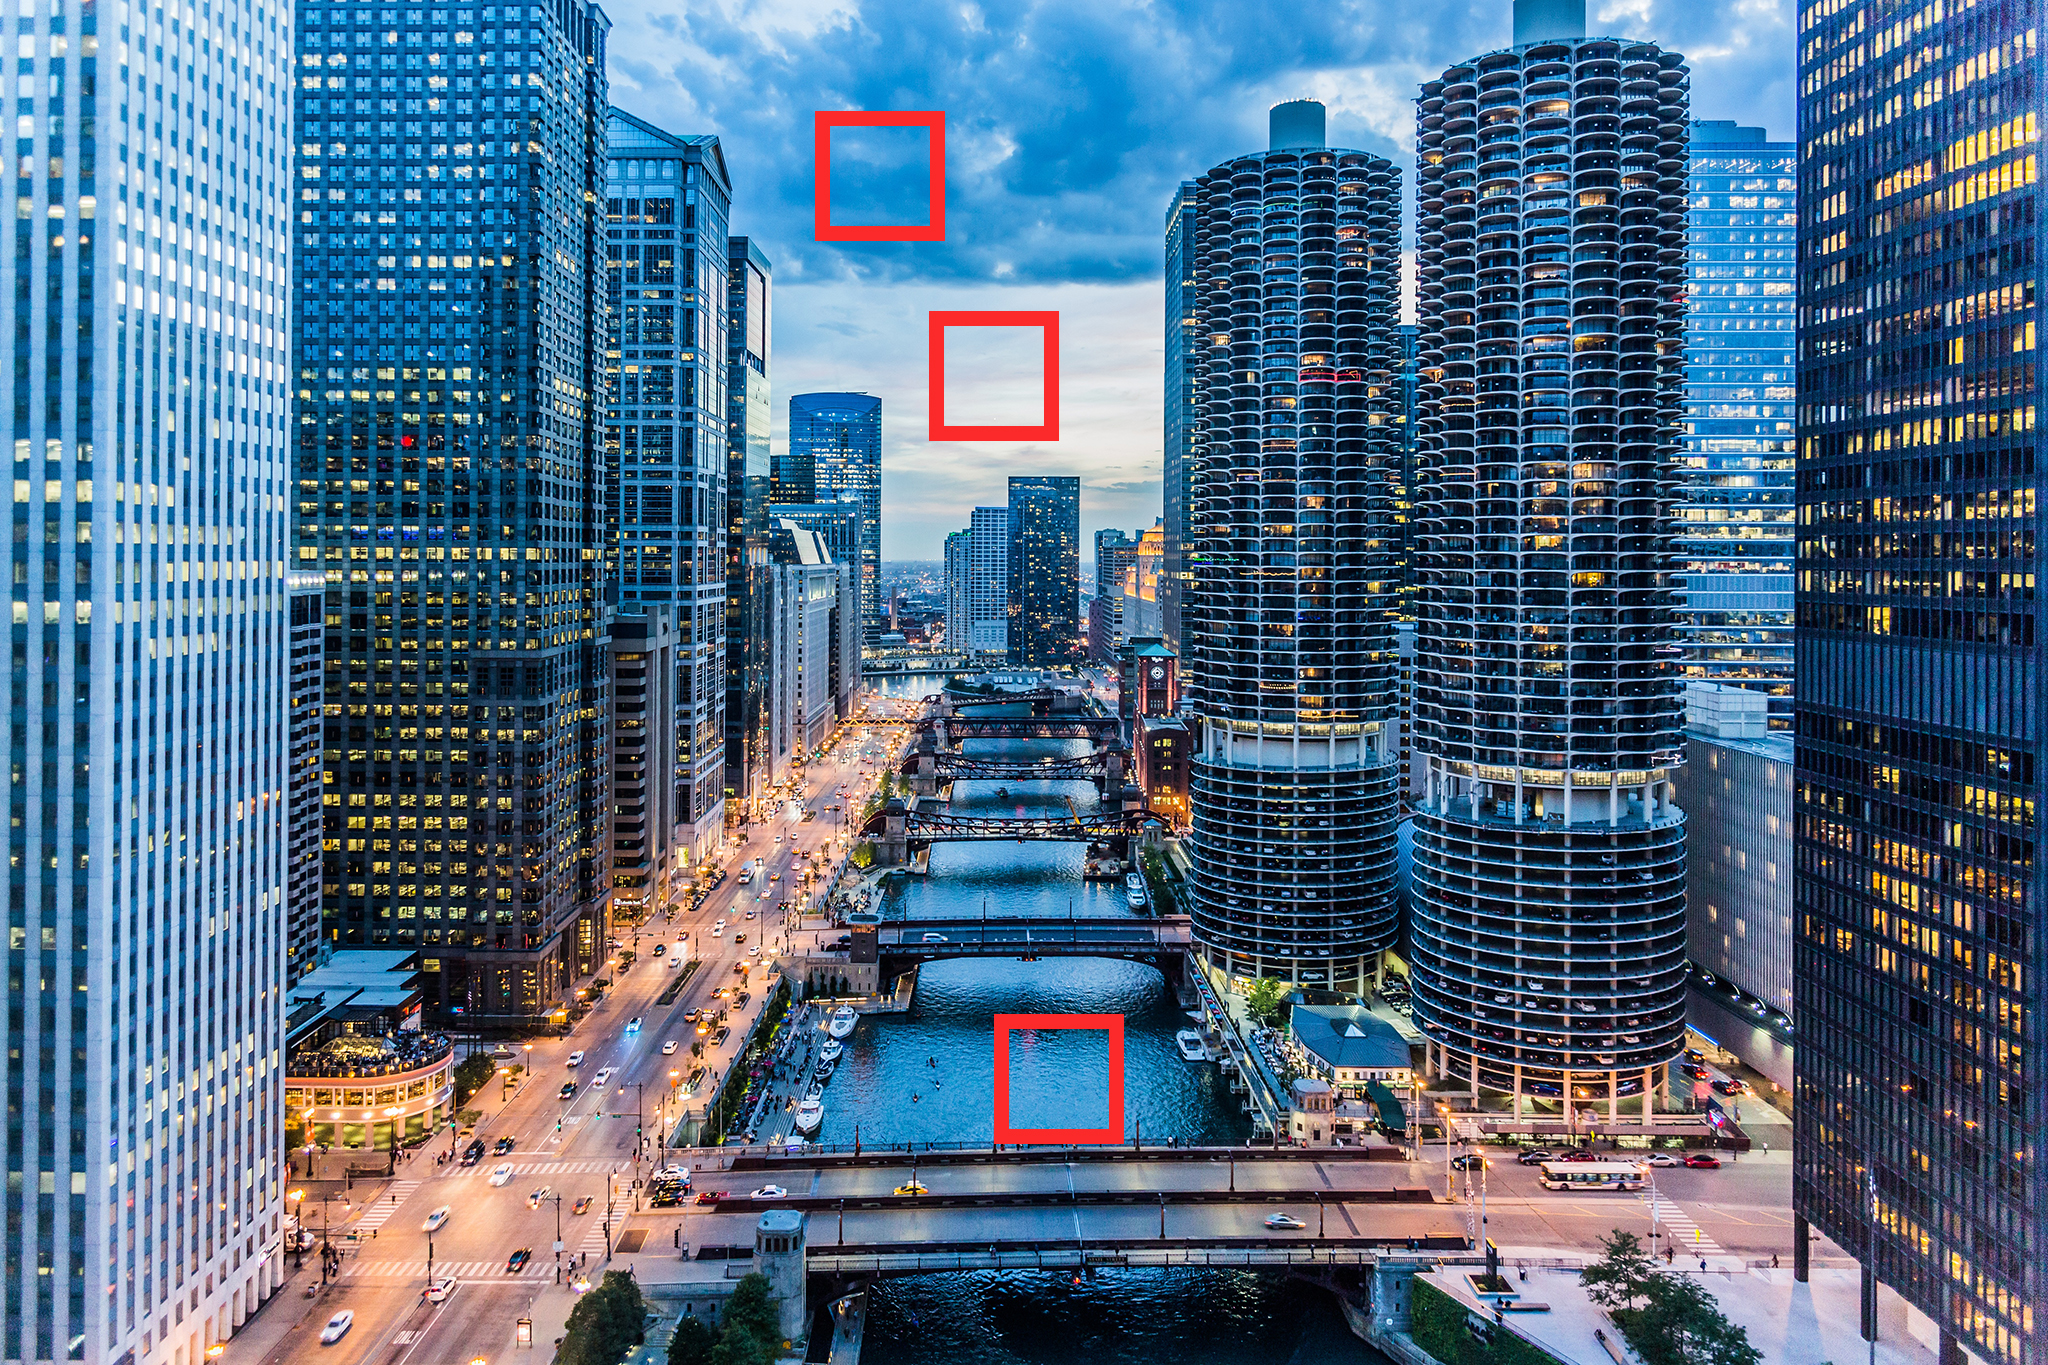
Clouds and water surface
We often use sky as a great canvas for building noise profile, but that only works where the sky has at least one small cloud-free patch. In the example below, the sky has lots of clouds. The water surface also doesn’t work for the profiling purpose. There are no large uniform areas suitable for profiling in this frame and the clip has no better frames for profiling. Tough. But, we and you can get away with this by using Generic Profile.
When you run into a situation when you cannot build a good noise profile using the frame you’ve got, the easiest pathway towards decent noise removal is the Generic Profile feature. It’s simple and quick to use.
Sometimes you may feel like even well adjusted Generic Profile is not giving you the result you want to. In such a case, we suggest you to inspect the whole clip to see if there is another frame with similar noise and some flat areas suitable for profiling. Build a noise profile and adjust the filter using that and the adjacent frames. Another option is using a noise profile from another clip that was taken by the same camera with the same shooting settings in similar light conditions.
Remember, noise reduction gets as good as the noise profile you are using. Take it seriously.