Luminance and Chrominance in noise profiling
In the previous article we talked about how images and video are comprised of the Luminance (brightness) channel and Chrominance (color) channels. We discussed how our eyes perceive digital noise differently in each and how this can be used to achieve the best looking noise reduction results. With this in mind, let’s first take a look at the tools and procedures within Neat Video and Neat Image that help you to build more accurate noise profiles.
Noise profiling with Profile Assist
Noise profiling is the most critical part of the denoising process. An accurate noise profile gives Neat Video and Neat Image a way to distinguish between unwanted noise and desirable details. The good news is that Neat filters have a great tool to help you build an accurate noise profile: a special viewer mode called Profile Assist. It displays the contents of the Luminance (Y) and Chrominance (Cr/Cb) channels with additional contrast to give you a better view of any fine details and compression artifacts possibly present there. You will see that the noise and compression artifacts in those channels are quite often very different in structure and intensity because different channels received different treatment before image/video came to Neat filter.
Using Profile Assist viewers during profiling
- Open the clip in Neat Video and click the “Auto Profile” button. It will find and select an area of the frame used as a main noise sample for profiling.
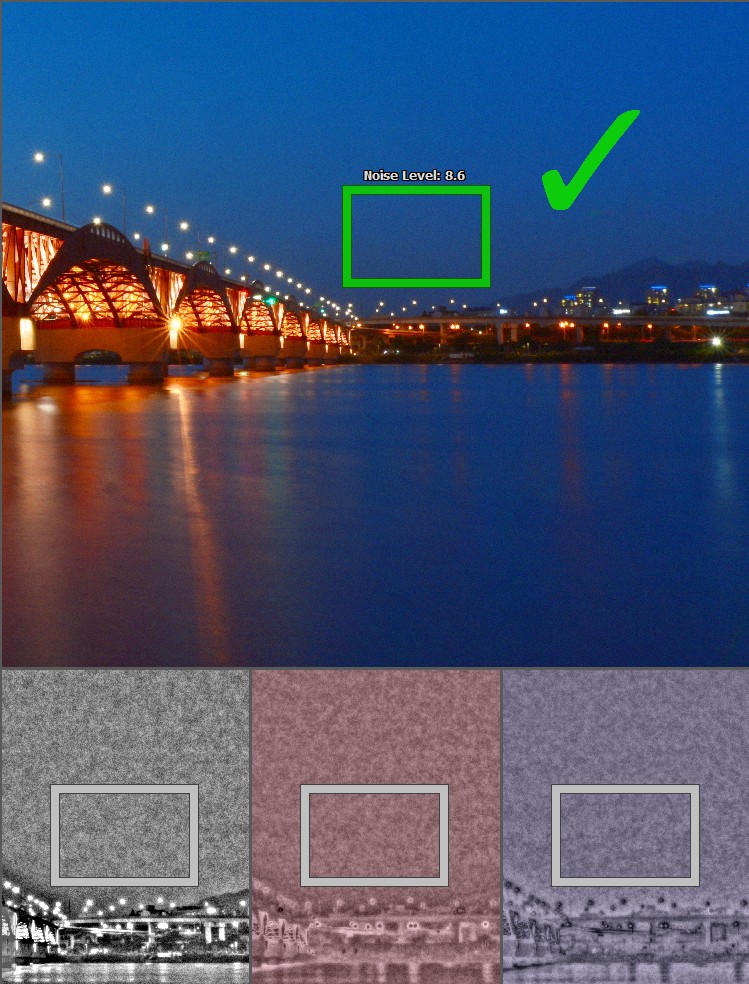
- Visually verify that the selected area shows some actual noise and it looks strongest for that frame.
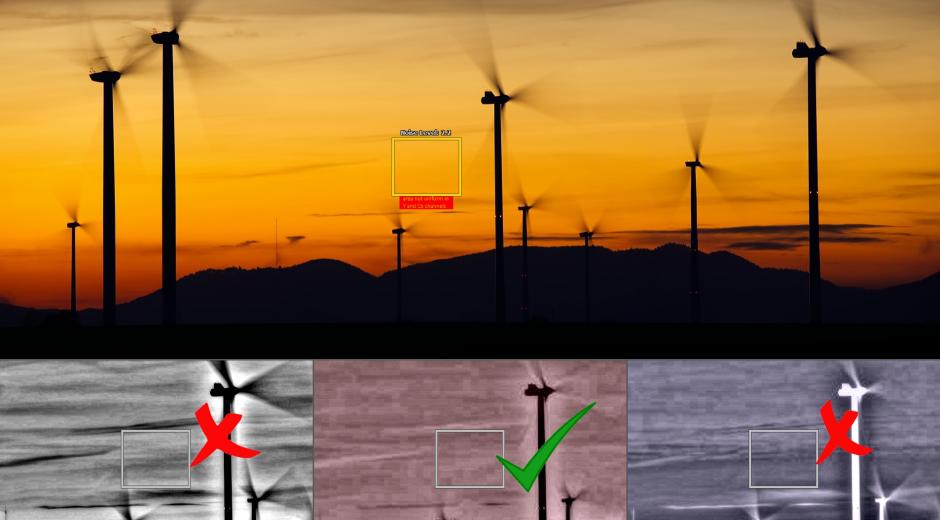
- Check the Profile Assist viewers now. Verify that the selected area contains no details in all three channels. The Profile Assist viewers will help to see any fine details that may be present there. You may also see some compression artifacts there (more on that a bit later).
- If the area selected by the Auto Profile contains any details of the scene, then manually select another spot in the frame and again verify it using the Profile Assist viewers.
- Once everything looks good, click Auto Profile again to build a new noise profile based on the area you have selected.
It is important to use a part of the frame that shows strong noise and no details in all three channels. Using such a sample of pure noise allows Neat Video and Neat Image to build an accurate profile. Presence of details in any of the channels could make the profile inaccurate. This also applies to any fine details that may be difficult to see in the regular image above. Profile Assist shows the content of the Luminance and Chrominance channels to help you better see those details in individual channels and avoid including them into analysis area.
Handling compression artifacts during profiling
Before we move on, there’s one more thing to consider during noise profiling and that is compression artifacts.
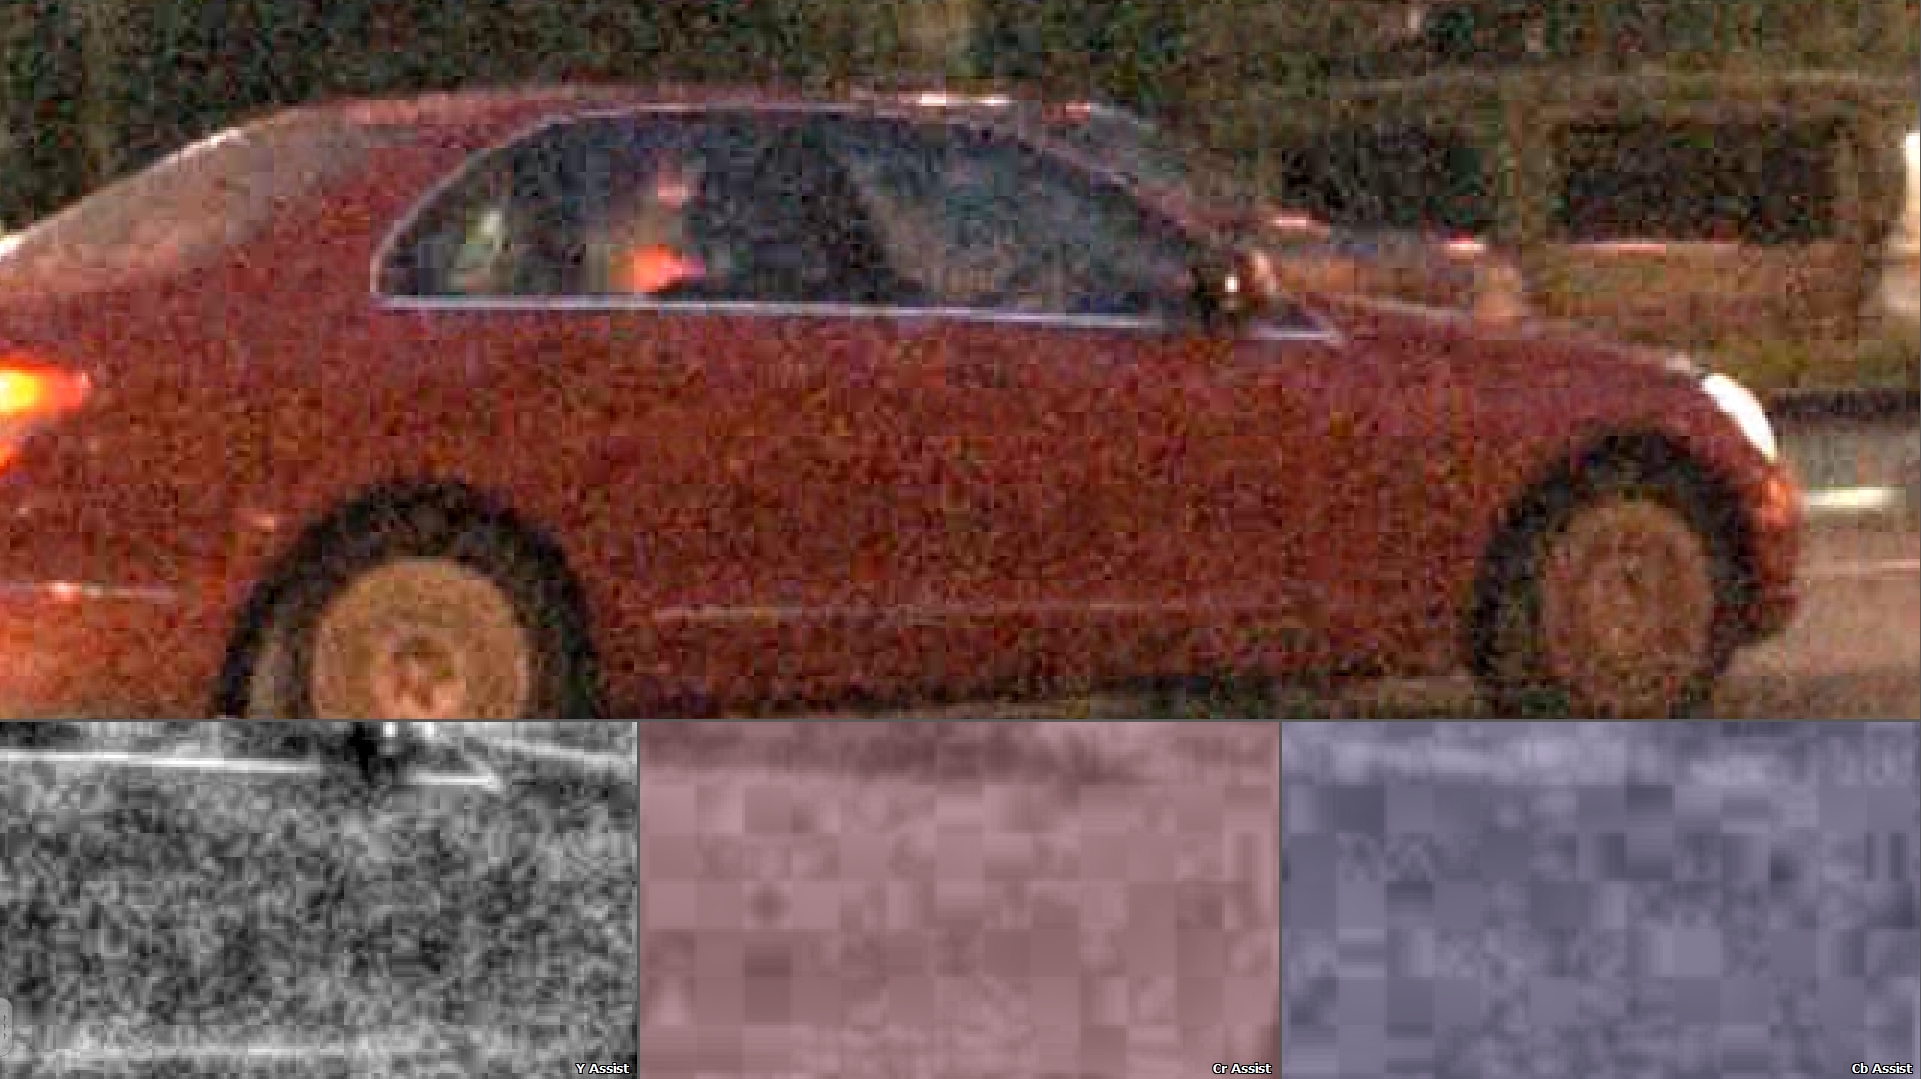
Compression artifacts are often introduced during previous compression (by camera itself or in post-processing). This affects each channel in different ways — often affecting Chrominance channels much more than Luminance. In fact, sometimes compression artifacts in Chrominance channels are even stronger than digital noise itself! You may see some strong blockiness in the Chrominance channels in such cases.
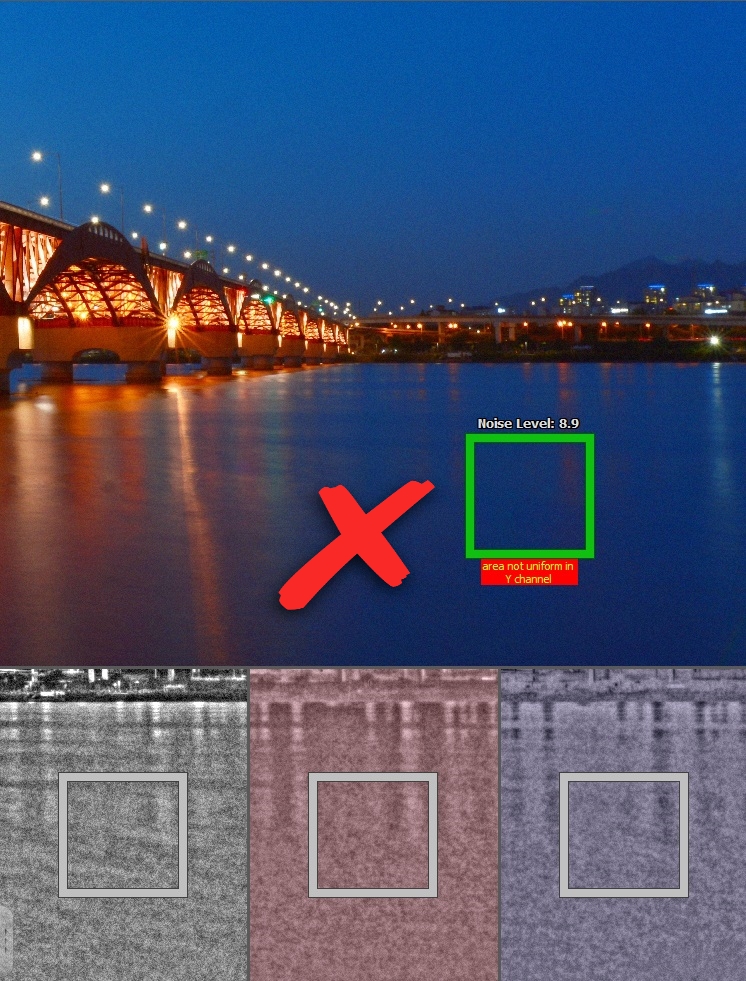
When this happens Neat Video and Neat Image may also give a warning saying that the selected area is ‘not uniform’ in some channels. This is to be expected because compression artifacts are usually not uniform by their nature.
What to do in such a situation? Use the Profile Assist viewers to check if the warning is caused by presence of compression artifacts or by presence of actual details:
- If the warning is caused by artifacts (you see blocky artifacts, for example, in Chrominance channels but you do not see any actual details there), then this area can still be used for profiling; the artifacts will be considered noise and will be reduced by the filter;
- If the warning is caused by any actual details (you see some actual details there), then a different area should be used for profiling; otherwise such details may be lost during noise reduction.
Next step: Noise filter settings
Ok, so now that we know how to check the Luminance and Chrominance channels to select a good area for profiling. Now let’s turn our attention to filter settings, which is the topic for the next article.