Save time by using your resources right

When approaching the task of noise reduction, it helps to keep in mind that you have three important resources at your disposal. These are: knowledge, your time and your hardware. The way these things come together will help you to achieve better results, more rapidly.
Knowledge comes with time. Spend a little of it up front by following our tutorials and How-To articles and you’ll be armed with the information that will help you avoid habits that cost you time. Likewise, spending a little time to set up Neat Video on your hardware can save you time when it comes to rendering and exporting.
So without further ado, here some time saving tips for using Neat Video.
1. Get the most out of your existing hardware

When you are using Neat Video for the first time we highly recommend running Neat Video’s Performance optimizer. This is a small tool that analyses your hardware and allows your computer to use its resources more effectively, which means your video will be processed faster. To start the process go to Tools > Preferences > Performance > Optimize Settings and click the Start button. You’ll be presented with the best detected combination of settings for your hardware. Repeat this process whenever your workflow changes, for example, when switching between FullHD and 4K content.
2. Use Neat Video tactically in your workflow
Because noise reduction places high demands on your computer system, you should think carefully about how you want to incorporate it into your work flow. You’ll want to avoid doing unnecessary things such as running Neat Video on the same clip over and over. That kind of thing will make processing time longer and could even slow down your computer’s whole GUI.
Here are a few good practices to put in place to reduce the effect of Neat Video on your system:
Avoid re-rendering
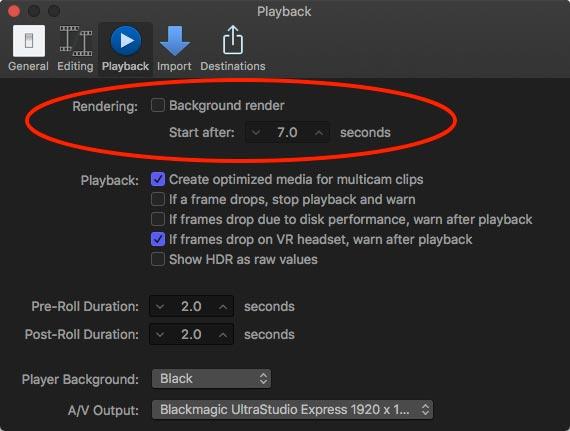
Turn off all background renders and skimming in your host application to prevent it from re-rendering when you do not need it. This will free up resources and make your system far more responsive and easier to work with. Once you have finished with all post processing and ready to get final result, just trigger the render manually. The beauty of this approach is you can choose if the clip you are working with needs to be rendered and when.
Set your filters, then disable Neat Video
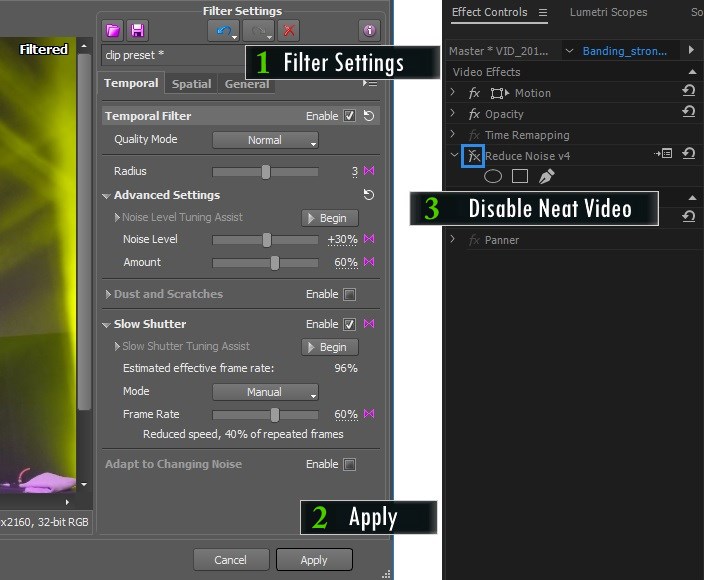
You only really need Neat Video to do its job when exporting your project. For each clip, apply Neat Video, adjust your filter settings, check the preview to verify the quality of noise reduction. Once you’re happy, you can disable Neat Video in your application, so it won’t affect performance. You can just switch it back when you’re done editing, and render or export with noise-free video.
Clean video before editing
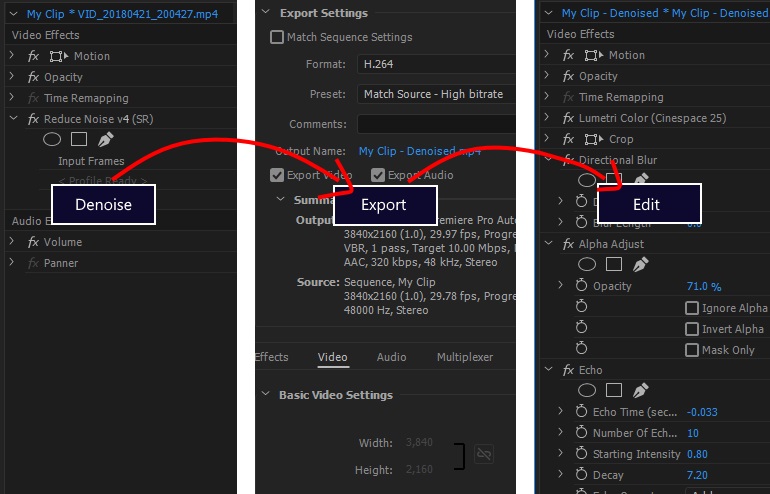
You can apply Neat Video to all the clips you are planning to work with beforehand and export them at maximum quality. You can then import these beautifully clean clips into your project and work with them right away, avoiding unnecessary re-rendering. Although it may sound excessive and somewhat cumbersome, this approach works for some professionals quite well. That’s because it allows preview to work faster and smoother. Giving you a more accurate view in preview while avoiding the need to disable Neat Video and / or background render.
What’s next?
- Stay tuned to learn everything about hardware that can change your experience with noise reduction forever.