Neat Video in Resolve, part 2: strategic caching for performance

In Part 1 of our series on using Neat Video in DaVinci Resolve we covered how best to apply the plug-in for Rec709, Log and Color Managed workflows. Now we’ll take a look at optimizing playback performance during color grading through the strategic use of the caching tools built into Resolve.
What is caching, and how can it help us?
DaVinci Resolve is based on a fast and flexible video processing engine which, combined with powerful CPUs and GPUs, is capable of playing back many effects and corrections in real-time. This real-time feedback is crucial for colorists working on tight deadlines or in live sessions with clients, where they need to preview the effects of their work without rendering.
However, despite its power, there are times when Resolve won’t be able to process the effects or color corrections on a clip in real-time. This may be due to hardware limitations, the complexity of a color grade, or a resource-intensive plug-in. To deal with these situations, Resolve provides a number of caching methods that speed up performance by pre-rendering operations and storing the results as high-quality intermediate video files. All downstream operations then use these files as their base, eliminating the need to recalculate the intensive process every time the clip is played back.
Using these caching features strategically, we can optimize the experience of working with the Neat Video plug-in. With caching properly configured, the plug-in is only processed once, each subsequent play-back pulling from the cached video in real-time. This allows for smooth real-time grading on a high-quality noise-reduced foundation.
In this post we’ll go over the different caching types available in Resolve, configuring the caching format settings, and implementing caching in a way that optimizes the way the Neat Video plug-in interacts with the rest of our grading operations.
Resolve caching types
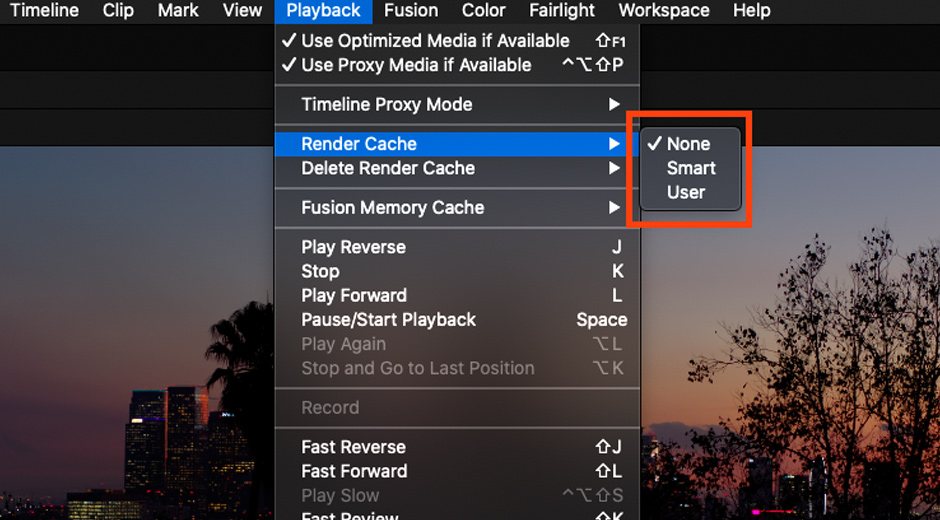
Resolve provides three main types of caching, which are complementary to each other: Source Caching (now referred to as Fusion Output Caching in R17), Node Caching and Color Output Caching.
Source caching
You can think of Source Caching as “pre-Color Page” caching. It caches processor-intensive codecs such as H.264, HEVC and some raw camera formats, speed and retime effects, Fusion effects, and titles and generators. Basically, it caches everything before the Color Page.
Node caching
Node Caching is the primary form of caching inside the Color Page. It caches the results of any specific node in a node tree, including all operations upstream from that node. This cache remains intact until a change is made to that or an upstream node, at which point it must be re-rendered. This is the type of caching we’ll use most when working with Neat Video.
Color output caching
The final cache stores the full output of the Color Page. This allows real-time playback of all color grades and effects on a clip, but must be re-rendered if anything is changed in the Timeline, Fusion Page or Color Page.
Smart caching vs user caching
In addition to its various cache types, Resolve offers two ways to engage them: Smart Caching and User Caching.
Smart caching
Smart Caching is a simple “set it and forget it” way of implementing caching in Resolve. When enabled, Resolve automatically renders things it deems performance-intensive, including certain clip formats, grading operations, plug-ins and timeline effects. And if there’s something that isn’t being cached automatically, you can manually flag it.
Smart Caching is great for lower-performance systems that require a lot of optimization to achieve real-time playback. It can be difficult, however, to set up a predictable caching strategy due to the sometimes unpredictable way Resolve makes its caching choices.
User caching
Like its name implies, User Caching leaves the caching decisions up to the user. With User Caching enabled, we can select specific items, like an individual node, to cache. This is great on high-performance systems that can play most operations in real-time, but require caching for specific operations like noise reduction. Through User Caching, we can be strategic in the way we set up our node trees for best performance.
Configuring the cache format and location
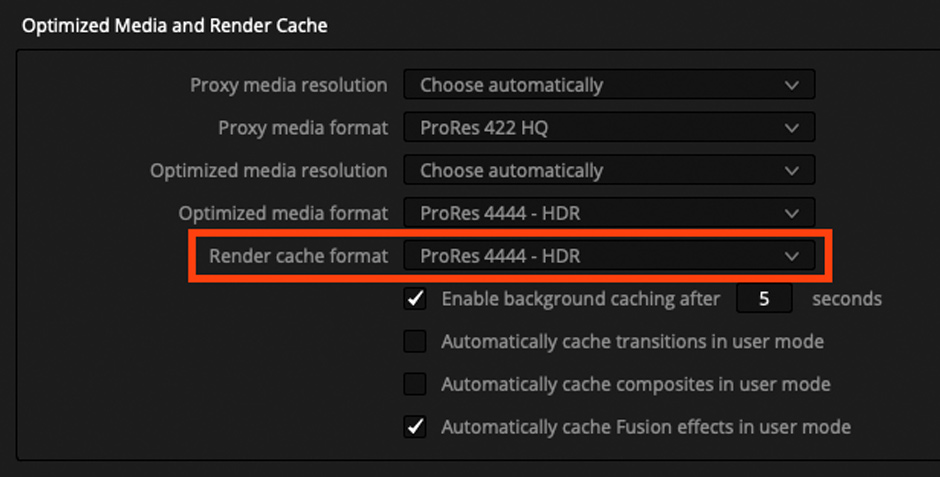
Cached video files in Resolve are meant to be “working” clips, in the sense that the user will perform additional operations on top of the cached clip. For this reason, it’s important to choose a Render Cache Format that maintains the full signal bit depth, dynamic range and color fidelity of the original clip. High-quality 16-bit float mezzanine codecs, such as ProRes 4444, ProRes 4444 XQ or DNxHR444, are ideal for this purpose.
Here are the steps to configure the Render Cache Format in Resolve:
Click Project Settings
- Click on “Master Settings”
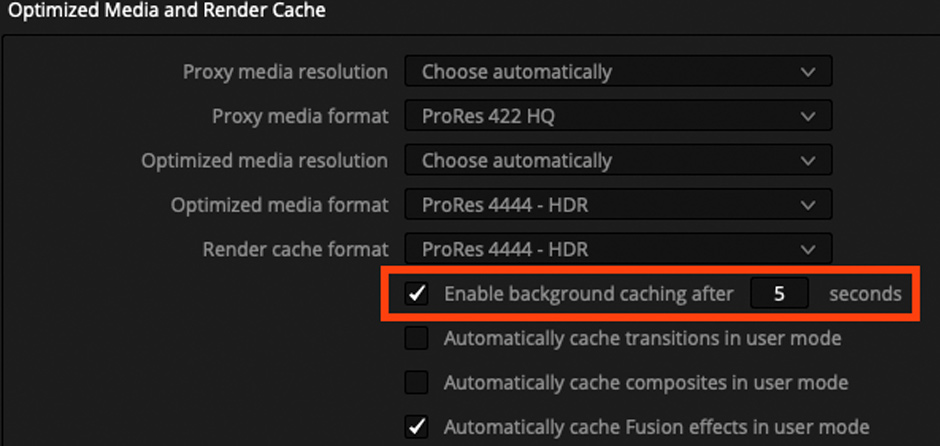
- Scroll down to “Optimzed Media and Render Cache” section
- Set the “Render cache format” to ProRes 4444, ProRes 4444 XQ or DNxHR444
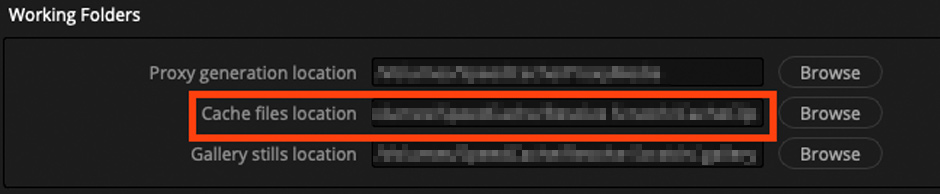
For performance purposes, It’s also important to set the Cache Files Location to a fast storage drive, such as an SSD or RAID array. We can configure that in Project Settings as well:
- Click Project Settings
- Click on “Master Settings”
- Scroll down to “Working Folders”
- Change the “Cache Files Location” to a location on a fast storage drive
Enabling caching for a Neat Video node
Now that we have our cache settings configured, we can apply it to a Neat Video node to cache its results and enable real-time grading.
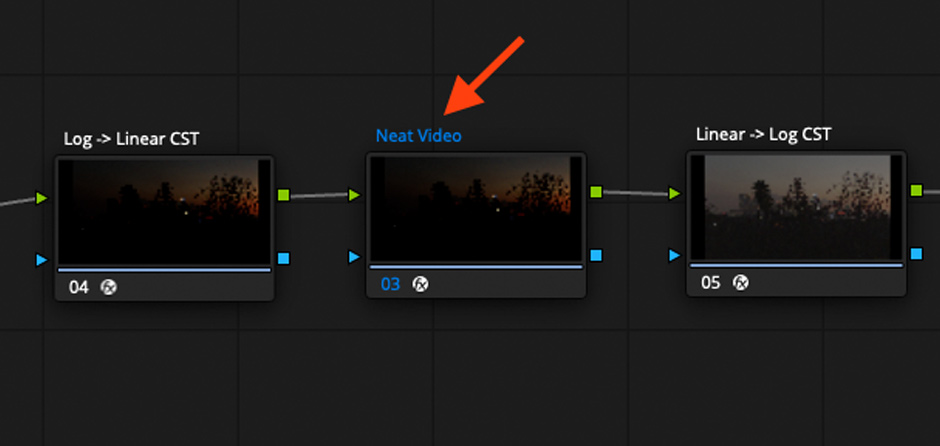
In the first post in this series we determined that the Neat Video plug-in’s optimal placement is at the beginning of a node tree. Every other color grading operation is then performed on this noise-reduced foundation. If we employ Node Caching in User mode to cache the Neat Video node, the system will only have to process the plug-in once. Then, we can grade from the cached clip with real-time playback.
Here are the steps to enable User mode and Node Caching on a node:
- Click the Playback menu
-
Choose Render Cache > User
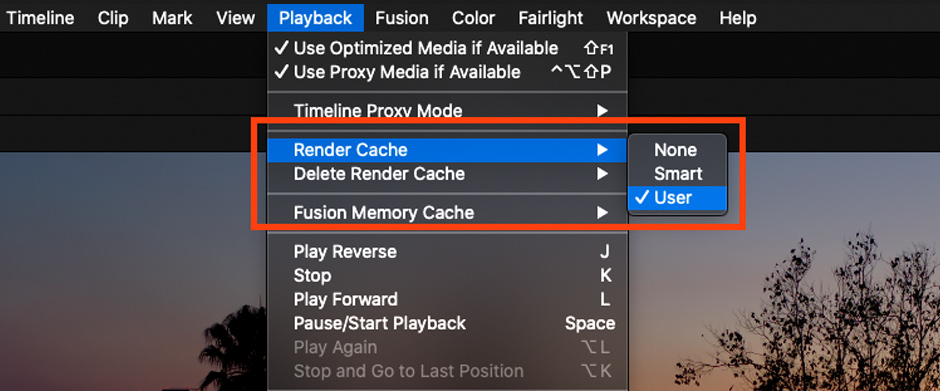
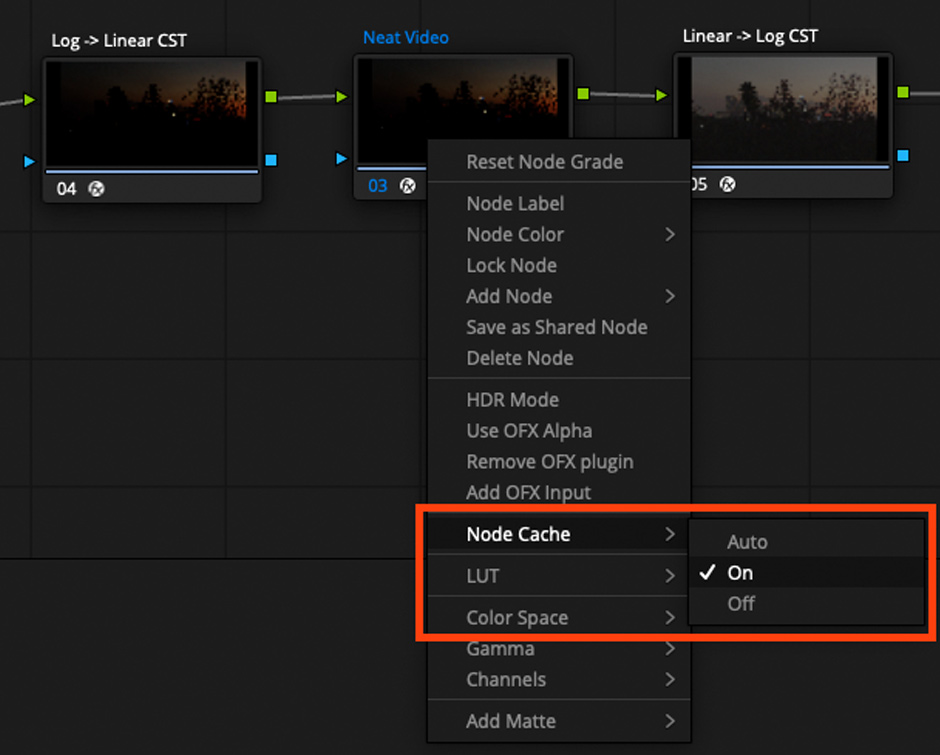
- Right-click the Neat Video plug-in node
- Choose Node Cache > On
Identifying cached nodes and clips
You can identify a cached node by the color of its title and number in the node tree. A node with caching enabled will display in red. Once the node is fully processed and cached, it will display in blue.
The timelines on the Edit and Color pages also display these colors as thin bars above clips, showing the progress of the caching process. This is a good way to check that all frames of a clip have been cached.

Working with caches
Items with caching enabled will render either on playback or in the background. There’s an option in Project Settings to enable background caching, and to set the inactivity time before the caching operation starts.
It's important to remember that a cache is only valid while all upstream operations feeding into it remain unchanged. Changing the settings on any operation upstream of a cached node or clip will require that node to be re-cached.
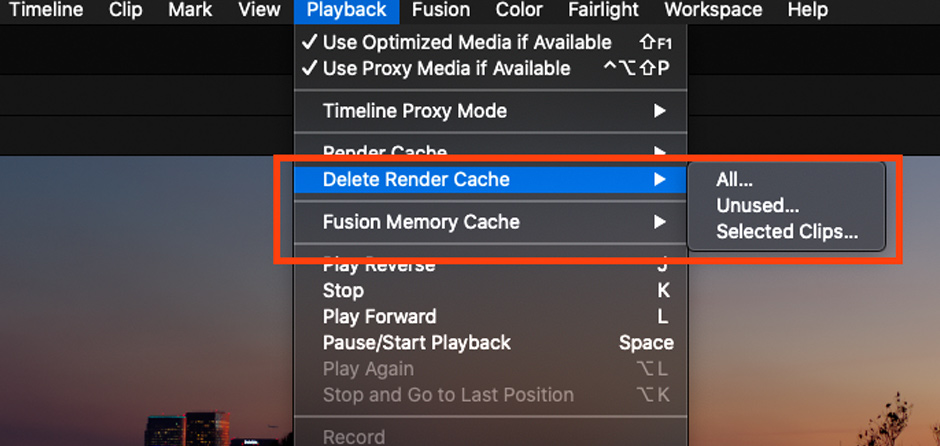
Finally, you can manage the cache files for a project through the Playback menu, under Delete Render Cache. This menu will allow you to delete ALL the cache files associated with the current project, UNUSED cache files, or cache files for the SELECTED CLIPS. This can come in handy if you need to force a clip to re-cache for some reason.
Notes on processing order & caching
Finally, it's important to be aware of the order Resolve processes and applies effects to clips, as it’s non-intuitive and can interfere with caching. Knowing Resolve’s internal processing order will help you avoid unexpected invalidation of cached clips, and help you plan your caching strategically.
Resolve calculates effects applied in the different pages in the following order: the Fusion page, then the Edit page, and finally the Color page. This is counter-intuitive, since the Fusion page comes after the Edit page in the interface.
Within the individual pages, Resolve’s processing order follows a more logical path:
- On the Fusion page, effects are applied according to the flow of the node tree
- On the Edit page, effects are applied as they are stacked in descending order, from top to bottom
- On the Color page, effects are applied following the flow of the Node Graph, generally from the Input on the left to the Output on the right
Wrapping it up
Caching is a powerful way to increase playback performance in DaVinci Resolve, especially when using intensive plug-ins like Neat Video. The different caching types in Resolve all serve specific purposes, but for consistent and predictable behaviour with the Neat Video plug-in it best to use User Caching and turn caching “ON” for that specific node. And since we use Neat Video at the beginning of our node tree, we don’t have to worry about having to re-process the cache once it’s rendered. The rest of our grading operations will sit downstream from our cache, benefitting from the solid noise-reduced foundation we’ve created.
Author: Peder Morgenthaler
Peder Morgenthaler is an experienced colorist, editor and post supervisor specializing in advanced color-managed workflows and finishing for commercials, reality TV, narratives, documentary film & streaming media. Based in Colorado, USA, he collaborates on projects globally. In addition to his post work, Peder is a contributor on MixingLight.com and works as a consultant on high-performance postproduction shared-storage systems for Seagate Technologies. You can find him and his work at framelinear.com