Make editing in Premiere Pro smoother
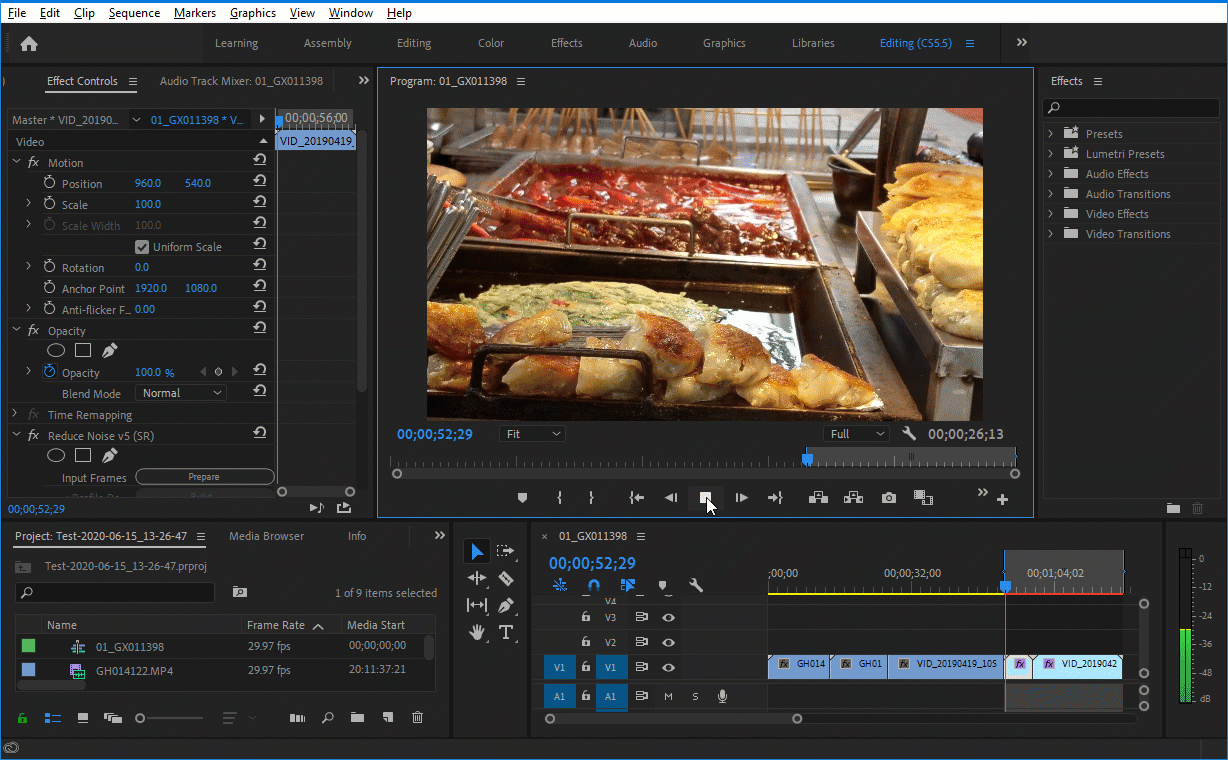
Editing video is a non-stop juggle. You constantly have to make decisions about what effects to add to clips, what frame size to choose and how much time you can afford to wait for Premiere to update its preview to let you comfortably edit the project further.
It’s not very uncommon to have Premiere working, let’s say, slower than desirable. This sluggishness may apply not just to preview update and playback, but also to the whole interface of Premiere.
Slow updating of preview in Premiere can happen:
- when you just apply a heavy effect like Neat Video
- when you afterward jump to another frame within the clip in the timeline
- when you add more effects to the same clip or changing their parameters
You can see choppy playback with skipped frames:
- when you try to start playback directly (without rendering)
General sluggishness of Premiere interface can occur:
- when preparing preview in clips with heavy effects
- when starting or stopping playback
- when doing other operations while Premiere is doing some background rendering
There are several key reasons why that can happen:
- Working with large resolution video requires more time to process each frame on the side of Premiere, on the side of Neat Video, on the side of other effects applied. If the processing time of each individual frame is large, then smooth playback and quick update of preview become technically impossible.
- Working with large resolution video requires more system memory and more GPU memory.
A shortage of those resources can cause an additional slowdown in the processing of each frame. - If available computing resources (CPU cores and GPUs) are not used efficiently, then the speed of processing suffers too.
- If some components of the project are especially slow, then this can cripple the responsiveness of Premiere as well. Neat Video maybe not very on its own, but there are also other components that can cause an extra slowdown still. For example, a slow effect like Lumetri or Warp Stabilizer placed before/above Neat Video can introduce a large unnecessary delay in processing.
As you can imagine there are ways of making things less annoying and hopefully easier for you. Let’s jump right into it.
Optimize Neat Video
When starting a new project, it is also a good idea to make sure Neat Video is set to use optimal hardware parameters allowing it to achieve the best performance. Use the Optimize Settings tool available in Neat Video Preferences to do that. Check out this video for more guidance:
If you are on a Mac with MacOS 10.15 or newer, you can also check if using Metal instead of OpenCL offers better performance. You can switch the mode in the advanced Settings dialog in Performance settings.
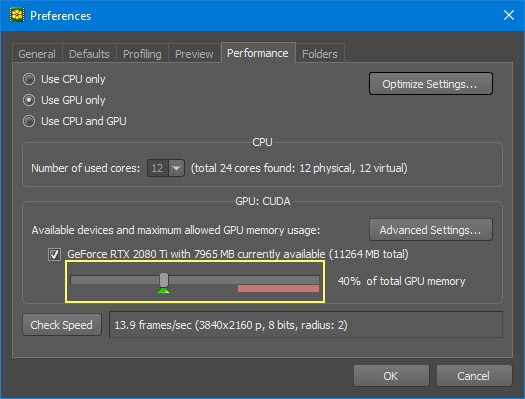
While you are in Performance settings of Neat Video, check the GPU memory usage reported there. Remember to keep the slider controlling the amount of GPU memory available to Neat Video away from the red bar. Otherwise Neat Video and other GPU users (including Premiere) may hinder each other, which will lead to some extra slowdown.
Render first, then play
It is perfectly understandable that you may want to start playback in Premiere as soon as you add and configure Neat Video or other effects in your clip. However, this can often result in very sluggish playback. The classic solution for that in Premiere is to render the clip or a selected part of the clip first and only then start the playback. To do that you need first to set the In and Out points in the timeline and then start to render using the menu commands:
Sequence > Render Effects In to Out
OR
Sequence > Render In to Out
Either command will render the area lying within the In and Out points.
Once the render is done, you can play that selected part of the video at full speed.
Apply Effects in the correct order
Another thing to remember is the order of the effects you have applied to your clip. It is known that Lumetry and Warp stabilizer effects dramatically reduce the speed of other temporal effects applied after them. It is not just Neat Video, other temporal effects are also affected. We have a video tutorial explaining and demonstrating that:
That is one of the reasons why we recommend applying Neat Video first and adding other effects after/below it.
Define the required resolution and stick with it
It’s not uncommon to have high-resolution input clips and work in a project with lower resolution. This happens, for example, because large frame formats are not often used in online video platforms. If done correctly, the size reduction can help to speed up the render process because applying Neat Video noise reduction to smaller frames is always faster than to larger frames.
For Premiere Pro the proper way of downsizing say a 4K clip looks like this:
- Put a 4K clip into a FullHD sequence
- Right-click the clip’s preview in Premiere and select “Scale to Frame Size” in the popup menu. (When you do this, Premiere truly down-sizes the input frames to the size of the sequence (FullHD) before supplying those FullHD frames to effects for further processing)
- Make sure Premiere's preview resolution is set to Full
- Apply Neat Video to the clip
Make sure you check our Clip Resizing and Render Speed article to learn more.
Use proxy
If you need to work with high-resolution video and keep that high resolution throughout the whole project, then you may want to consider using reduced preview resolution in Premiere or using proxy-based editing. These measures however require some extra accuracy when setting up instances of Neat Video. In short, if you do offline editing (proxy), then click Toggle Proxies to turn proxies off (turn it grey), apply and adjust Neat Video, and then Toggle Proxies back on again (turn the button blue). This will ensure Neat Video is applied correctly to the clip and you will get the best possible denoising.
Disable heavy effects
Another option to avoid a slowdown in the preview of Premiere Pro is to disable the instance of a heavy effect or filter (Neat Video's Reduce Noise v5 is one of them) after adding and setting it up in your clip. You can simply disable the instance of the filter using Premiere controls and such a disabled effect will not affect the performance for the time of editing. However, you will need to re-enable it when you are ready to do the final render/export of your project.
Control video memory
In case of GPU running low on video memory (you can check that for example in Neat Video Preferences > Performance; you may also receive GPU-related errors suggesting memory shortage), try to manage the use of GPU memory by Premiere and/or by Neat Video. In Neat Video itself, you can reduce the amount of GPU memory allowed to Neat Video, or you can completely disable use of GPU by Neat Video there. This will spare the GPU resources for other users such as Premiere itself and possibly other effects. However this will reduce the processing speed of Neat Video, so you may want to check if it is perhaps a better idea to switch Premiere itself to CPU mode instead. You can do that in Premiere Preferences.
Adobe recommends using a GPU with at least 4 GB of video memory for 4K video processing. If you add heavy effects like Neat Video, then you will need more video memory to allow comfortable editing. If you have a choice, opt for a GPU with more memory, as this is one of the possible bottlenecks.
Check available system memory
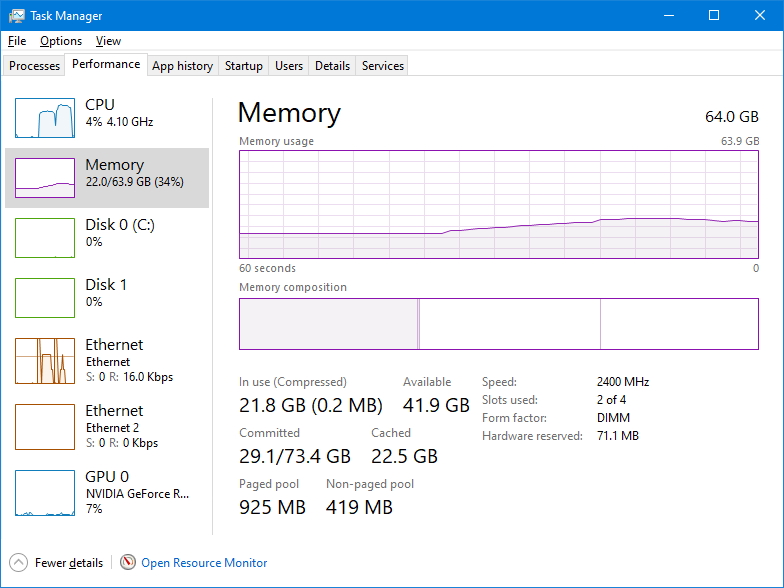
Running low on system memory may cause a slowdown too. If you see that the computer is running low on memory (you can check that using Windows Task Manager or MacOS Activity Monitor) when working on your project, then please consider upgrading/increasing the physical memory installed in it. The minimum amount recommended for 4K video processing by Adobe is 32 GB or higher. We would recommend going somewhat higher to have some reserve.
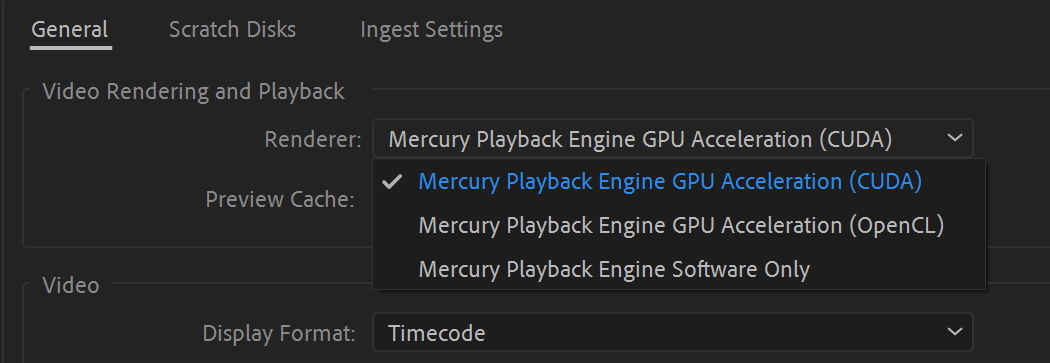
Experiment with Premiere’s playback settings
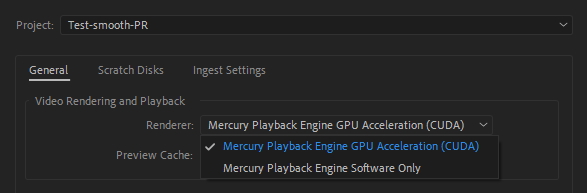
Check the Video Rendering and Playback section in the Project Settings in Premiere Pro: File > Project Settings > General… > Video Rendering and Playback. It will allow you to choose what hardware is going to be used for rendering. Allowing Premiere to use a GPU via CUDA, OpenCL or Metal can make Premiere’s work faster. However, if the same GPU is also used in Neat Video, then the overall render speed may be lower as Premiere and Neat Video will be competing for shared GPU resources (computing cores and memory). So it is always worth trying and comparing different settings to see what works best in your particular case.
Unfortunately, Premiere Pro doesn’t give you much control if you want to divide the GPU resources between the host application and effects. However, if you have two GPUs from NVIDIA and AMD, you can restrict Premiere to NVIDIA GPU by choosing the CUDA mode, which will leave the AMD GPU free for Neat Video, but that’s about it. Therefore you may need to run some speed tests with different combinations of Renderer option in Premiere’s project settings and GPU(s) allowed for use in Neat Video Preferences. The winner combination may depend on your hardware and project.
Transcode with faster codec
Last, but not least, check the codec of the input video clips. If the video is encoded with a “slow” codec or if it's a RAW file, then it may be useful to transcode the video with a faster intermediate codec such as Apple ProRes, Cineform or something similar. Working with source video clips encoded with a faster codec can significantly improve the efficiency of the render process and editing/playback in Premiere.
As you can see the is more than one thing you can do to make your Premiere Pro editing smoother. Try these ideas, combine them and let us know what worked for you. If you have more ideas or tricks that you use in your work to help Premiere and Neat Video work better together, please share those with us. We want to learn from you.