Video Noise / Grain reduction in Premiere Pro in 2024
First published on August 25, 2022
In today's digital era, video content creators strive for impeccable quality, which often means battling unwanted noise and grain. As a Premiere Pro user, you have a powerful ally in your quest for pristine visuals. Let's delve into the latest techniques and tools for achieving superior video noise and grain reduction in Premiere Pro.
Video Noise Reduction: Understanding the Basics
Noise in video is often caused by inadequate lighting, incorrect selection of the lenses for low-light shooting, excessively high ISO settings, or external factors like heat and interference. The most effective way of keeping the footage clean is capturing it correctly during filming.
For filmmakers working in a run-and-gun documentary style, achieving optimal filming conditions isn't always feasible. Ultimately, the story takes precedence over everything else. Thankfully, with the aid of advanced plugins in Premiere Pro, video noise can still be effectively minimized even if captured in less than ideal shooting scenarios. This means previously unusable footage can suddenly become a valuable asset in your editing timeline.
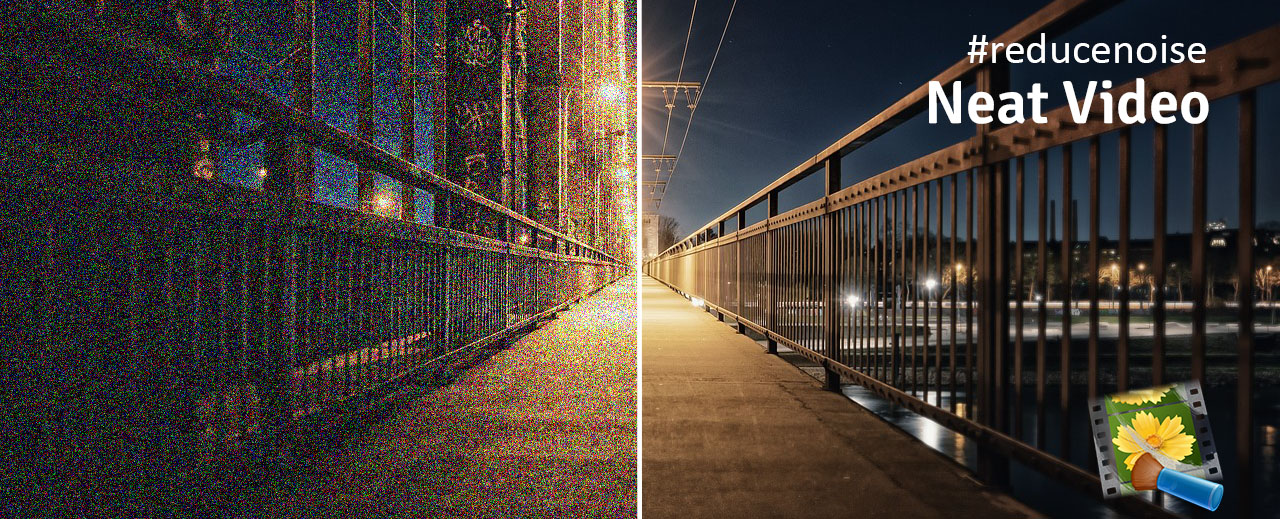
Industry Standard: Neat Video
Automatic profiling system, the ability to remove noise only where it’s needed and preserving details makes Neat Video an industry standard when it comes to removing video noise from footage. It can denoise and deflicker your clips with a few simple steps in Premiere. In addition to video noise and flicker reduction, Neat Video also has several other tools to enhance video quality or modern footage as well as archive video: dust and scratches filter, reduction of compression artifacts, jitter reduction and more.
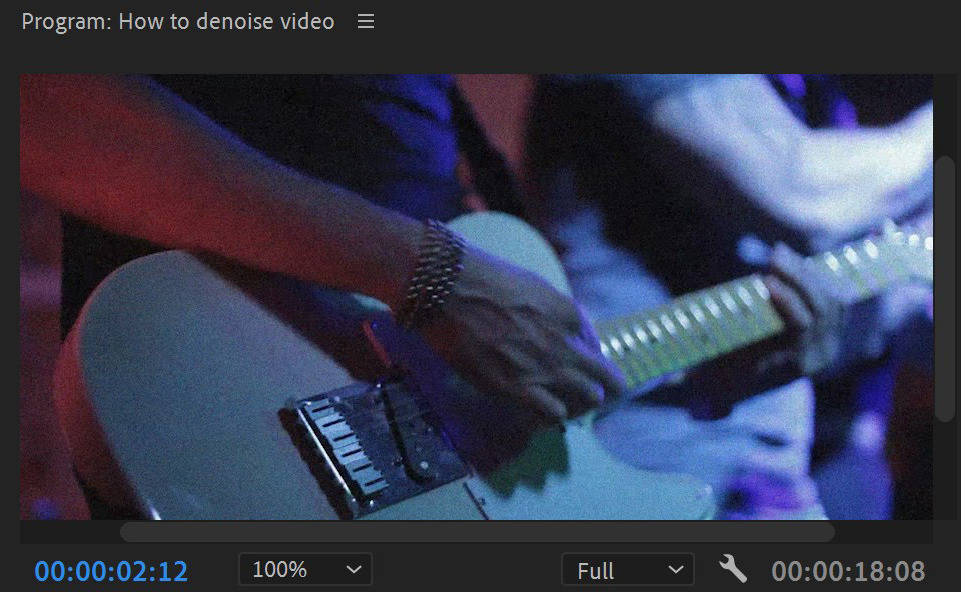
Step 1: Get the clip ready
The first step is to import a noisy video in Premiere Pro and apply color corrections (if needed):
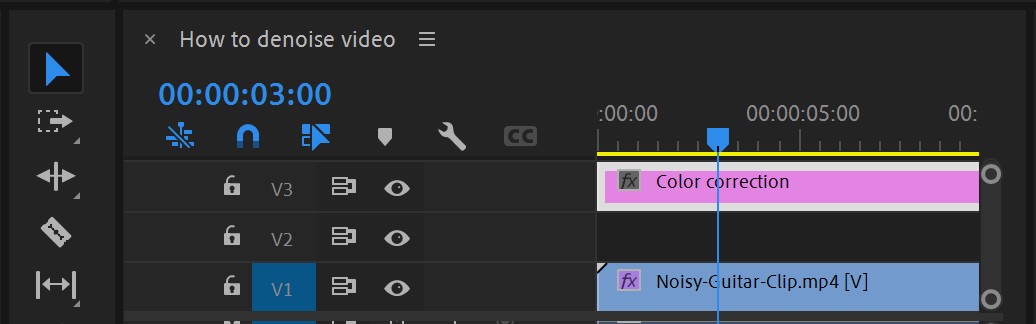
- Import your video clip into Premiere Pro's timeline.
- Apply an adjustment layer on top of your clip (in our case, the adjustment layer V3 is shown in the picture below). Note: leave space for another adjustment layer (in V2) for Neat Video. This point is important as the order of the adjustment layers determines the order Premiere Pro applies effects to the clip.
- Color correct/apply presets to the adjustment layer to suit.
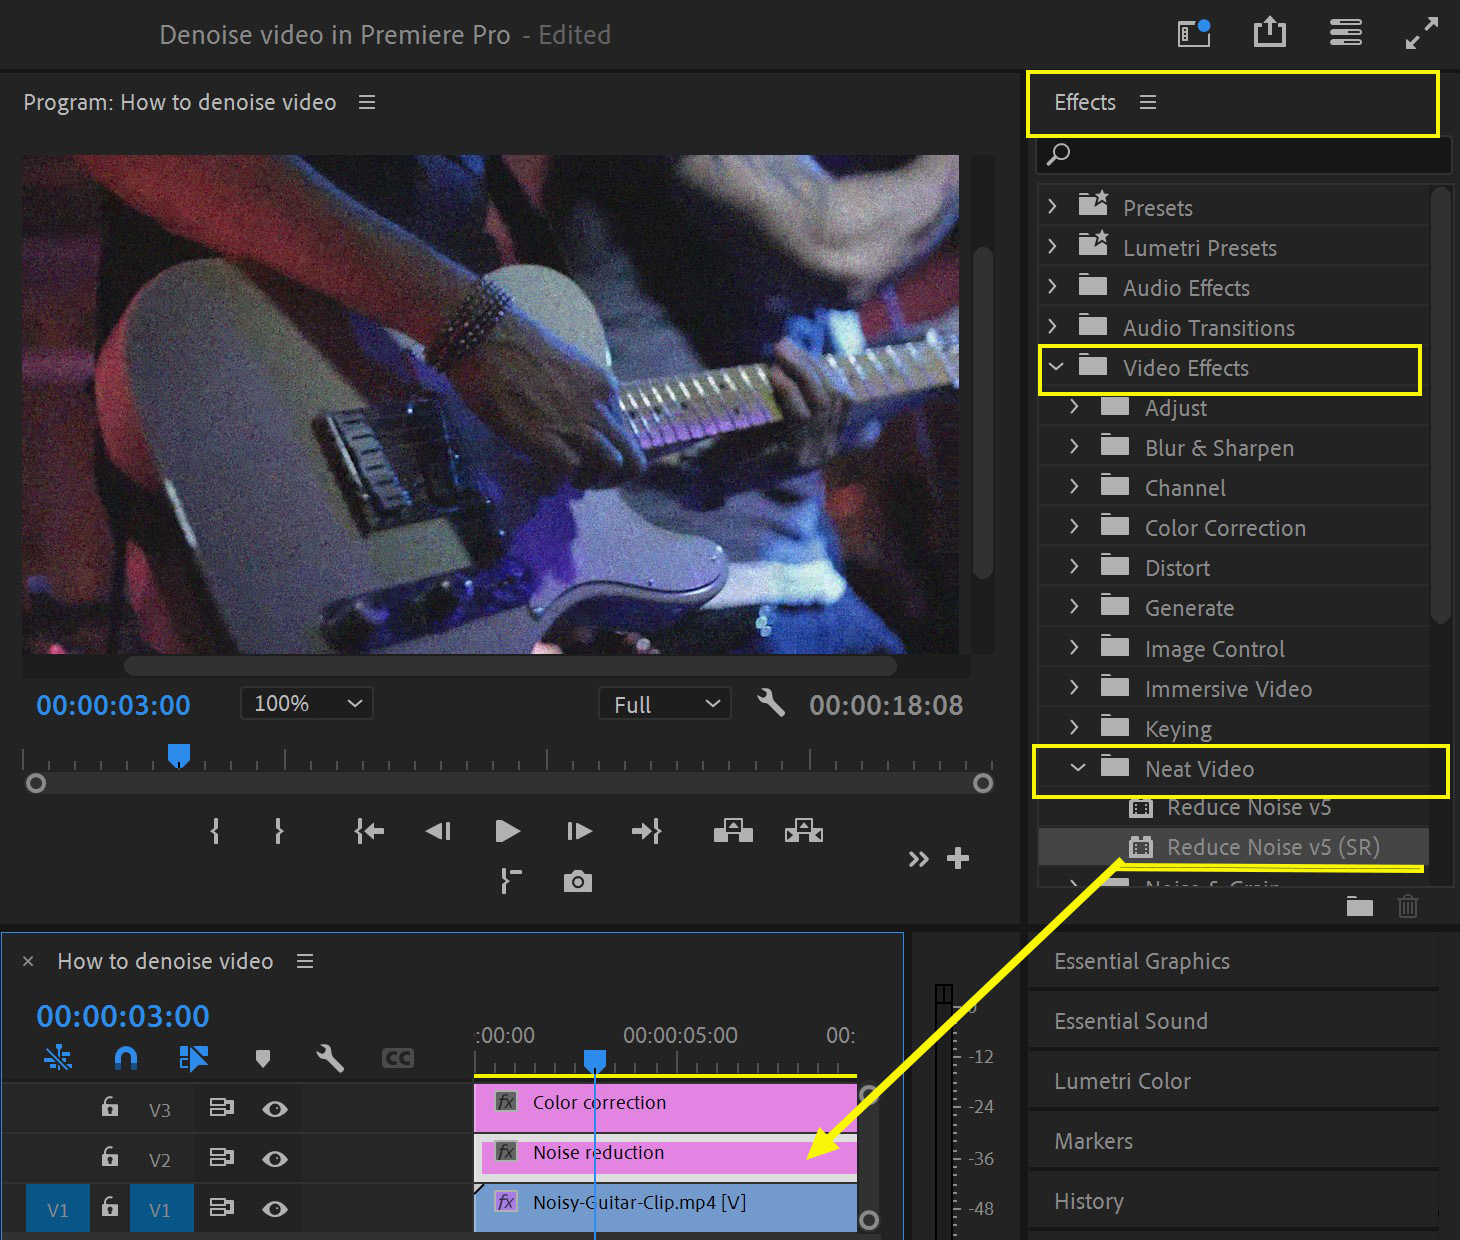
Step 2: Apply Reduce Noise v5 (SR) effect
There are numerous ways to apply the effect to your timeline, but in this article, we will use adjustment layers as many video editors prefer this method.
- Place a new adjustment layer directly above your clip (in V2).
- Go to the Effects panel, then Video Effects > Neat Video and drag-n-drop Reduce Noise v5 (SR) onto the adjustment layer (in V2) prepared for the denoiser effect.
Note: just adding the effect will not immediately reduce any noise or affect the clip right away; we still have to adjust the settings of the effect as described in the next step.
Step 3: Adjust the settings of the Reduce Noise v5 (SR) effect
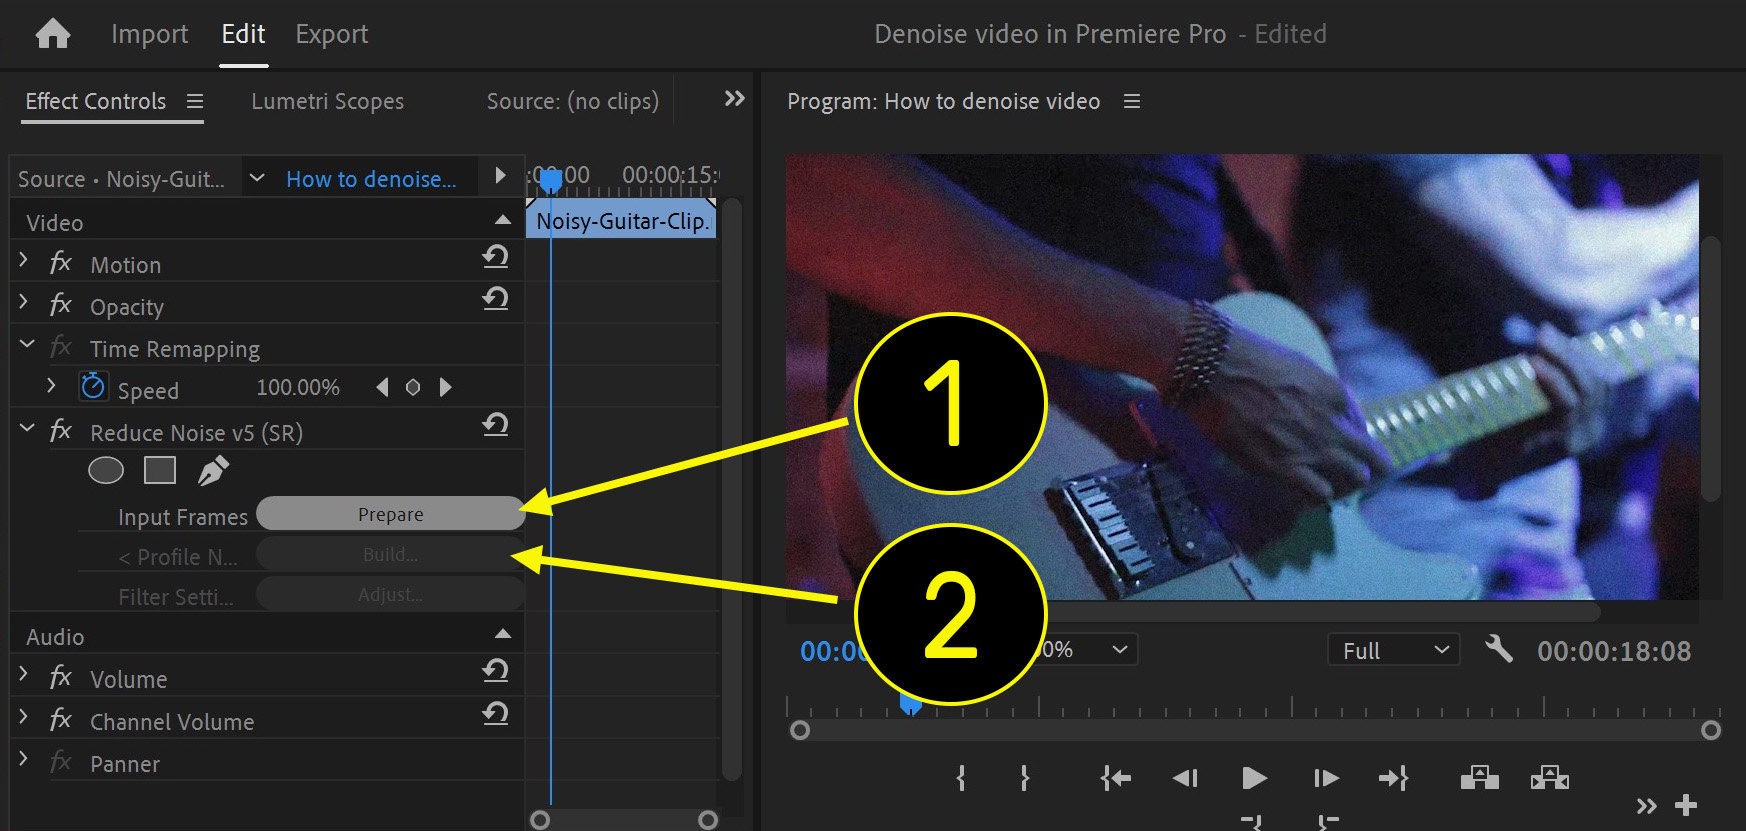
- Click on the clip in the timeline and go to the Effects Control panel of Premiere.
- Under Reduce Noise v5 (SR) on the left side, (1) click the Prepare button, wait 1-2 seconds, and then (2) click the Build button. Neat Video window will open and display the current frame from the video.
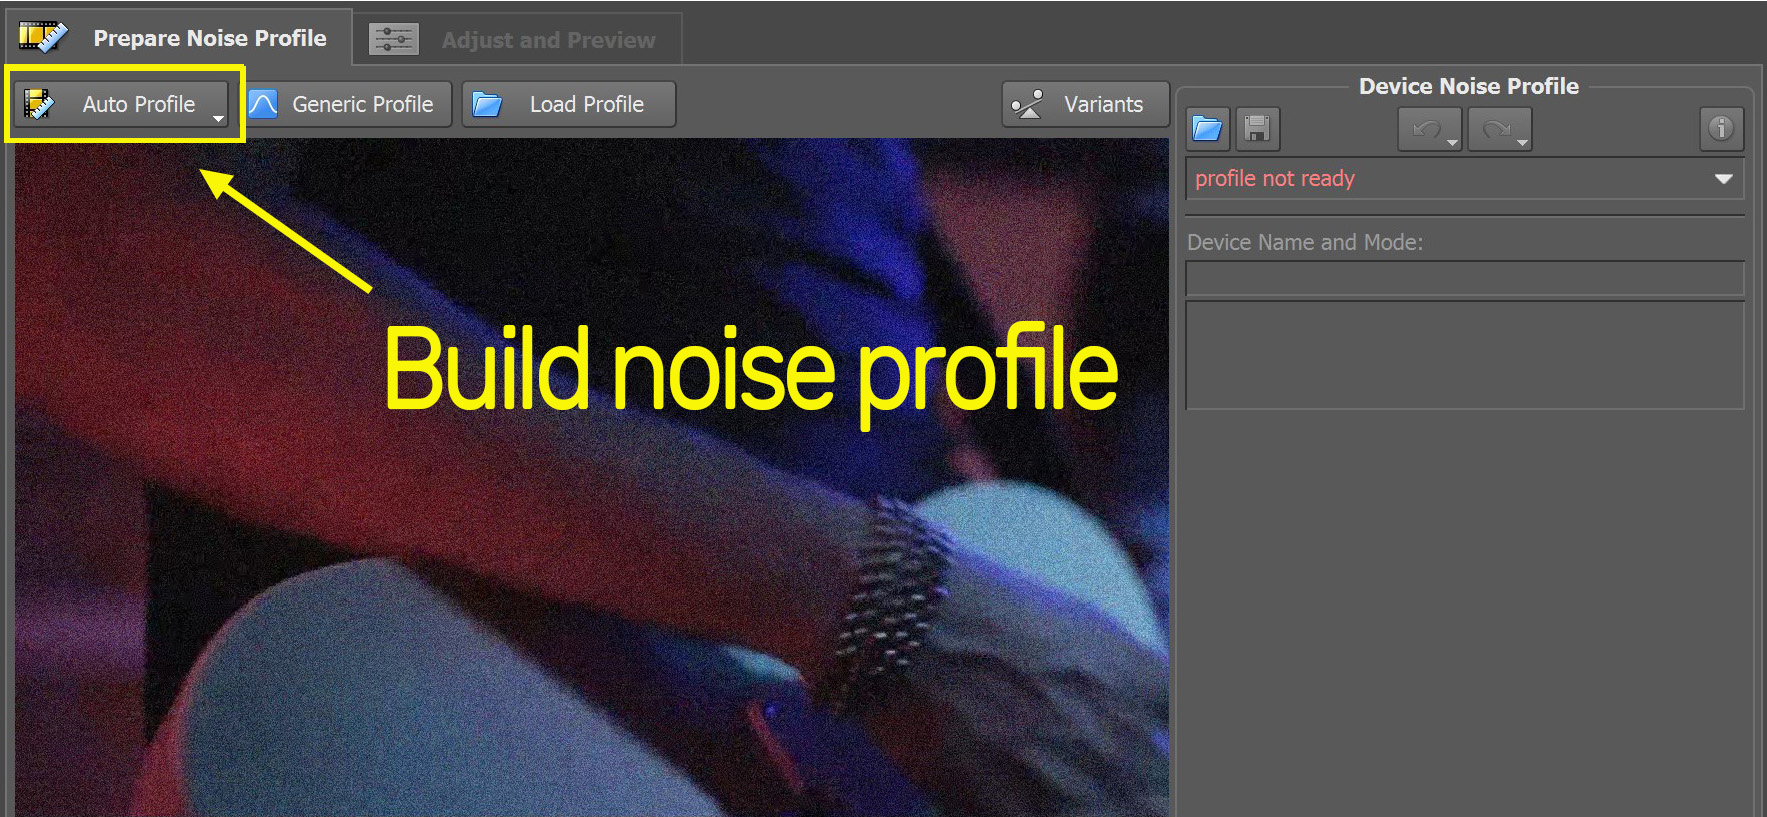
3. In the Neat Video window, click the Auto Profile button.
Neat Video will look for a detail-free area with a sample of noise to analyze and will automatically build a noise profile based on that area.
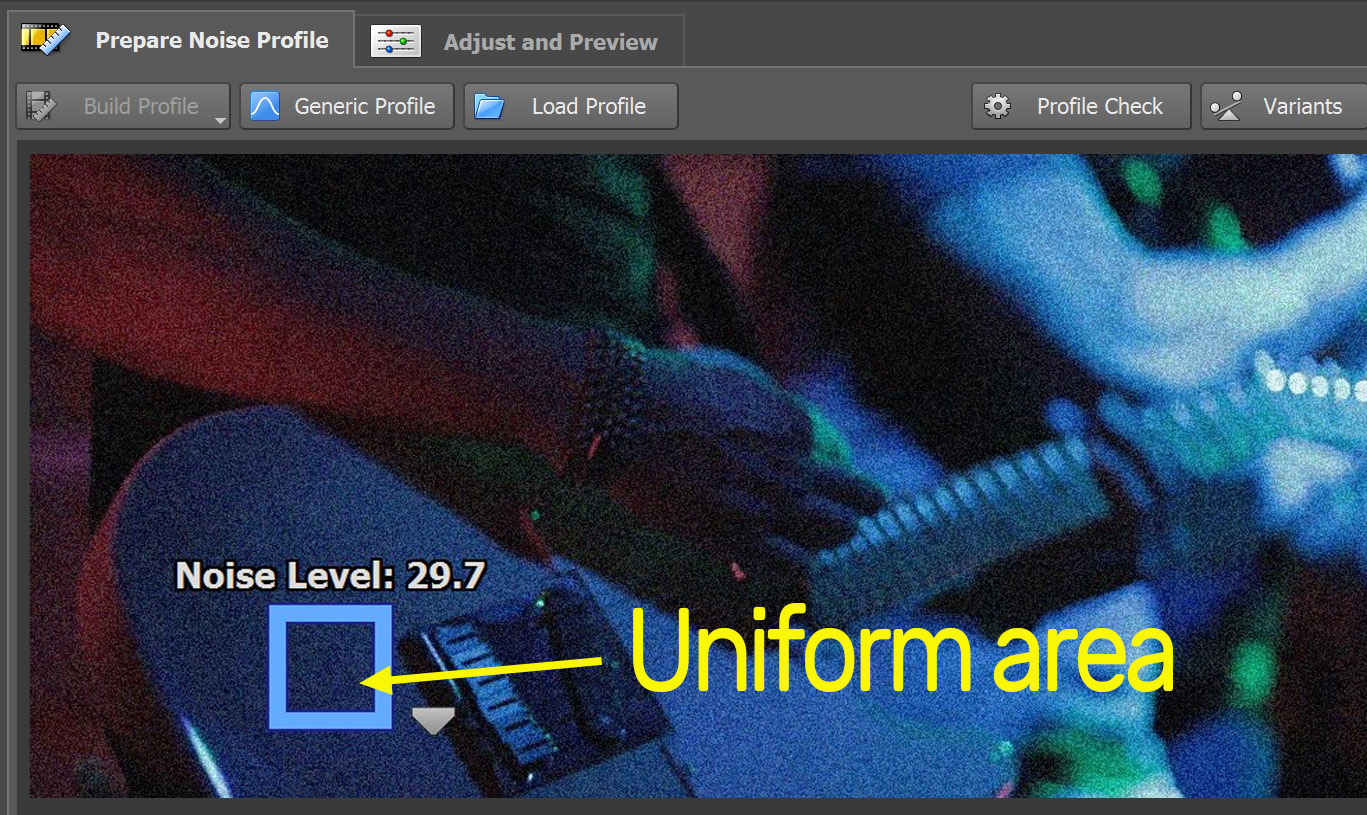
If you want to choose an area manually, for example, to choose a more noisy area, you can manually select a suitable area and click the Build Profile button to create a noise profile based on your selection. When you are happy with the area and the profile is ready, switch to the Adjust and Preview tab.
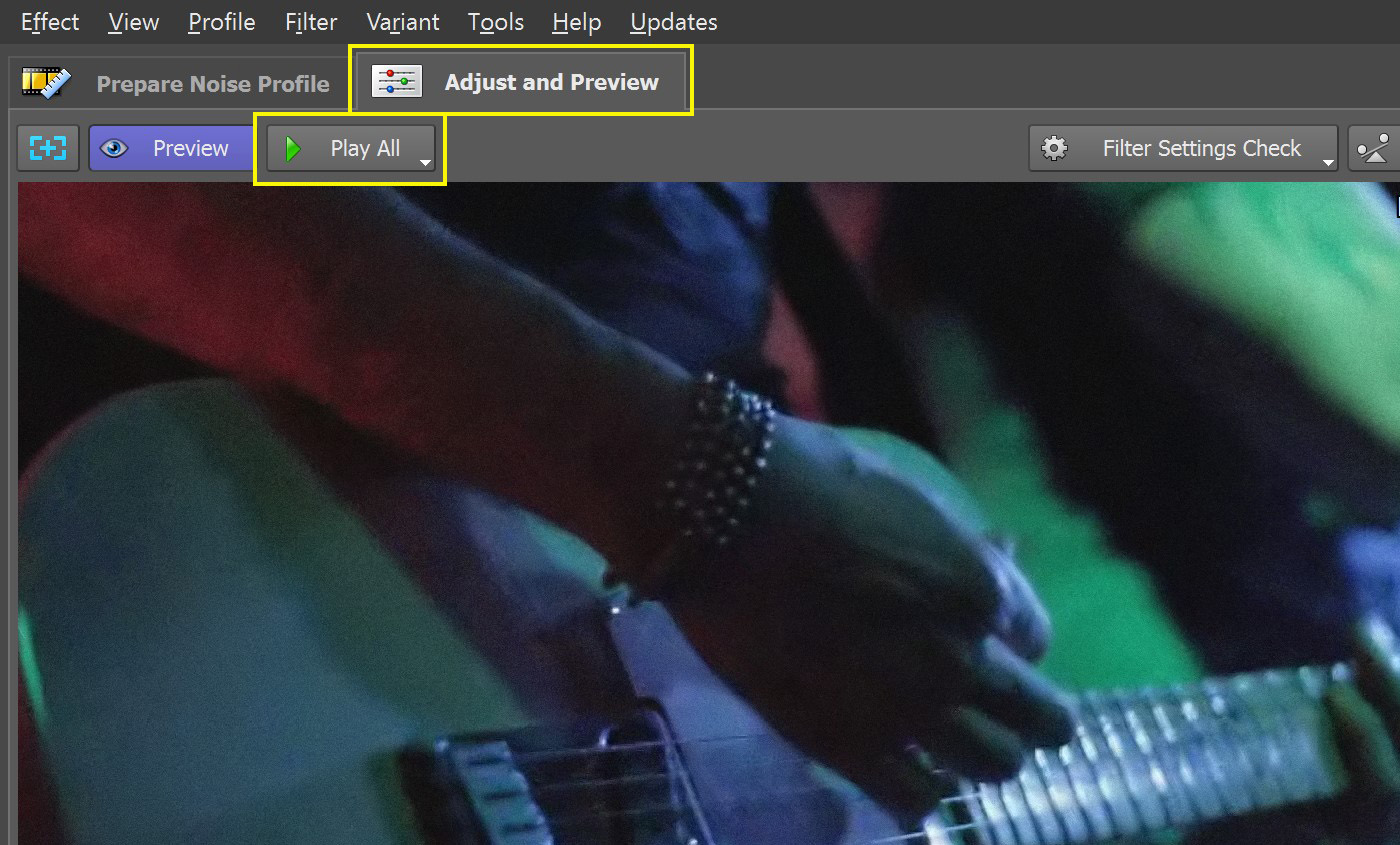
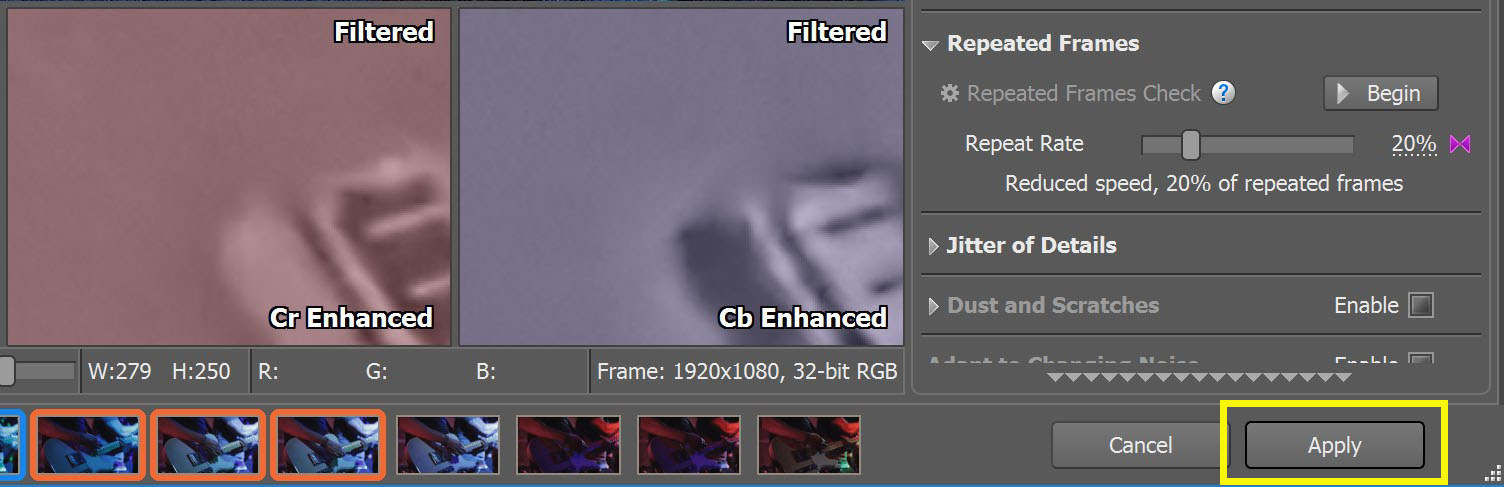
4. To preview the changes made by Neat Video, click the Adjust and Preview tab at the top and select the Play All button to see noise reduction on moving images.
5. Adjust Temporal and Spatial filters if necessary. For example, try to increase the Radius in the Temporal filter.
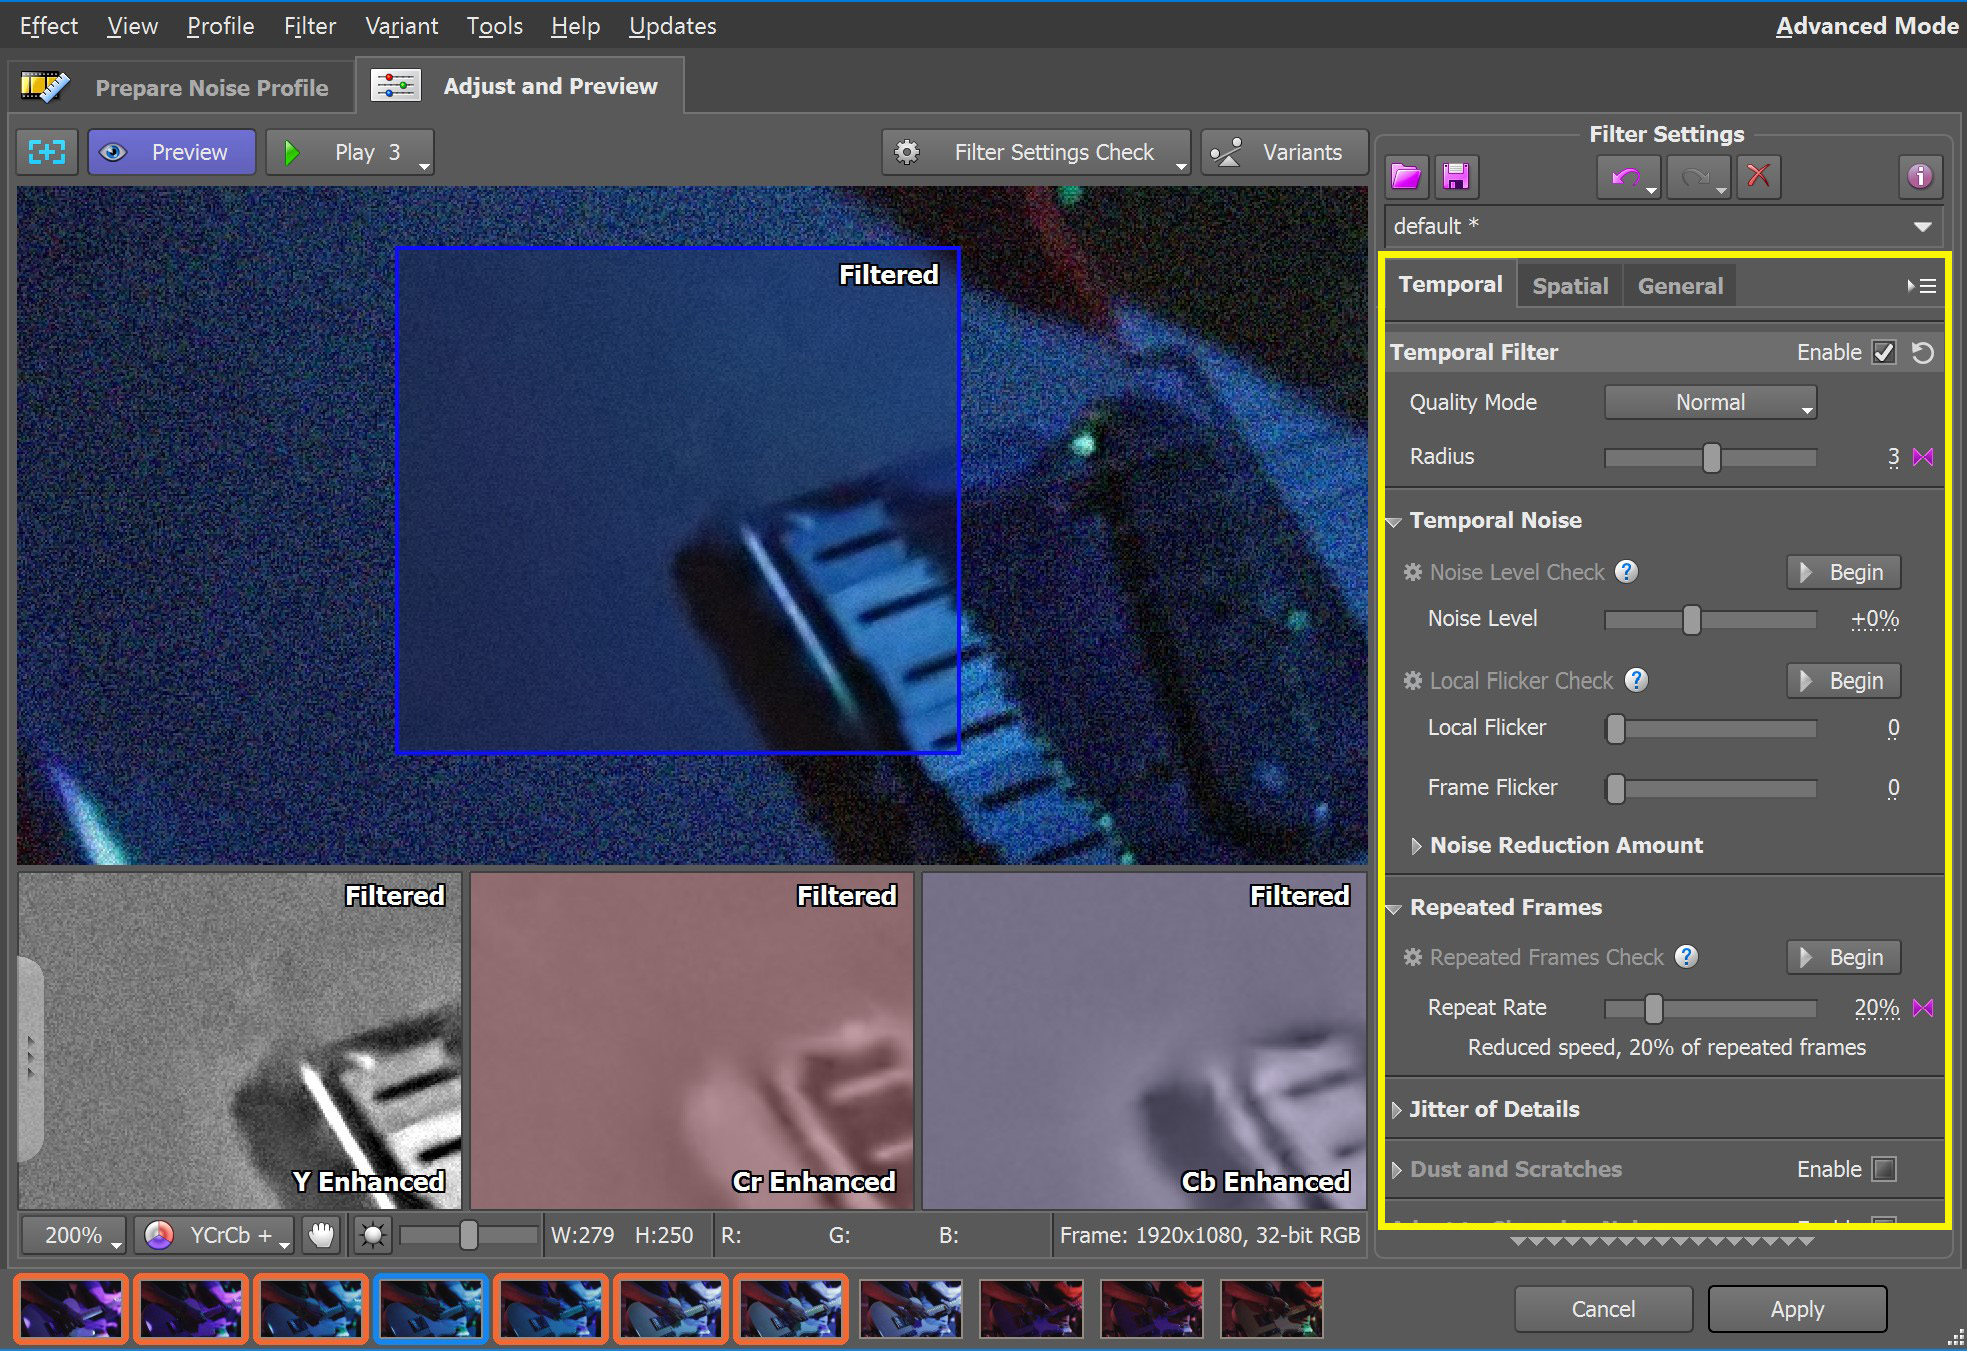
In most cases, a good quality noise profile is all you need to get a much cleaner or noise-free video. However, if you have a super-noisy video or an otherwise difficult case, Neat Video offers many suitable tools for removing various kinds of video noise, grain, flicker, dust, scratches and other problems.
6. Once you are happy with the results of noise reduction in the preview, click Apply to make Premiere save and apply these adjustments to the clip.
You will directly see that even this simple workflow based on automatic noise analysis does a fantastic job of video noise and grain removal. There are many more advanced features that Neat Video has to offer to deal with pretty much any kind of noise and flicker.
Try it out for yourself and see what you think!
Pro Tips for Optimizing Preview
After applying Neat Video, playback in your timeline may slow down due to the intensive processing required for noise reduction, especially for high-resolution videos like 4K.
To preview the filtered footage at full speed:
- Set In and Out points to mark the area you want to preview.
- Click the menu Sequence and select Render Effects In to Out.
- Let Premiere render the selected section and then play it back at full speed.
To improve editing speed:
You can turn off the Reduce Noise v5 (SR) effect globally in the whole project. Just remember to switch it back on before the final export.
- Select any of the clips treated with Neat Video and place the Current Time Indicator within that clip (in the timeline, select a frame inside that clip).
- Open Neat Video’s window (Prepare, then Build).
- Go to Neat Video’s menu Effect > Skip Neat Video Processing and then click the Apply button.
- Work on the project with no noise reduction overhead.
- When you are ready to export the timeline, go back to the same menu (in step 3) and disable the Skip Neat Video Processing option, to re-enable the Neat Video denoiser.
That is just one way of making Premiere's playback more responsive. There are several other things you can use as well.
Free effects in Premiere Pro
Now, let's see how to remove grain (and/or flicker) from video using some of the free options available in Premiere Pro. These free approaches involve treating each individual clip and the affected areas separately. They also make the video a bit blurry, which may not suit a professional video editor or colorist, but they give some options for removing video noise for free. They could be good options for someone who is just starting to explore the video editing field.
Median effect
- Import your footage into the timeline.
- Navigate to the Effects panel and search for Median. Alternatively, go to Video Effects > Obsolete > Median (Legacy) and drag and drop the Median effect onto your clip.
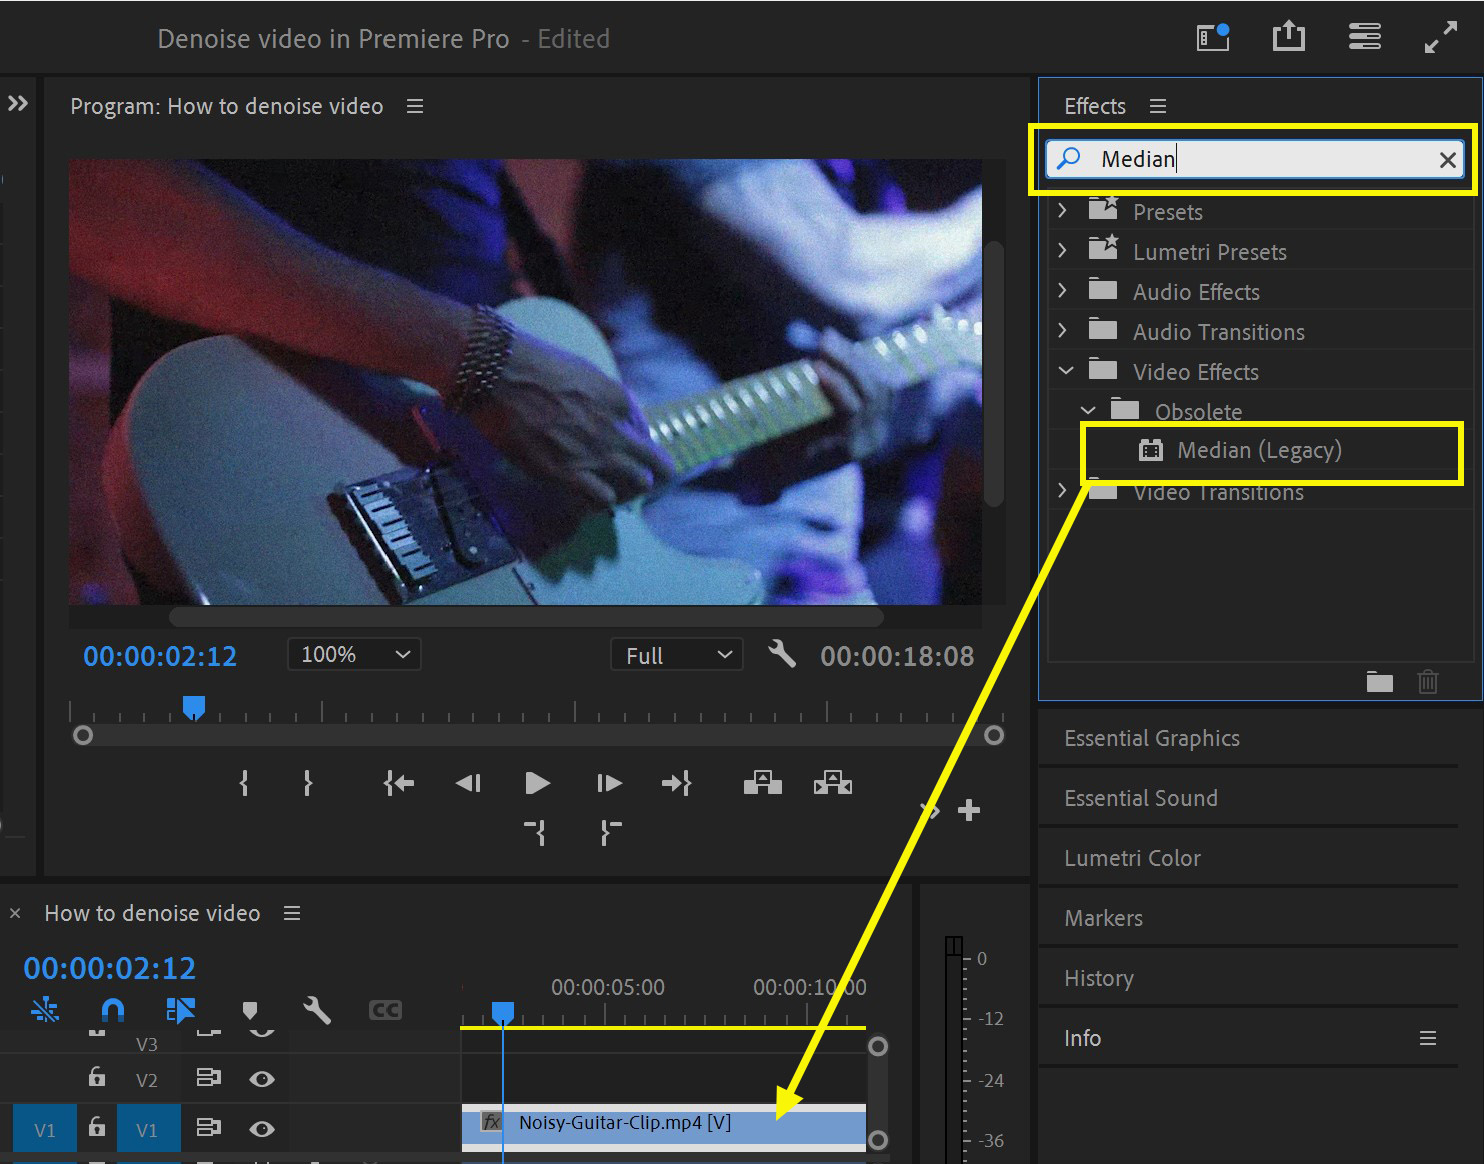
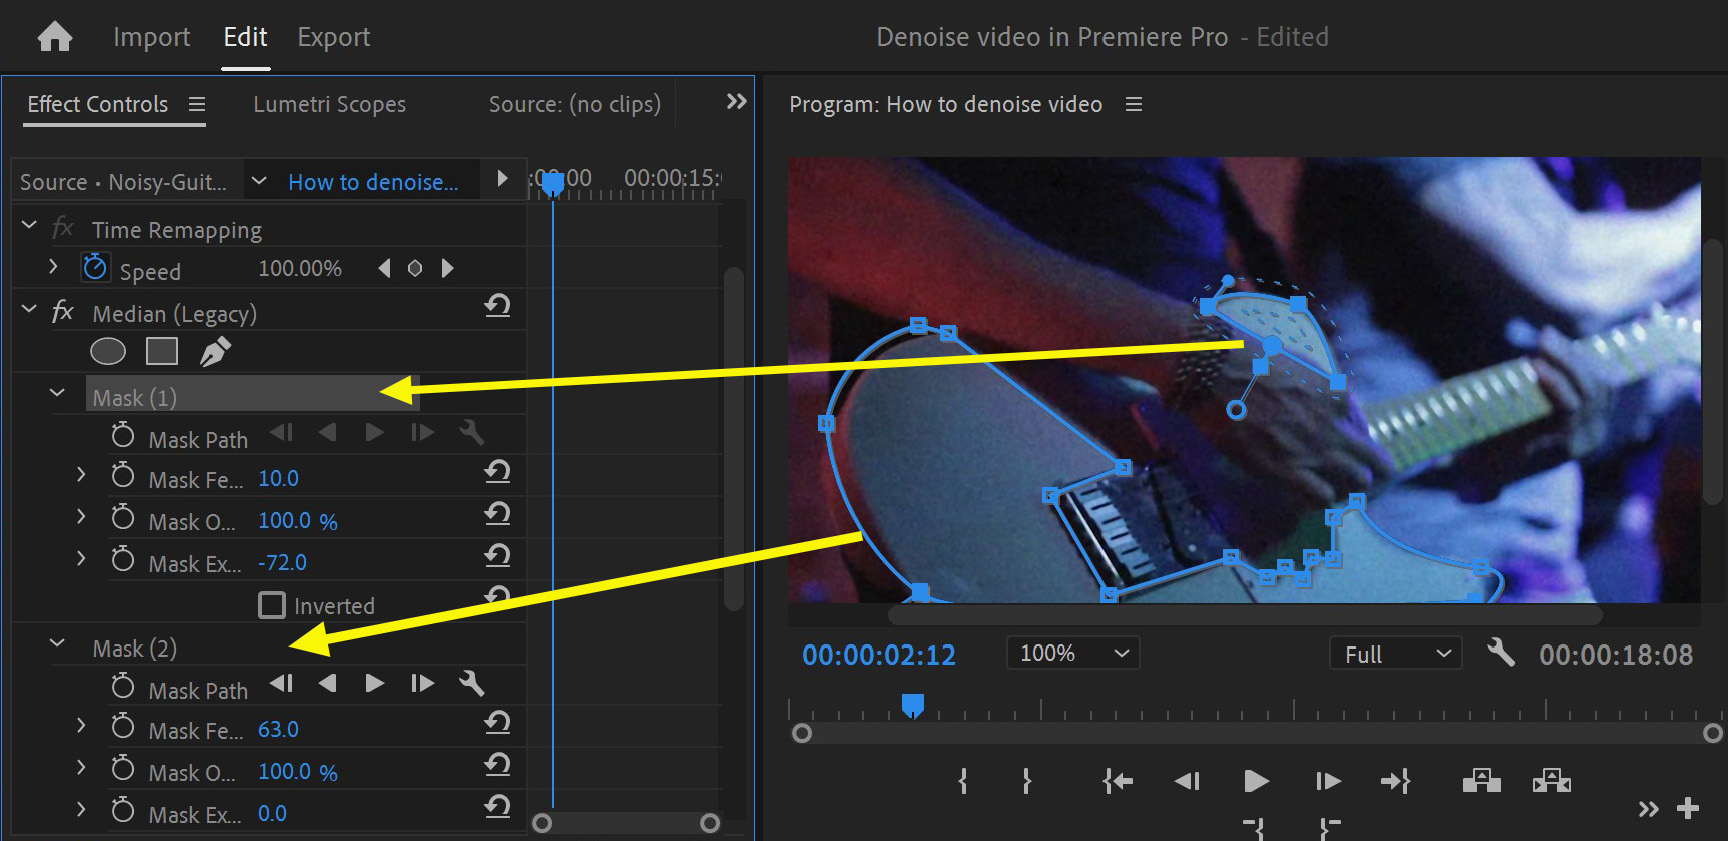
3. The Median effect is now available in the Effects control panel where you can make the adjustments. Change the Radius value to find the level where this denoising effect reduces video noise/grain sufficiently, without turning everything into a blur.

4. As the Median effect washes out the whole image you may need to use masks to select the areas where you want to reduce visual noise.
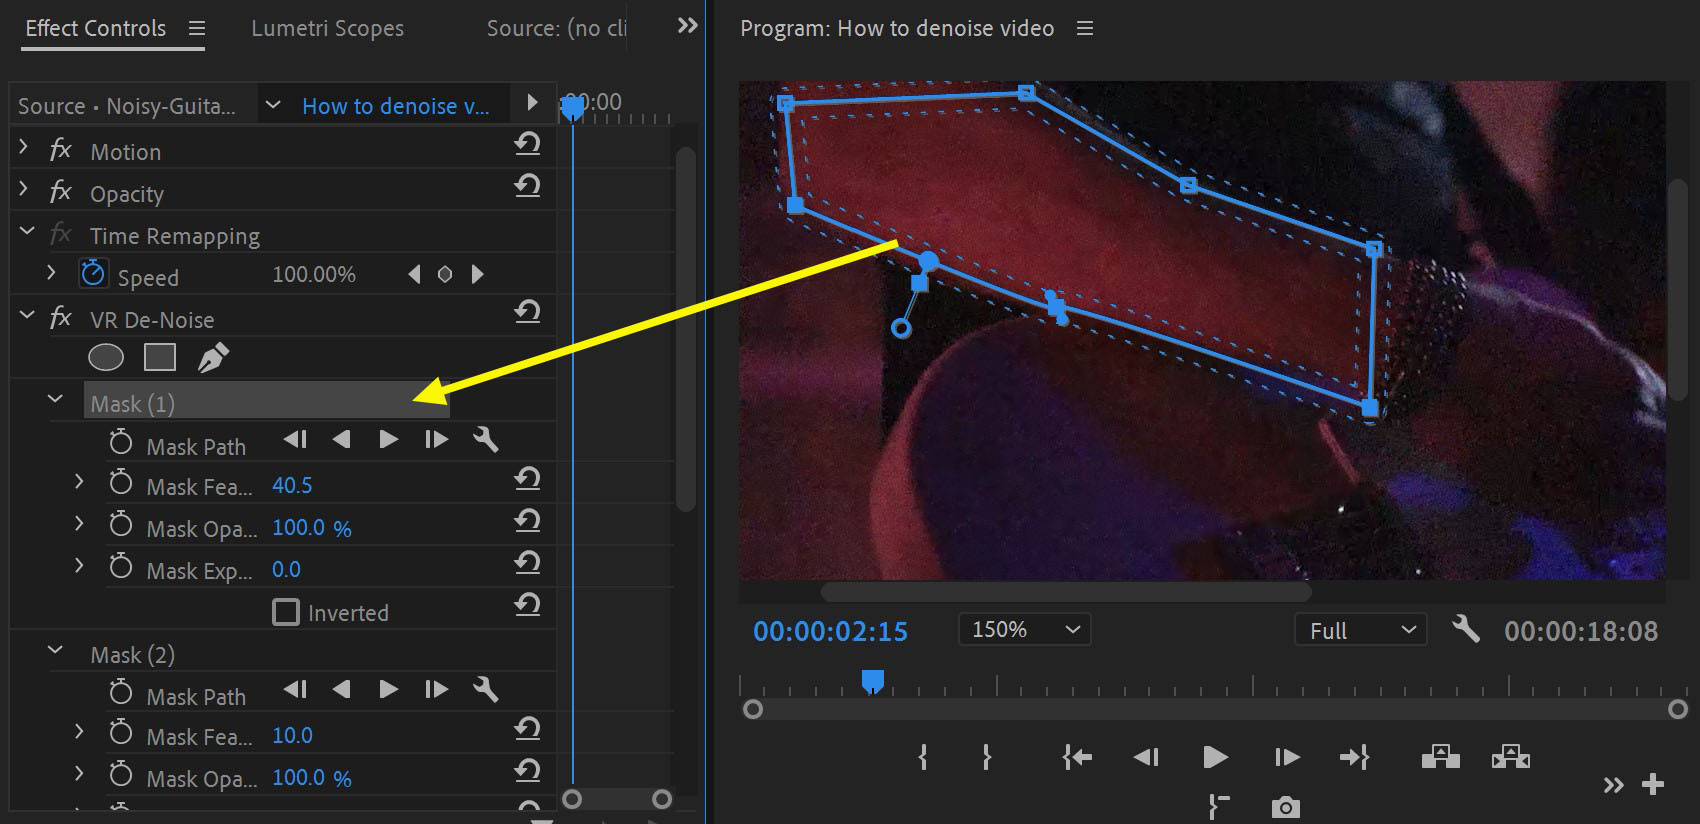
VR De-Noise
Another free alternative is the VR De-Noise effect. Even though this effect is meant to be used for 360-degree video clips, you can also use it with normal clips with some success. The workflow is very similar to what you would do using Median effect:
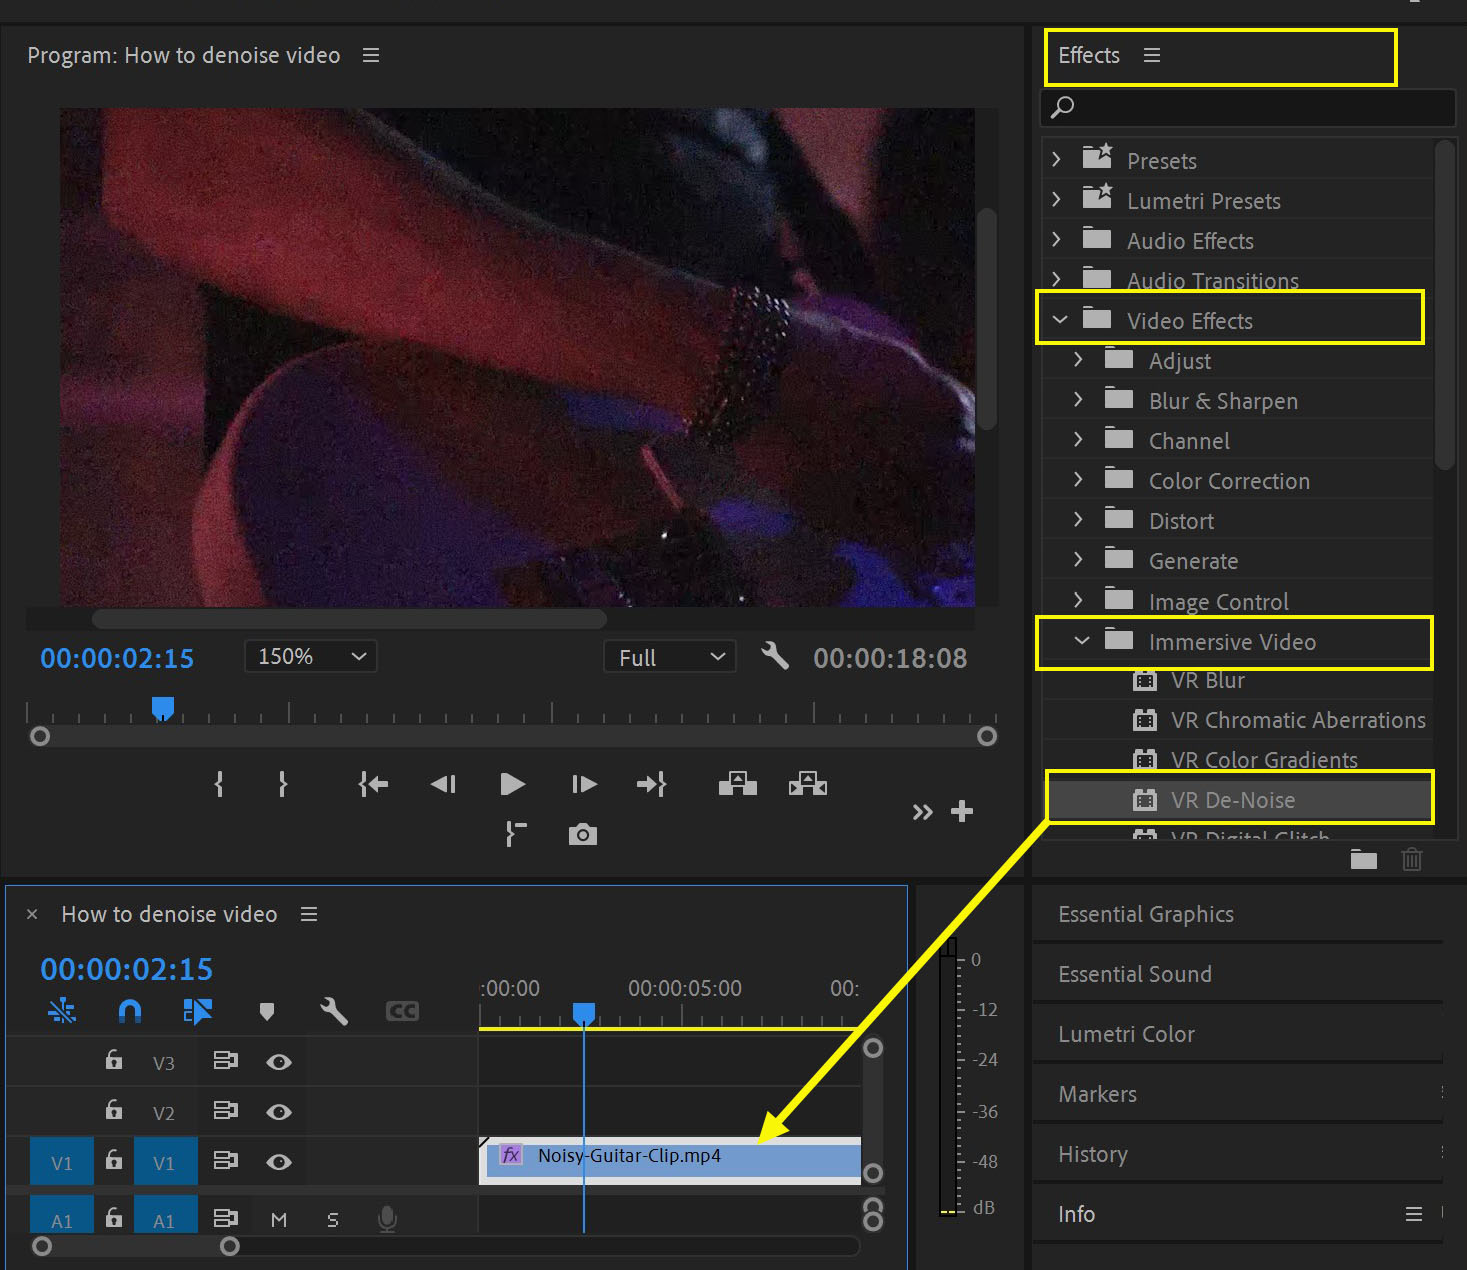
- Import your footage into the timeline.
- Navigate to the Effects panel and go to Video Effects > Video Effects > Immersive Video > VR De-Noise and drag and drop the VR De-Noise effect onto your clip.
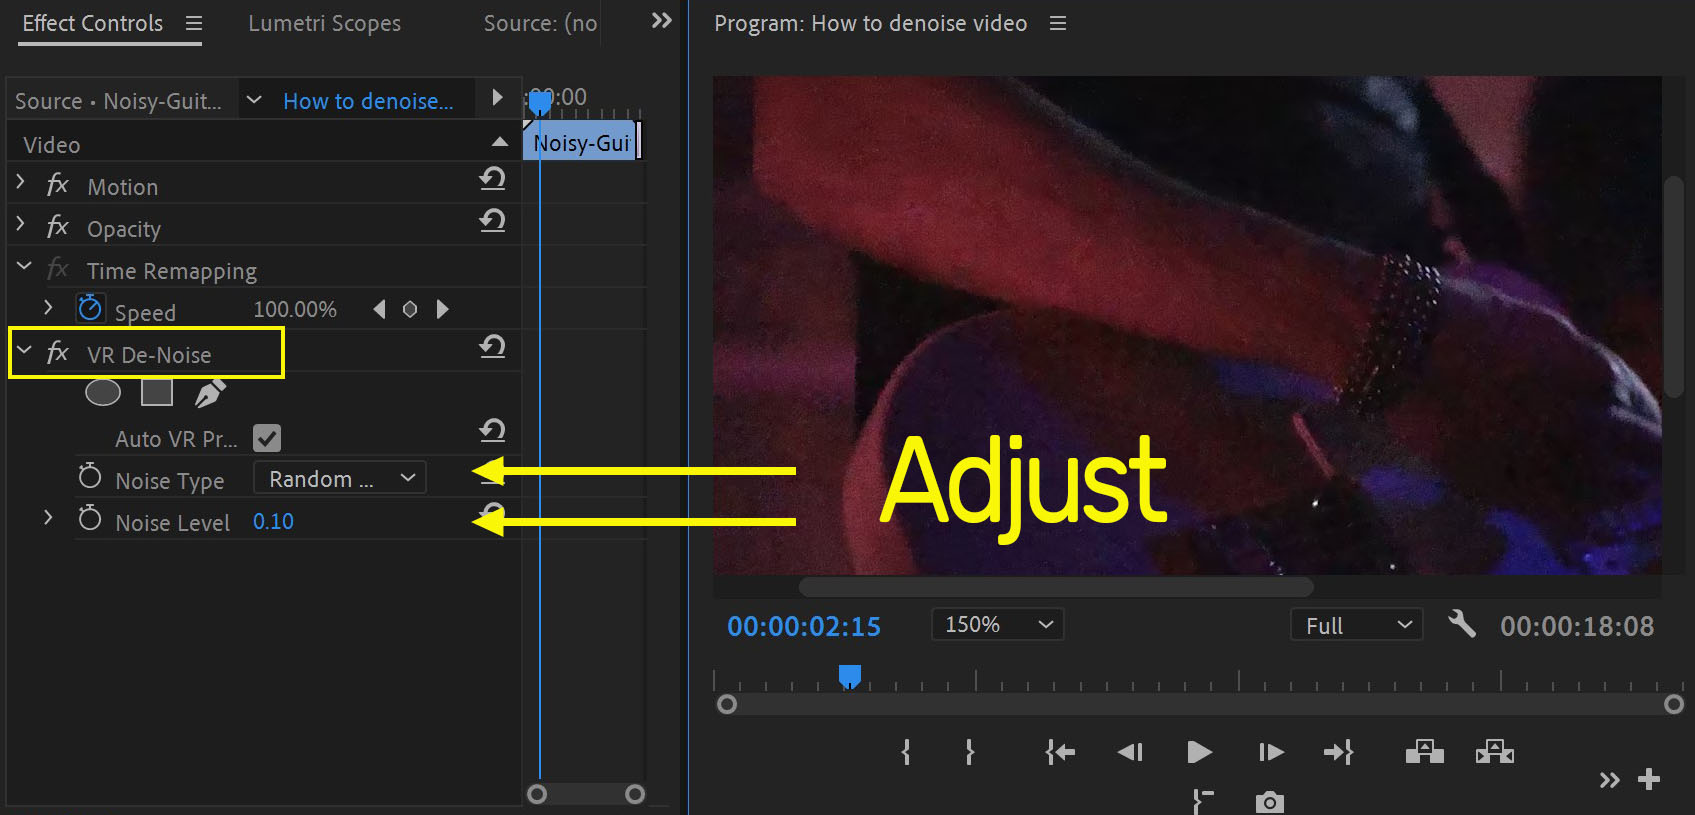
3. Go to the Effects control panel and adjust Noise Type and Noise Level.
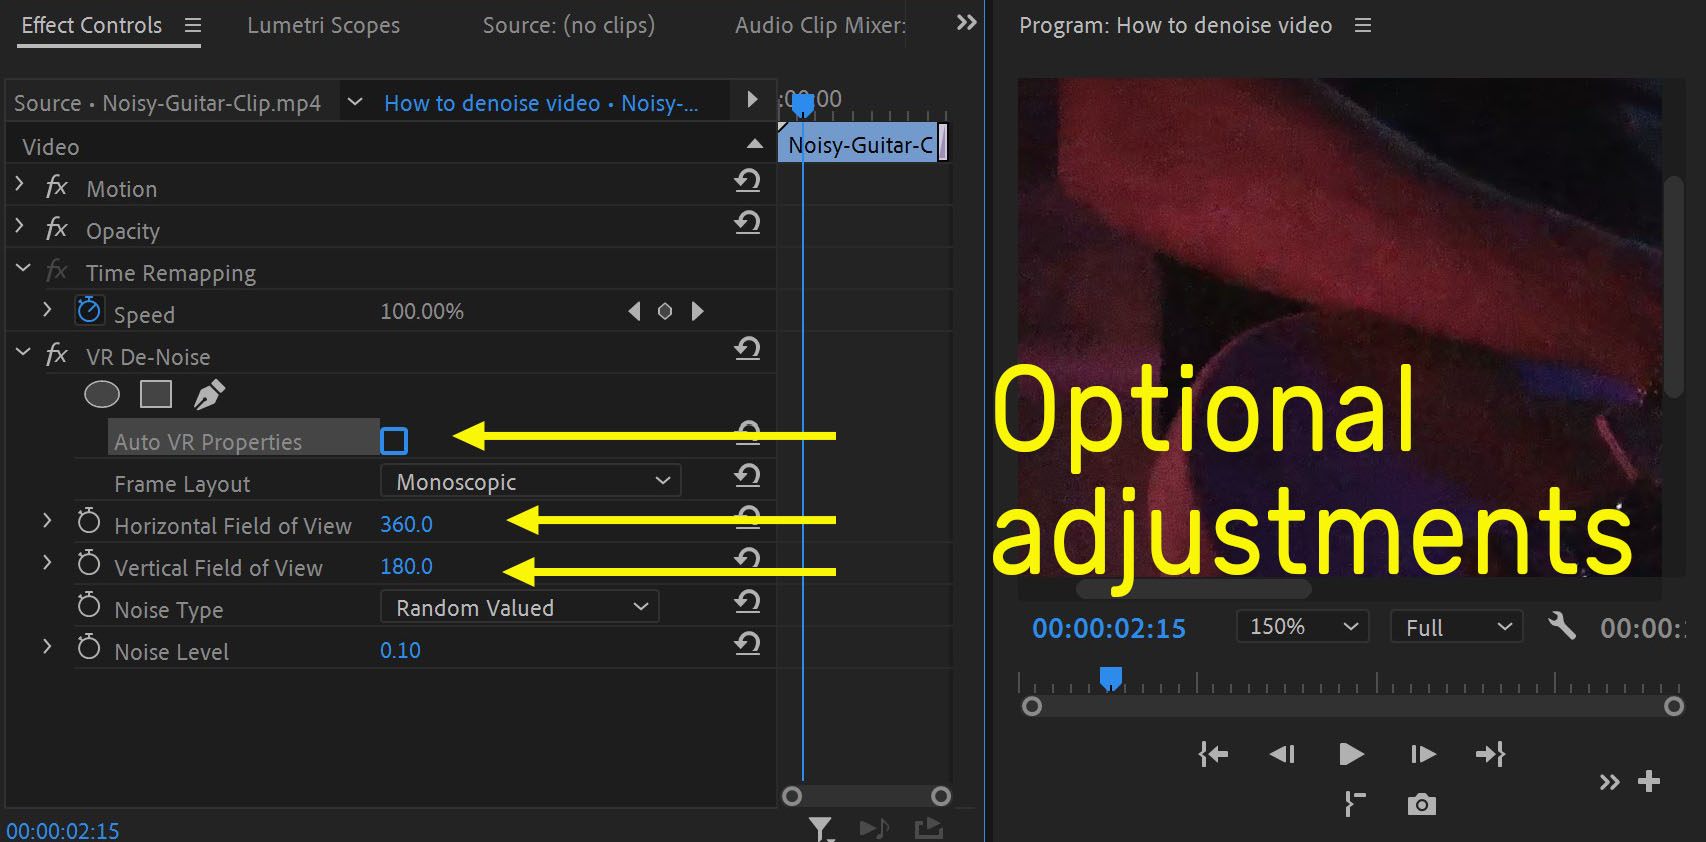
4. If you want to play with the settings further, uncheck the Auto VR Properties box and adjust the Horizontal and Vertical Fields of View.
5. Use masks to select just the areas where you want to reduce visible noise to avoid making the whole image look unnatural and blurry.
Conclusion
Mastering the art of video noise and grain reduction in Premiere Pro opens up a world of possibilities for video operators, video editors and colorists. The amount of footage that can be saved, improved and used will surprise you very quickly. With the latest techniques and tools at their disposal, Premiere Pro users have the power to elevate their storytelling and deliver exceptional video content in 2024 and beyond.